이 가이드는 하라주쿠 스타일링과 현실적으로 입을 수 있는 스트리트 패션을 섞은, 의상 중심 이미지 생성을 위한 실전형 애니메이션 패션 에디토리얼 워크플로를 테스트합니다. 목표는 무작위 코스튬 혼란이 아닙니다. 실루엣이 한눈에 읽히고, 레이어 구성이 납득 가능하며, 애니 스타일링이 룩북·캠페인 보드·스토어프런트 콘셉트·스트리트 스타일 에디토리얼에도 그대로 쓸 수 있게 만드는 재현 가능한 방식입니다.
이번 테스트에서 가장 강한 결과는 각 이미지를 먼저 패션 촬영 브리프로 다루고, 그다음 애니 이미지로 접근했을 때 나왔습니다. 샷 타입, 의상 구조, 리테일/에디토리얼 맥락을 먼저 두면 결과가 안정적으로 붙었습니다. 반대로 "Harajuku aesthetic" 같은 모호한 스타일 단어만 앞세우면 모델이 액세서리를 과하게 늘리거나, 레이어를 망가뜨리거나, 코스프레 성향이 강한 룩으로 흘러가며 착용 가능한 느낌을 잃는 경우가 많았습니다.
빠른 답변
- 무드 단어만 쓰지 말고, 먼저 구체적인 패션 샷 타입부터 적으세요.
- 각 룩은 강한 하라주쿠 시그널 하나 + 안정적인 스트리트웨어 베이스 하나로 제한하세요.
- 아우터, 상의, 하의, 신발, 가방, 액세서리까지 전체 의상 구조를 명시하세요.
- 하라주쿠 골목, 도쿄 셀렉트숍 내부, 에디토리얼 스튜디오 세트처럼 도쿄 패션 맥락을 넣어 스타일이 흔들리지 않게 고정하세요.
- 이미지가 코스튬처럼 보이면 색을 줄이기 전에 특이한 액세서리부터 덜어내세요.
무엇을 테스트했나
이번에는 패션 이미지에서 자주 필요한 여덟 가지 유형의 프롬프트를 테스트했습니다.
- street-style full body
- three-quarter outfit editorial
- head-to-toe lookbook
- catalog grid page
- runway or backstage moment
- product flat lay
- storefront display
- accessories close-up
핵심 변수는 실루엣 제어, 원단 가독성, 액세서리 과밀도, 손의 안정성, 그리고 애니 스타일화를 추가한 뒤에도 의상이 여전히 현실적으로 입을 만해 보이는지였습니다. 프롬프트를 만들고 수정하는 단계에서는 [Prompt Lab](/promptlab)이 버전 관리에 유용했고, [Create](/create)는 빠른 반복 테스트에 적합했습니다. 생성 후 정리 단계에서는 [Upscaler](/upscaler)가 특히 텍스타일 가장자리, 신발 디테일, 가방 하드웨어에서 중요했습니다.
생성 전에: 준비 체크리스트
첫 프롬프트를 쓰기 전에 아래 체크리스트부터 확인하세요.
| Checkpoint | What to decide first | Why it mattered in this test | |---|---|---| | Shot type | full body, lookbook, detail, display | Prevented the model from drifting into portrait framing | | Styling anchor | one Harajuku signal | Too many subculture cues made outfits unreadable | | Wearable base | denim, mini skirt, cargos, blazer, bomber | Helped the image feel like street fashion instead of costume | | Palette | 2 main colors + 1 accent | Reduced accessory noise and improved product clarity | | Fabric mix | denim, nylon, rib knit, mesh, faux leather | Texture calls improved editorial realism | | Footwear | platform sneaker, loafer, knee boot, tabi-style boot | Shoes often collapse if left vague | | Context | Harajuku lane, Tokyo retail, studio set, backstage | Anchors regional style better than generic "city" | | Body framing | head-to-toe, three-quarter, waist-up detail | Fixed frequent crop failures |
하라주쿠와 웨어러블 스타일링을 먼저 이해할 것
많은 애니 패션 에디토리얼 결과물의 약점은 색이 아닙니다. 핵심은 위계입니다. 모든 아이템이 주인공이 되려고 하면 이미지가 스타일링이 아니라 소품 창고처럼 보입니다. 가장 좋았던 결과는 아래 공식에서 나왔습니다.
1. 강한 포인트 레이어 하나 2. 몸에 맞거나 단순한 베이스 레이어 하나 3. 통제된 액세서리 묶음 하나 4. 현실적인 신발
이 정도면 상업적 가독성을 잃지 않으면서도 하라주쿠 특유의 에너지를 충분히 살릴 수 있습니다.
애니메이션 패션 에디토리얼 프롬프트 워크플로: 단계별 가이드
1단계: 분위기보다 샷 플랜부터 시작하기
첫 테스트는 전체 의상을 프레임 안에 유지하면서도, 무대 의상처럼 과장되지 않고 섹시하고 젊고 실제로 입을 수 있는 룩으로 잡아낼 수 있는지 확인하는 과정입니다.
Topic: Harajuku-inspired wearable street-style outfit with anime editorial energy
Genre: Street Style
Camera: Fujifilm GFX100S
Lens: 45mm f/2.8
Lighting: Overcast diffusion
Location: Harajuku backstreet with shop signs, clean sidewalk, muted traffic in background
Style: Tokyo street fashion editorial
Final Prompt: street-style full body fashion shot, anime fashion editorial mixing Harajuku styling with wearable Japanese streetwear, confident model in a cropped moto jacket layered over a fitted mesh top, pleated micro mini skirt over bike shorts, slouch socks, platform sneakers, small patent shoulder bag, silver chain belt, hair clips used sparingly, full outfit visible head to toe, relaxed walking pose, body-conscious silhouette, tasteful sexy editorial mood, overcast Tokyo street light, fabric texture visible in nylon, mesh, and pleats, clean documentary framing, Harajuku shopfront context, magazine-ready composition, balanced color palette of charcoal, bubblegum pink, and chrome accents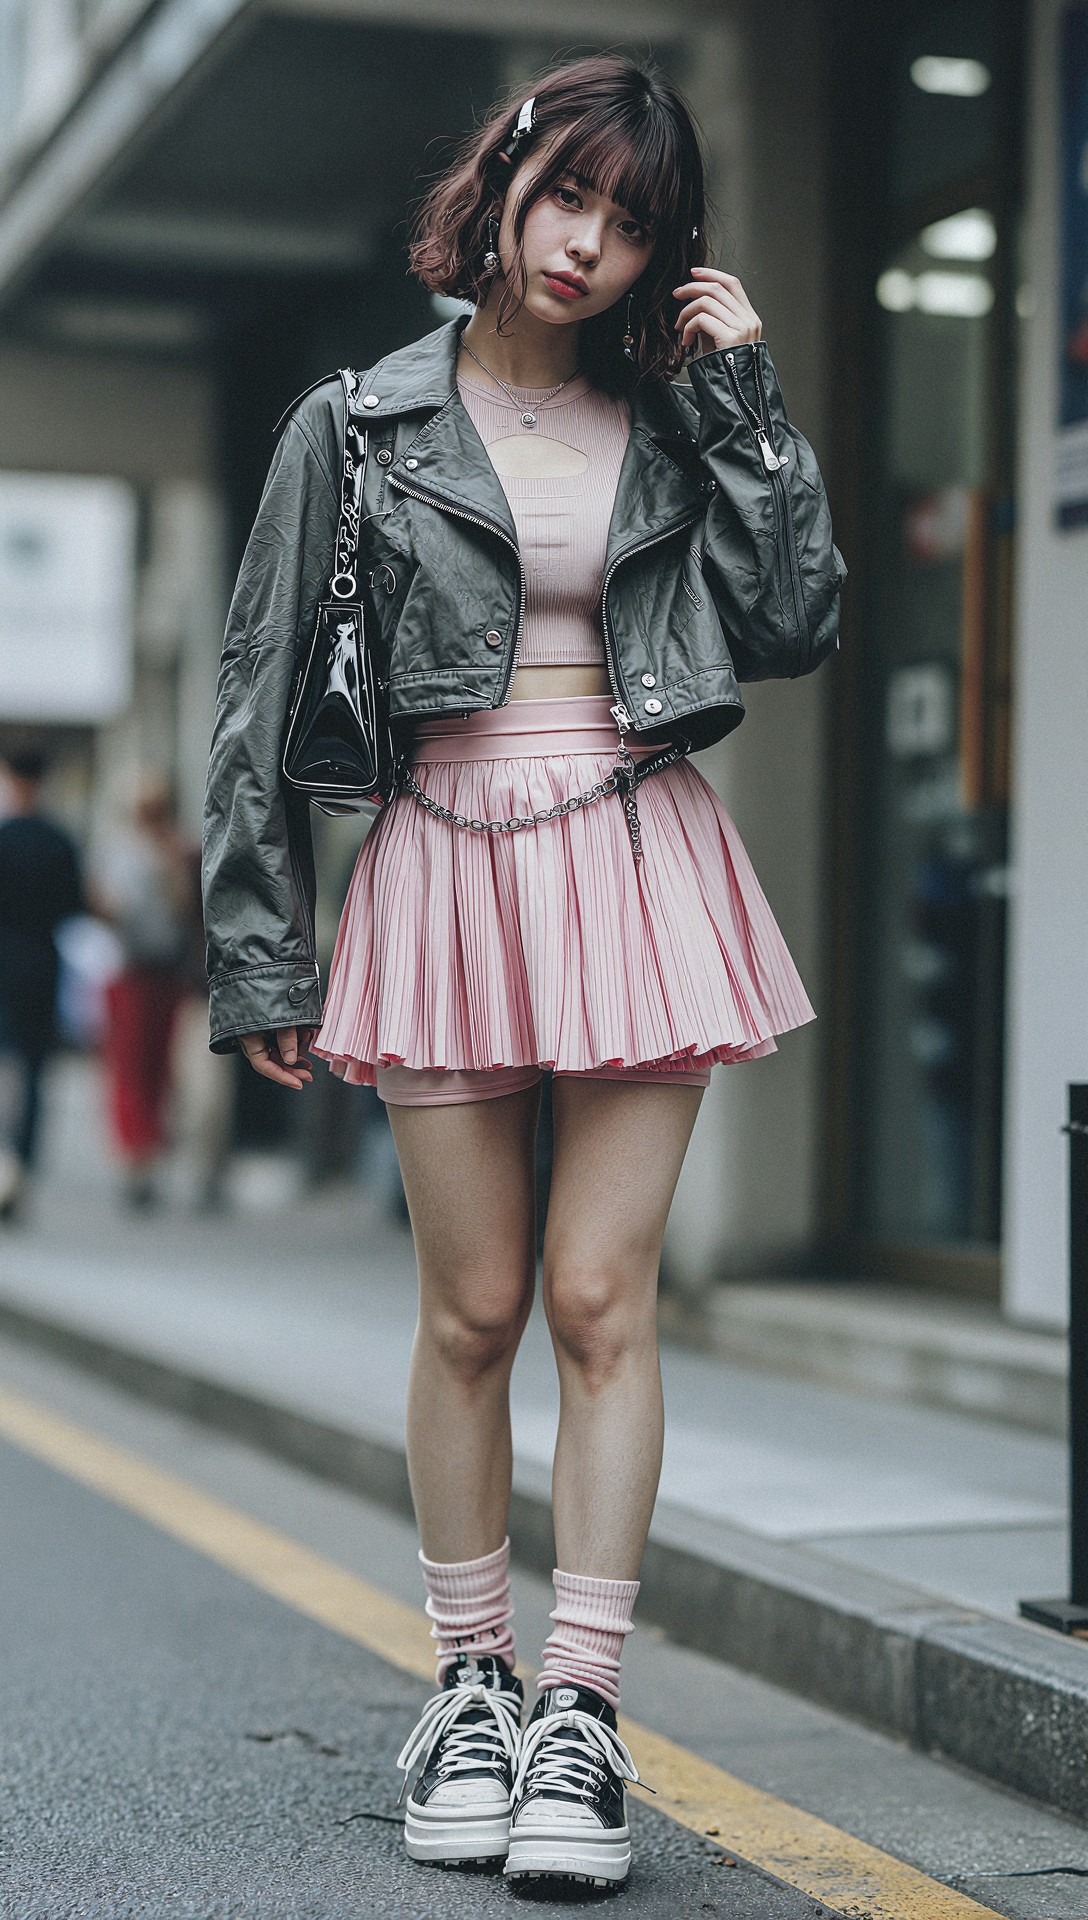
전체 실루엣이 한눈에 읽히는지 확인하세요. 신발이 사라지거나, 크롭이 너무 타이트해지거나, 액세서리가 과하게 늘어나 지저분해진다면 샷 플랜이 충분히 강하지 않았다는 뜻입니다.
왜 잘 작동했나: 초반에 street-style full body를 명시하면 프레이밍이 훨씬 안정됐습니다. 반대로 "anime girl in Harajuku outfit" 정도로만 쓰면 얼굴 중심 구도와 무작위 레이어링으로 쉽게 흘렀습니다.
2단계: 강한 하라주쿠 시그널은 하나만 고르기
이 테스트는 서브컬처 신호를 하나만 분리해서 봅니다. 컬러 포인트 레그웨어와 미니스커트 레이어 비율이 그 요소입니다. 프레임을 과적재하지 않고도 스타일을 고정할 수 있는지 확인하는 목적입니다.
Topic: Wearable Harajuku mini-skirt layering for anime editorial
Genre: Fashion Editorial
Camera: Canon EOS R5
Lens: 50mm f/1.8
Lighting: Soft window light with white bounce
Location: Minimal editorial studio with pale gray seamless and acrylic cube
Style: Clean commercial fashion magazine
Final Prompt: three-quarter outfit editorial, anime fashion editorial focused on a wearable Harajuku-inspired look, fitted cropped cardigan in lavender, white baby tee, black pleated mini skirt layered over fitted shorts, one knee-high color-pop sock and one slouch sock, chunky loafers, compact crossbody bag, delicate choker, subtle rings, seated then half-rising pose on acrylic cube, full outfit logic clearly visible from shoulders to shoes, tasteful sexy styling through silhouette not exposure, smooth studio light, crisp garment edges, clean negative space, fabric detail in rib knit, cotton jersey, and polished leather, modern Japanese streetwear meets magazine styling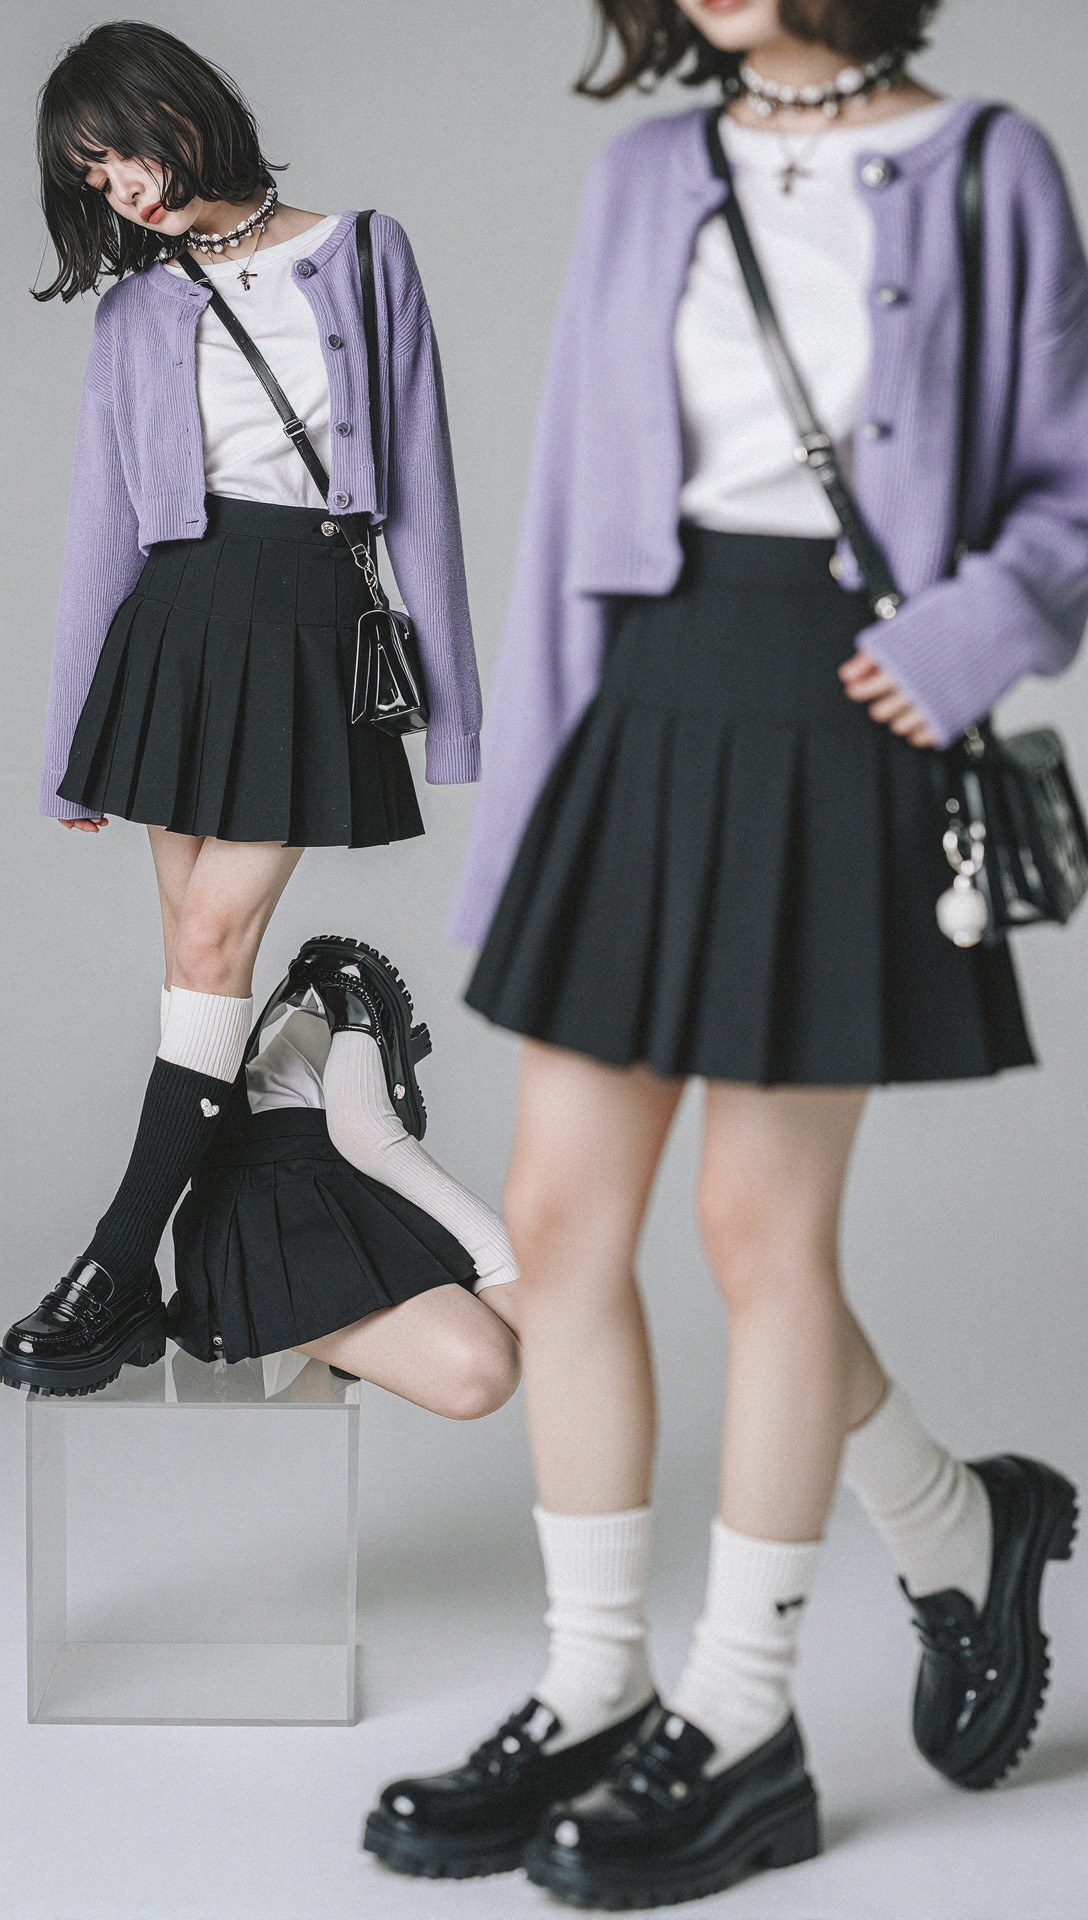
허리선과 밑단의 레이어 라인을 보세요. 강한 결과에서는 스커트 위에 쇼츠가 겹쳐진 구조가 또렷하게 읽힙니다. 약한 결과에서는 쇼츠가 사라지거나 스커트와 섞여버립니다.
배운 점: 하라주쿠 시그널은 하나면 충분합니다. 여기에 과한 헤어 장식, 패턴 슬리브, 플랫폼 부츠, 스티커, 장난감 액세서리까지 한 번에 더하면 상업적 활용성이 빠르게 떨어졌습니다.
3단계: 애니 감도를 더하기 전에 웨어러블 베이스를 먼저 고정하기
결과를 상품 페이지나 룩북 기획에도 쓰고 싶다면, 익숙한 스트리트웨어 베이스에서 출발하세요. 이 테스트는 의상 구조를 더 단단하게 유지할 수 있는지 확인합니다.
Topic: Japanese streetwear base with anime editorial finish
Genre: Lookbook Photography
Camera: Sony A7R V
Lens: 40mm f/2.5
Lighting: Large softbox key plus subtle rim light
Location: Concrete studio with soft shadow falloff
Style: Head-to-toe contemporary lookbook
Final Prompt: head-to-toe lookbook image, anime fashion editorial built from wearable Japanese streetwear, oversized charcoal bomber jacket over fitted off-shoulder knit top, high-waist straight-leg cargos with seam detailing, slim belt, pointed platform ankle boots, structured mini bag, narrow sunglasses pushed up on head, clean standing pose with one hip shifted, complete silhouette fully visible, sexy but controlled editorial attitude, anime-inspired line clarity in the styling and color blocking rather than exaggerated costume elements, studio fashion lighting, premium textile detail in nylon, knit, and washed cotton, neutral backdrop for catalog use, sharp commercial framing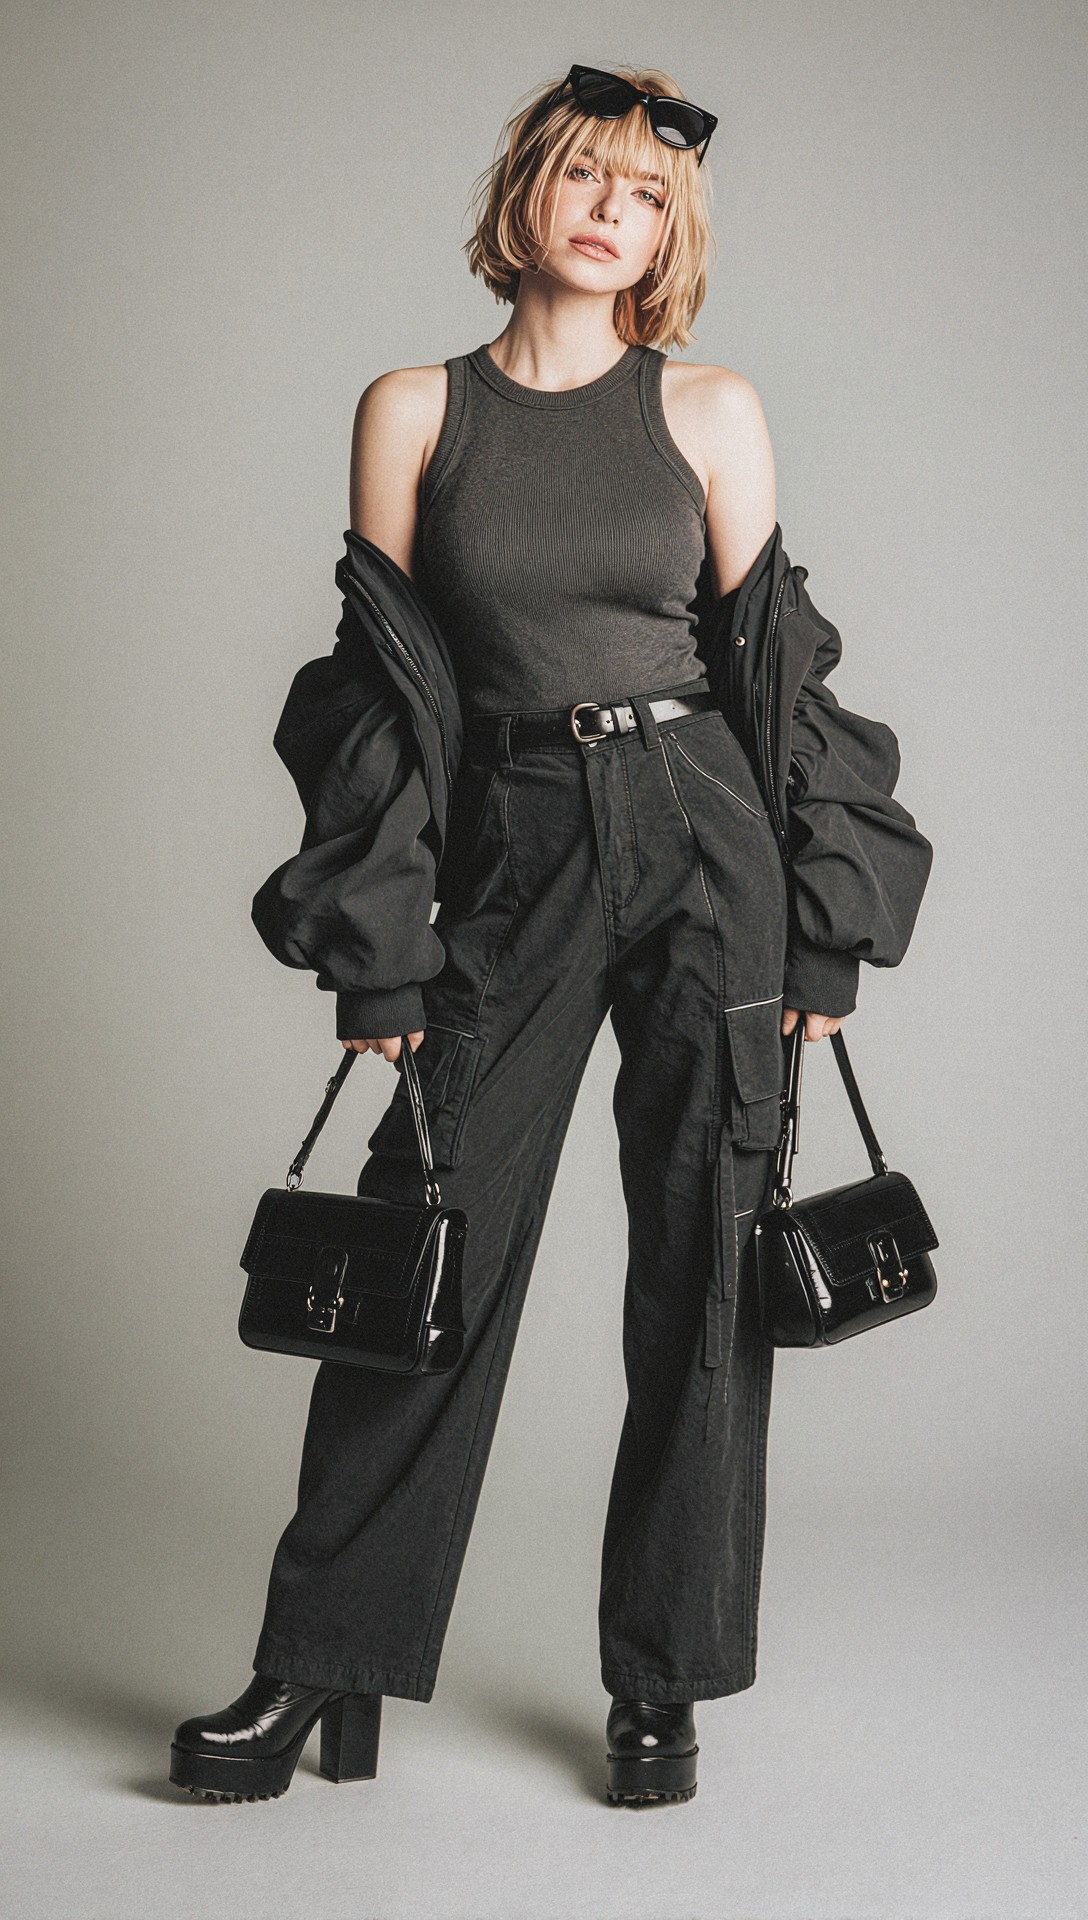
봄버 재킷, 상의, 카고 팬츠가 각각 독립적인 볼륨을 갖는지 확인하세요. 여기서 가장 흔한 실패는 원단 융합입니다. 재킷과 팬츠가 같은 텍스처로 붙어 실루엣이 납작해집니다.
이 세팅에서는 앞선 프롬프트보다 덜 "귀엽게" 나오는 대신, 쇼핑 중심 크리에이티브에는 훨씬 재활용하기 쉬웠습니다.
4단계: 일관된 의상 비교가 필요할 때는 카탈로그 구조 사용하기
상업적 검토를 하는 독자는 한 장의 히어로 이미지보다 라인업 기획에 쓸 수 있는 프롬프트를 원할 때가 많습니다. 이 테스트는 패션 그리드 페이지에서 일관성을 확인합니다.
Topic: Anime-inspired streetwear capsule shown as a catalog page
Genre: Product Editorial
Camera: Nikon Z8
Lens: 35mm f/4 on 24-70mm zoom look
Lighting: Even studio panel lighting
Location: White e-commerce studio set
Style: Catalog grid page
Final Prompt: catalog grid page showing four coordinated anime fashion editorial looks inspired by Harajuku and Tokyo street fashion, each look presented head-to-toe in separate clean panels, wearable outfit systems with cropped varsity jacket, fitted tank, pleated skirt, wide-leg denim, compact bags, platform sneakers, loafers, layered belts, restrained hair accessories, sexy editorial confidence through pose and silhouette, consistent white background, clear garment separation, fashion-buying presentation, polished layout feel, strong commercial clarity, distinct color stories of black-red, cream-silver, pastel-lilac, and navy-pink, crisp studio output with readable fabric texture and accessory hardware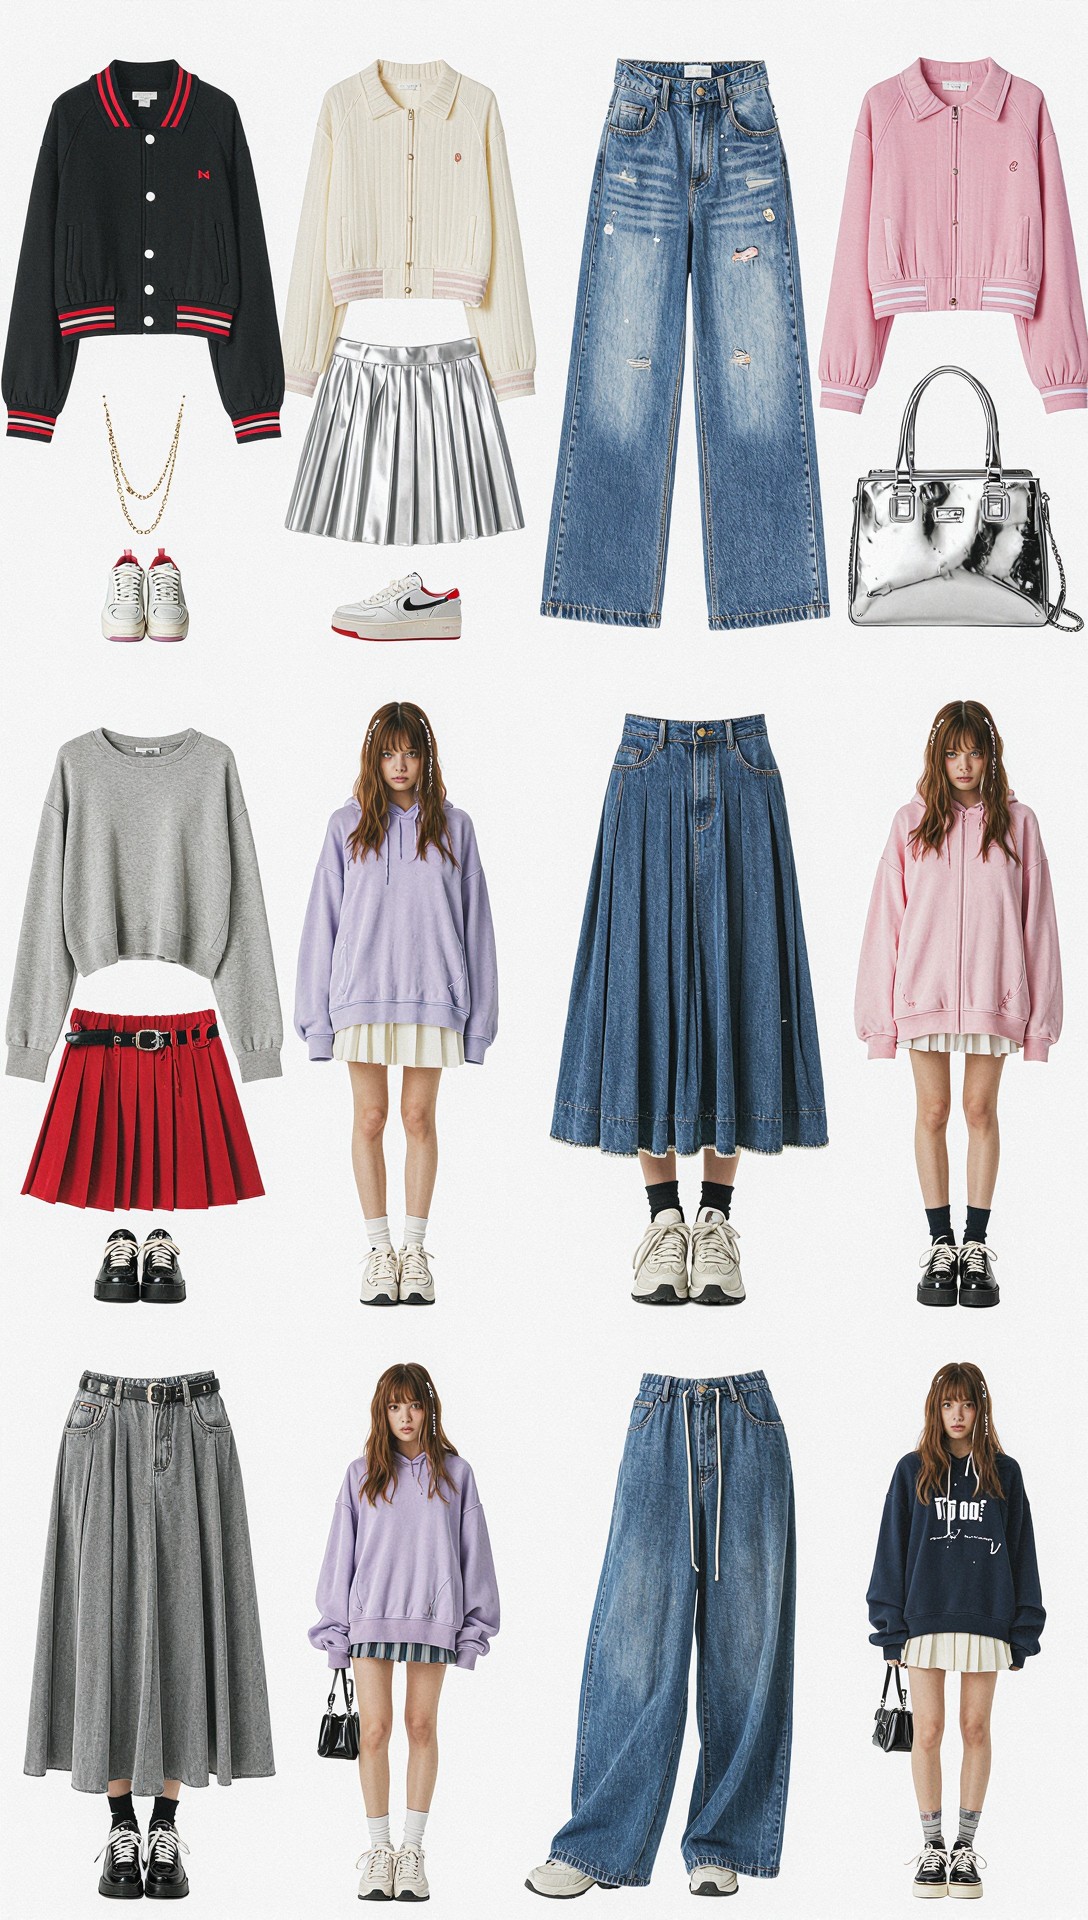
패널 간 일관성을 보세요. 좋은 결과는 각 룩이 서로 다르면서도 같은 캡슐 안에 묶여 보입니다. 약한 결과는 패널마다 신체 비율이 흔들리거나 신발이 돌연 변형됩니다.
이때는 [Gallery](/gallery) 레퍼런스가 특히 도움이 됩니다. 원하는 실루엣 계열이 이미 정해져 있다면 여러 출력을 나란히 비교한 뒤 어느 프롬프트 가지를 유지할지 결정하세요.
5단계: 도쿄 스트리트 패션을 현실감 있게 만들려면 장면 맥락을 추가하기
다음 테스트는 리테일 맥락이 의상을 더 그럴듯하게 만드는지 확인합니다. 장면이 구체적일수록 대체로 효과가 좋았습니다.
Topic: Tokyo select-shop storefront with anime fashion styling
Genre: Fashion Campaign
Camera: Leica SL2-S
Lens: 35mm f/2
Lighting: Late afternoon natural light with storefront reflections
Location: Harajuku select shop entrance with racks, decals, and glass display
Style: Boutique campaign editorial
Final Prompt: storefront display fashion campaign image, anime fashion editorial with wearable Harajuku styling at a Tokyo select-shop entrance, model stepping out of the shop wearing fitted striped knit top, cropped faux leather jacket, low-rise wide denim, chain-detail belt, heeled platform boots, mini handbag, layered ear cuffs, visible shopping racks and styled mannequins behind glass, full outfit centered in frame, confident sexy street-fashion attitude, late afternoon reflections on glass, realistic retail merchandising context, rich fabric and hardware detail, balanced reds, blacks, and faded blue denim, premium boutique campaign composition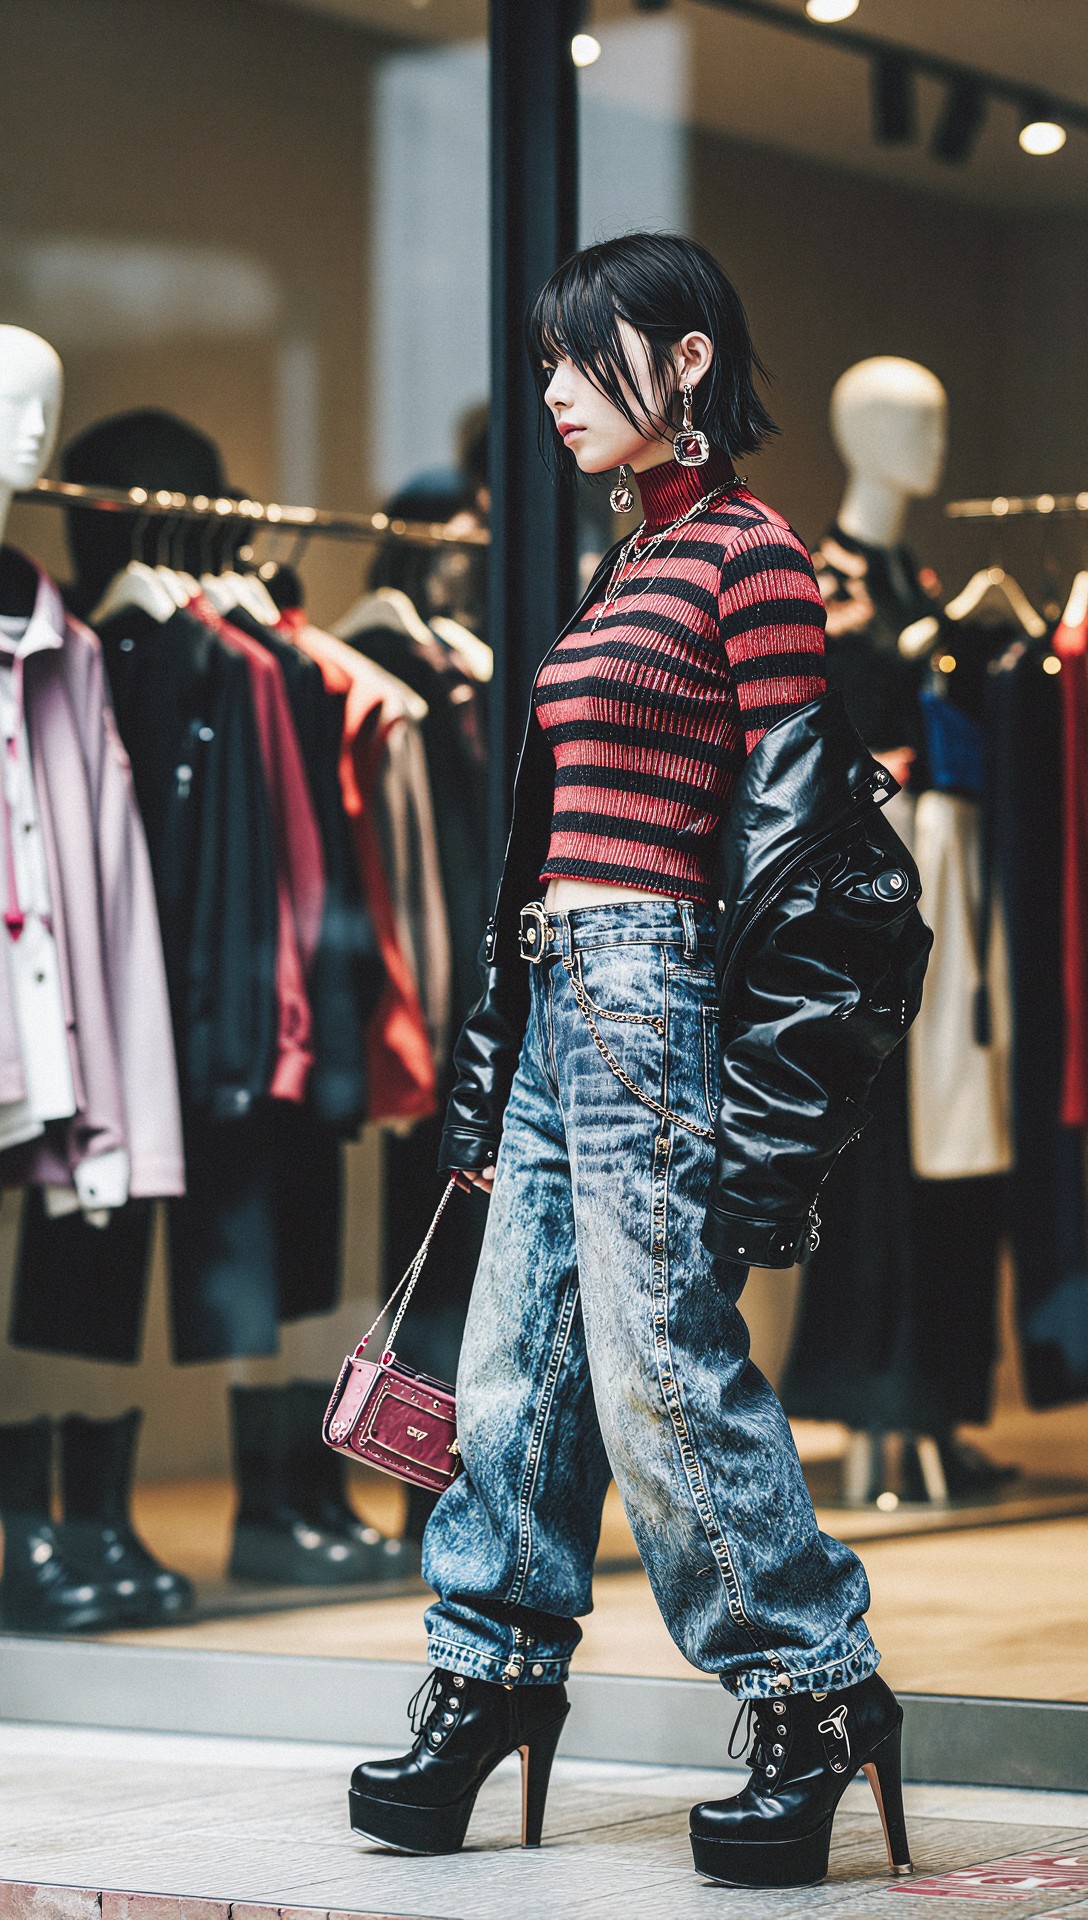
유리 반사가 이미지를 살리는지, 아니면 의상을 날려버리는지 확인하세요. 매장 내부가 일반 카페나 로비처럼 보이지 않고 실제 패션 리테일 공간처럼 보이는지도 중요합니다.
구체적인 리테일 맥락은 설득력을 높이는 가장 쉬운 방법 중 하나였습니다. 반대로 "Tokyo city" 같은 배경은 간판과 군중이 튀어나와 옷보다 더 눈에 띄는 경우가 많았습니다.
6단계: 방향성이 강한 스타일 테스트에는 런웨이·백스테이지 프롬프트 사용하기
이 테스트는 같은 의상 언어를 더 비상업적이고, 더 에디토리얼하게 보고 싶을 때 유용합니다. 더 복잡한 조건에서도 스타일링 논리를 유지할 수 있는지 확인합니다.
Topic: Anime editorial runway look with wearable streetwear construction
Genre: Runway Documentary
Camera: Canon EOS R3
Lens: 24-70mm f/2.8 at 50mm
Lighting: Mixed backstage practicals and runway spill light
Location: Tokyo fashion week backstage corridor
Style: Backstage fashion report
Final Prompt: runway backstage moment, anime fashion editorial showing a wearable Harajuku-meets-streetwear look before showtime, model in a corset-layered hoodie dress over straight trousers, detached sleeves, compact belt bag, pointed boots, glossy lip, minimal jewelry, stylist adjusting hem while full outfit remains visible, racks of garments and production tape in background, sexy editorial tension but fashion-first composition, documentary realism, mixed warm and cool backstage lighting, sharp focus on garment layering, visible construction details, authentic Tokyo runway atmosphere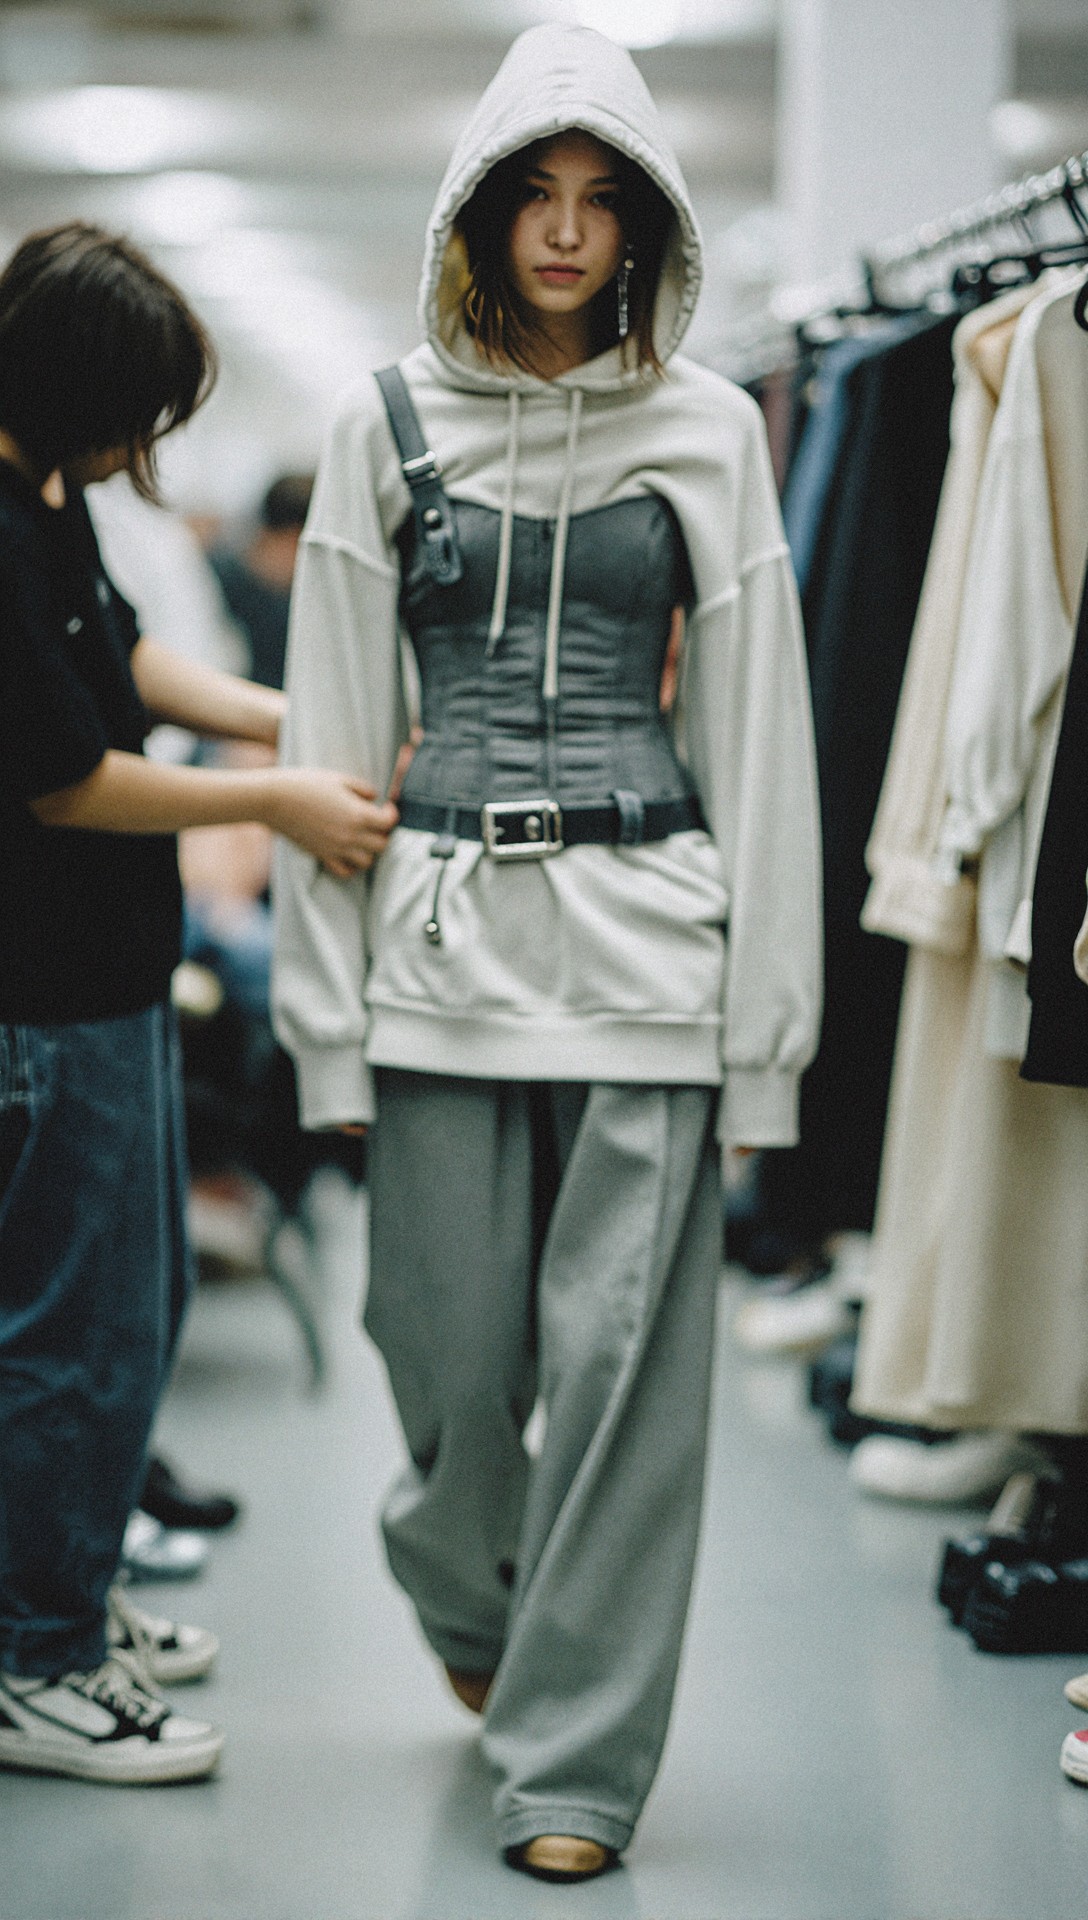
손, 추가된 팔다리, 의상 연결성을 확인하세요. 백스테이지 프롬프트는 인물과 사물이 많기 때문에 더 쉽게 무너집니다.
이 방식의 가장 강한 용도는 콘셉트 테스트입니다. 목표가 깨끗한 쇼핑 이미지라면 백스테이지부터 시작하진 않겠습니다.
7단계: 제품 기획과 모델 샷을 분리하기
모델이 의상 시스템보다 너무 앞서 보인다면, 플랫레이나 아이템 우선 이미지로 분리하세요. 이 테스트는 사람 없이도 룩의 시각적 DNA가 유지되는지 확인합니다.
Topic: Harajuku-wearable outfit components arranged for editorial planning
Genre: Product Editorial
Camera: Phase One XF IQ4
Lens: 80mm f/2.8
Lighting: Overhead softbox with controlled shadow edges
Location: Matte studio tabletop in cool gray
Style: Luxury flat lay merchandising
Final Prompt: product flat lay of an anime fashion editorial outfit blending Harajuku styling with wearable street fashion, carefully arranged cropped faux leather jacket, fitted mesh top, pleated mini skirt, bike shorts, chain belt, slouch socks, platform sneakers, patent mini shoulder bag, silver rings, hair clips, clean editorial spacing, sexy fashion attitude conveyed through silhouette and styling not body, luxury merchandising precision, top-down composition, premium texture detail in leather, mesh, pleats, rubber sole, and patent finish, cool gray background, Tokyo street fashion capsule planning image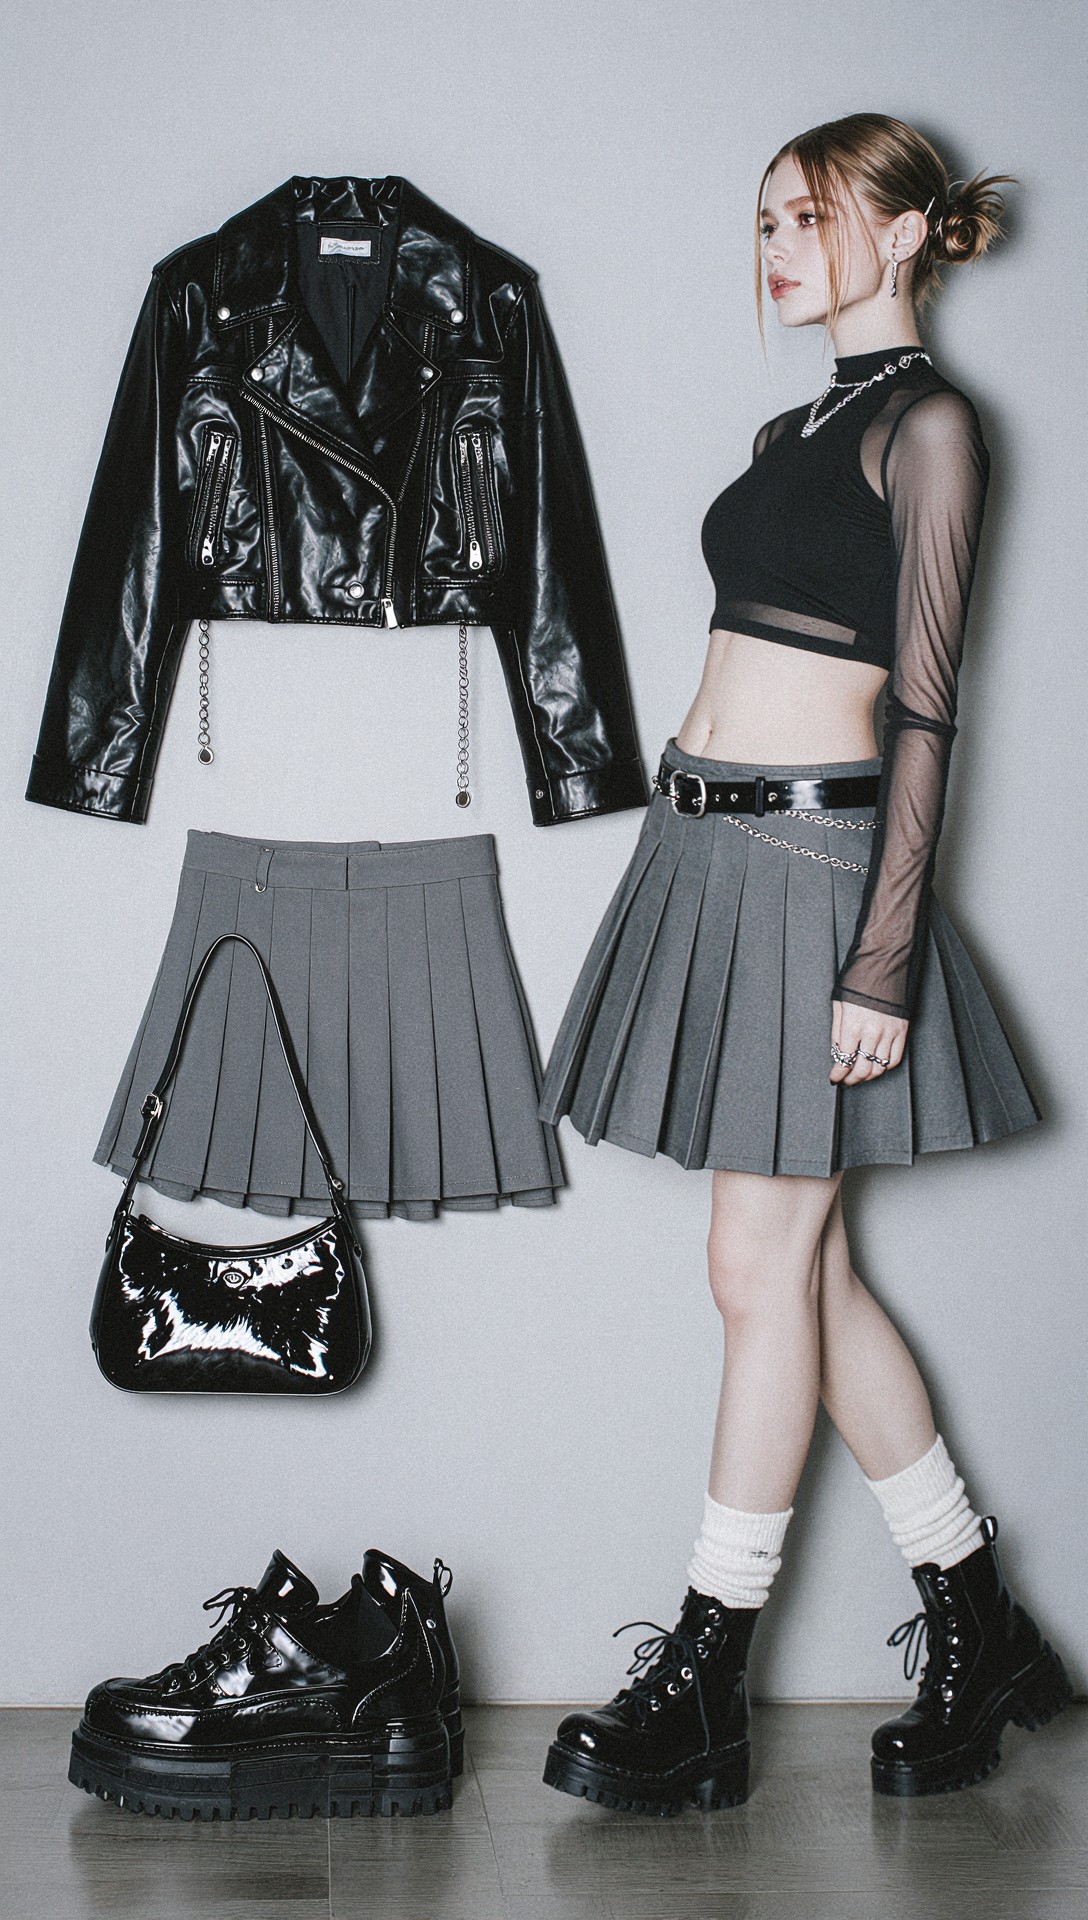
각 아이템이 식별 가능하고, 비례가 맞는지 보세요. 플랫레이는 전체 바디 생성에 시간을 쓰기 전에 의상 논리가 실제로 성립하는지 드러내는 데 매우 유용합니다.
이 단계는 전체 워크플로에서 가장 실용적인 체크포인트 중 하나였습니다. 플랫레이가 이미 과하게 꽉 차 보이면 모델 샷은 대개 더 나빠집니다.
8단계: 마지막은 액세서리와 텍스타일 디테일 점검으로 마무리하기
많은 애니 패션 에디토리얼 결과물은 썸네일 크기에서는 괜찮아 보여도 하드웨어, 스티치, 작은 액세서리에서 무너집니다. 마지막 테스트는 클로즈업 제어를 확인합니다.
Topic: Streetwear accessories detail for anime fashion editorial
Genre: Accessories Campaign
Camera: Sony A1
Lens: 85mm f/1.8
Lighting: Beauty dish key with neon rim light
Location: Minimal reflective set with smoked acrylic surface
Style: High-end accessories advertising
Final Prompt: accessories close-up from an anime fashion editorial look, focus on mini patent shoulder bag, chain belt detail, rings, ear cuffs, zipper pulls, and cropped jacket hem, lower face and torso partially visible but styling remains the subject, sexy editorial mood through posture and fitted silhouette, polished Tokyo streetwear accessories campaign, sharp hardware reflections, black, silver, and candy-pink palette, smoked acrylic set, luxury detail emphasis, clean composition, realistic material rendering, anime-inspired graphic clarity without losing product realism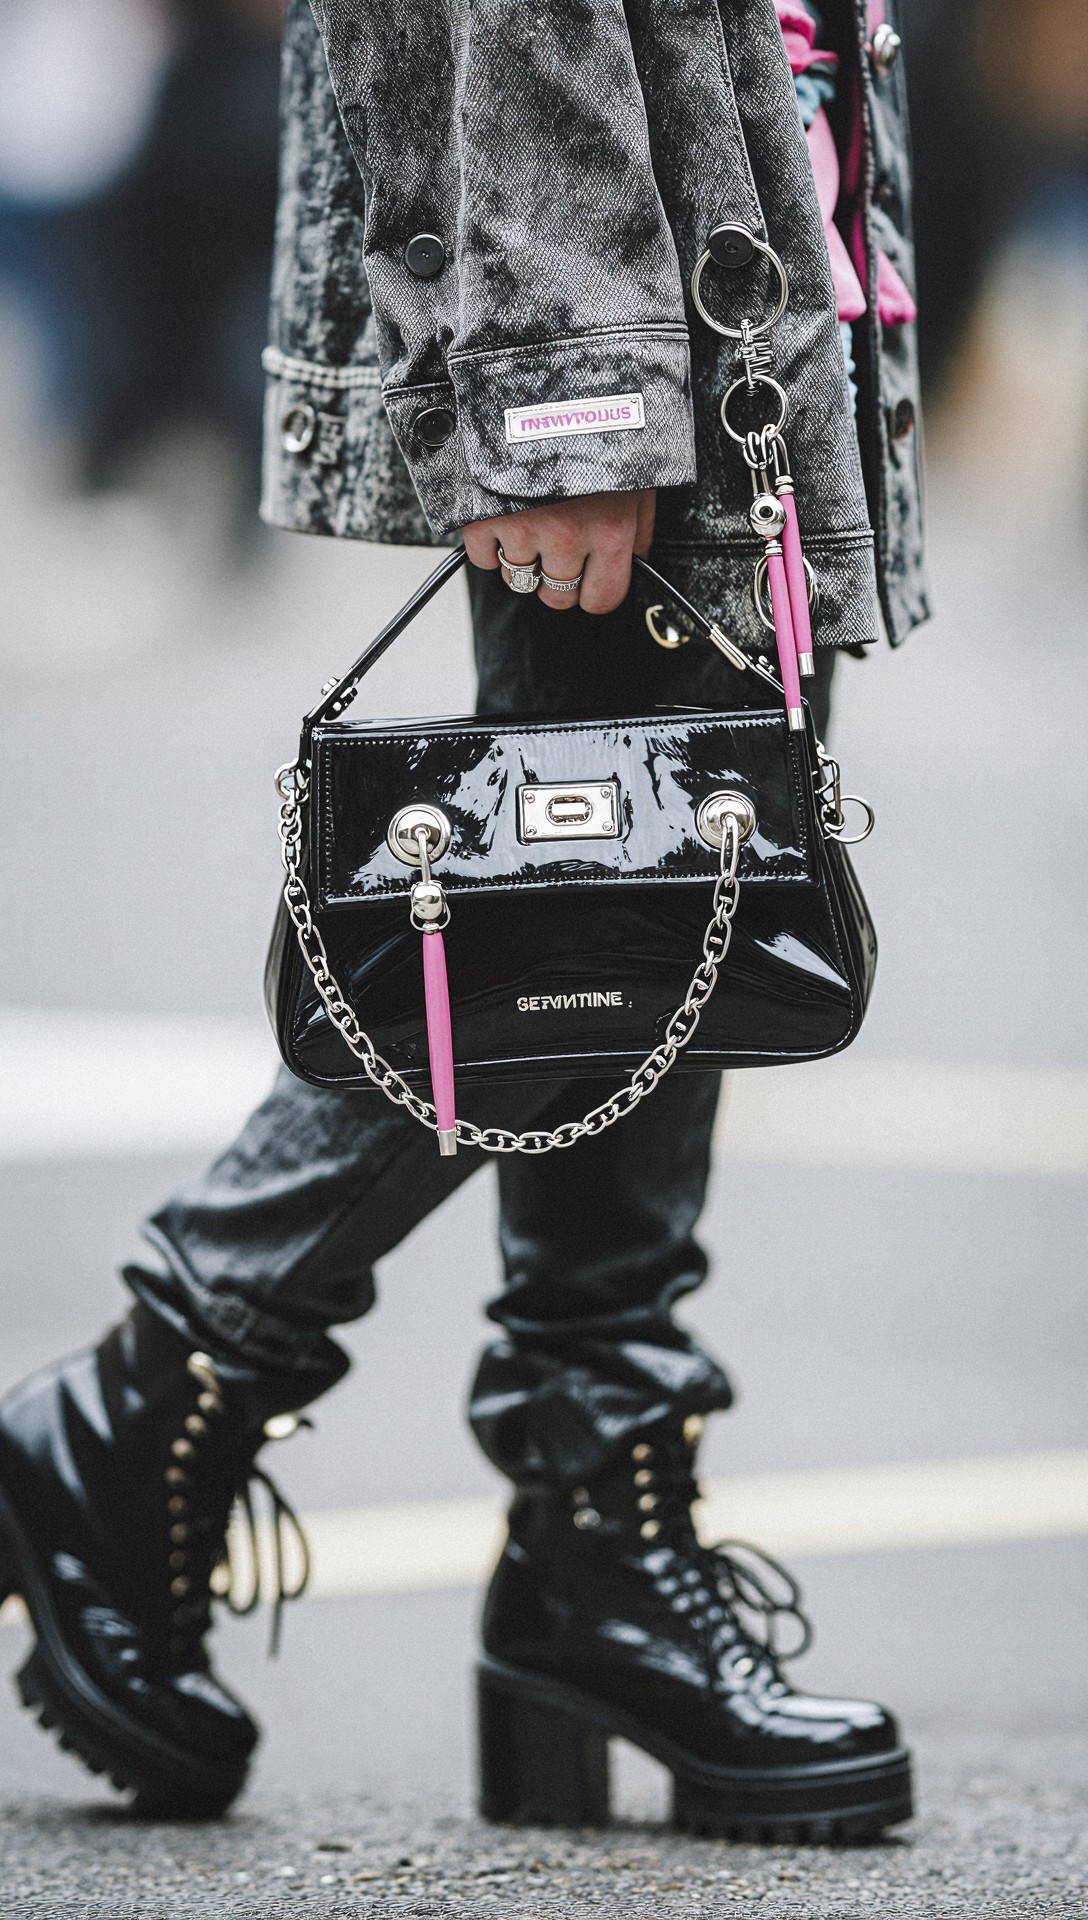
지퍼 톱니, 체인 링크, 반지 개수, 가방 스트랩 구조를 확인하세요. 이런 디테일에서 강해 보이던 이미지도 자주 무너집니다.
하드웨어가 계속 실패한다면, 의상 이미지를 먼저 만들고 액세서리 디테일은 별도 이미지로 생성하세요. 한 장에 두 역할을 모두 맡기면 실패 확률이 높습니다.
프롬프트 예시: 왜 이런 재료가 잘 작동했나
이번 테스트 전반에서 일관되게 먹힌 요소는 아래와 같았습니다.
- 명명된 샷 타입
- 하나의 패션 맥락
- 하나의 지배적인 실루엣 아이디어
- 명시적인 의상 스택
- 초반에 지정한 신발
- 절제된 액세서리 수
- 노출이 아니라 핏과 태도로 표현한 섹시한 무드
약점은 늘 모호함이었습니다. "anime"와 "Harajuku"만 앵커로 남기면 출력은 코스프레, 포스터 아트, 얼굴 중심 크롭으로 흘렀습니다. 반대로 에디터가 실제 지면 스타일링을 지시하듯 의상을 묘사하면 이미지 모델도 대체로 그 구조를 따라왔습니다.
결과물 검수용 품질 체크리스트
각 배치 생성 후 이 기준으로 검수하세요.
의상 가독성
- 2초 안에 아우터, 상의, 하의, 신발, 가방을 구분할 수 있는가?
- 실루엣이 우연이 아니라 의도적으로 보이는가?
- 하나의 포인트 요소가 룩을 이끌고 있는가?
패션 정확도
- 밑단 길이, 허리선, 레이어가 물리적으로 말이 되는가?
- 신발이 온전하고 좌우가 대칭인가?
- 액세서리가 의상을 보완하지, 대체하고 있지는 않은가?
애니 스타일화 균형
- 이미지가 스타일라이즈되어 있으면서도 코스튬 아트로 변하지 않는가?
- 비율이 여전히 스트리트 패션으로 입을 만한 수준인가?
- 표정보다 스타일링 시스템이 먼저 읽히는가?
상업적 활용성
- 이 이미지가 룩북, 캠페인 무드보드, 스토어프런트 콘셉트, 상품 페이지에 들어갈 수 있는가?
- 레이아웃 사용을 위한 여백이나 프레이밍 통제가 충분한가?
- 배경이 옷을 보조하고 있는가?
이 워크플로에서 확인된 강점
가장 잘하는 것
- 풀바디 의상 기획
- 장난기 있는 하라주쿠 신호와 상업적 스트리트웨어 실루엣의 결합
- 캡슐 방향성용 무드보드 제작
- 컬러 스토리와 액세서리 한계 테스트
가장 강했던 결과
이번 테스트에서 가장 좋았던 것은 head-to-toe lookbook 방식이었습니다. 실루엣 제어가 가장 깔끔했고, 원단 분리도 가장 일관됐습니다. 캠페인 방향을 정하기 전에 여러 워크플로를 비교하는 사용자라면 여기서 시작하는 편이 좋습니다.
유용한 차선책
storefront display 프롬프트는 도쿄 스트리트 패션의 맥락을 더하면서도 상품 관련성을 잃지 않는 데 가장 좋았습니다. 백스테이지보다 상업적이고, 오픈 스트리트 프롬프트보다 더 현실감 있었습니다.
한계와 실패 리스크
출력이 약해진 지점
- 가방이나 벨트 근처의 손이 자주 변형됨
- 플랫폼 슈즈가 바닥면과 합쳐짐
- 미니스커트 위 쇼츠 레이어가 종종 융합됨
- 복잡한 하라주쿠 배경이 옷과 경쟁함
- 액세서리 클로즈업은 하드웨어가 판타지 금속처럼 과장될 때가 있음
실패를 가장 많이 만든 원인
1. 한 줄에 너무 많은 서브컬처 레퍼런스를 넣은 경우 2. 신발을 명시하지 않은 경우 3. "urban Japan" 같은 모호한 장면 표현 4. 뷰티 포트레이트와 전체 의상을 동시에 요구한 경우 5. 한 장에 너무 많은 액세서리를 보여주려 한 경우
이 문제가 자주 생긴다면 샷을 단순화해서 [Create](/create)로 다시 돌리고, 핵심 스타일링이 맞은 뒤에만 [Upscaler](/upscaler)를 쓰세요. 업스케일링은 망가진 레이어 논리를 고쳐주지 않습니다.
약한 결과를 손보는 방법
이미지가 너무 코스튬처럼 보일 때
- 특이한 액세서리 묶음 하나를 제거하세요.
- 강한 패턴 하나를 텍스처로 바꾸세요.
- "Harajuku fashion" 대신 pleated mini, mesh top, cropped biker jacket처럼 구체적인 아이템으로 바꾸세요.
이미지가 너무 타이트하게 크롭될 때
- 프롬프트를 "street-style full body" 또는 "head-to-toe lookbook"으로 시작하세요.
- "full outfit visible head to toe"를 명시하세요.
- 35mm~50mm 프레이밍 언어를 사용하세요.
원단이 서로 뭉개질 때
- 각 소재를 직접 이름으로 적으세요.
- 세트업이 목적이 아니라면 재킷과 팬츠를 같은 마감으로 두지 마세요.
- overcast diffusion이나 softbox key처럼 텍스처를 살리는 조명 메모를 하나 추가하세요.
액세서리가 지저분해질 때
- 가방, 하나의 주얼리 계열, 하나의 헤어 디테일만 남기세요.
- 액세서리 테스트는 별도 디테일 프롬프트로 옮기세요.
- 명사를 늘리기보다 "restrained accessories"를 요청하세요.
애니 스타일이 사라질 때
- 선의 또렷함, 컬러 블로킹, 그래픽 구도로 애니 영향을 추가하세요.
- 판타지 소품을 더하는 방식으로 해결하지 마세요.
- 의상은 현실적으로 유지하고, 스타일화는 렌더링 언어에서 처리하세요.
FAQ
애니 패션 에디토리얼 프롬프트를 코스프레가 아니라 입을 수 있는 룩처럼 보이게 하려면?
패션 샷 타입과 의상 논리부터 앞세우세요. 안정적인 스트리트웨어 베이스 위에 하라주쿠 시그널 하나만 얹는 방식이 가장 좋습니다.
애니 패션 에디토리얼 의상 프롬프트에 가장 좋은 샷 타입은?
깔끔하게 의상을 평가하려면 head-to-toe lookbook이 가장 안전한 시작점입니다. 무드와 현실감을 원한다면 street-style full body가 그다음으로 좋습니다.
하라주쿠 패션을 프롬프트할 때 결과가 복잡해지지 않게 하려면?
액세서리를 제한하고, 팔레트를 통제하고, cropped jacket, pleated mini, wide denim처럼 하나의 뚜렷한 실루엣 주인공을 지정하세요.
일본 스트리트웨어 프롬프트에는 거리 배경과 스튜디오 배경 중 무엇이 더 좋은가?
의상 정확도와 비교에는 스튜디오가 좋습니다. 룩이 이미 안정된 뒤 하라주쿠 리테일이나 뒷골목 맥락을 추가하세요.
도쿄 스트리트 패션 프롬프트에서 가장 중요한 디테일은?
신발입니다. 신발이 모호하면 전체 의상이 상업적 신뢰감을 잃는 경우가 많습니다.
요약 추천
이 워크플로는 미적인 무드 이미지가 아니라 실제로 활용 가능한 의상 이미지를 만들고 싶은 독자에게 가장 잘 맞는 애니메이션 패션 에디토리얼 프롬프트 시스템입니다. 룩북, 캠페인 기획, 캡슐 콘셉트, 스트리트웨어 스타일링 테스트에 특히 잘 맞습니다. 반대로 극단적인 코스튬 스타일링, 무거운 판타지 소품, 뷰티 우선 포트레이트 아트를 원한다면 적합하지 않습니다.
이 방법을 한 문장으로 줄이면 이렇습니다. 프롬프트는 패션 에디터가 촬영을 지시하듯 쓰고, 애니 스타일화는 기반이 아니라 마감으로 추가하세요. 세팅에서 가장 중요했던 것은 구체적인 도쿄 패션 맥락이었습니다. 프롬프트 디테일에서 가장 중요했던 것은 전체 의상 논리, 특히 신발, 가방, 레이어 순서였습니다.
프롬프트 반복 아이디어를 더 보고 싶다면 [articles](/articles)를 둘러보거나 [Prompt Lab](/promptlab)에서 변형을 테스트해 보세요.