Best AI Image Enhancer for Web Images: Sharper Thumbnails, Hero Banners, and Social Creatives 한국어 요약
이 페이지는 ZView Space의 영어 원문을 한국어 검색 사용자도 이해할 수 있도록 정리한 SEO 요약입니다. 핵심은 단순한 얼굴 중심 이미지가 아니라 패션 에디토리얼, 룩북, 아웃핏, 프롬프트 테스트, 이미지 생성 워크플로우를 실제로 어떻게 구성할지입니다.
핵심 요약
- 원문 주제: Best AI Image Enhancer for Web Images: Sharper Thumbnails, Hero Banners, and Social Creatives
- 목적: AI 이미지 생성에서 outfit, silhouette, fabric, pose, location, camera framing을 더 명확하게 설계합니다.
- 활용 범위: Z-Image Turbo, Krea2 Turbo, Qwen Image, Anima, SeedVR2 같은 이미지 생성 및 업스케일 워크플로우에 적용할 수 있습니다.
- SEO 관점: 제목, 설명, 이미지 alt, 프롬프트 예시가 실제 검색 의도와 맞아야 색인 가능성이 높아집니다.
한국어 사용자를 위한 체크포인트
1. 프롬프트가 얼굴 묘사에만 머물지 않고 전체 스타일과 의상 구성을 설명하는지 확인합니다. 2. 패션 이미지라면 상의, 하의, 아우터, 신발, 액세서리, 소재감, 촬영 장소를 분리해서 씁니다. 3. 생성 결과는 바로 게시하지 말고 디테일, 손, 의상 형태, 배경 일관성, 이미지 품질을 비교합니다. 4. 글 본문에는 실제 테스트 기준과 실패를 줄이는 방법이 들어가야 검색엔진에서 얇은 콘텐츠로 보일 가능성이 줄어듭니다.
원문 미리보기
Web visuals rarely fail because the idea is weak. More often, they fail because the final asset is soft, compressed, cropped badly, or resized beyond what the source can handle. If you're looking for the best AI image enhancer for web images , the real questio
---
Web visuals rarely fail because the idea is weak. More often, they fail because the final asset is soft, compressed, cropped badly, or resized beyond what the source can handle. If you're looking for the best AI image enhancer for web images, the real question is not just which tool sharpens best. It is which workflow helps thumbnails stay crisp, hero banners stay clean, and social creatives survive compression without looking brittle.
This guide compares what actually matters for web use: detail recovery, text and edge handling, resize quality, speed, prompt-assisted regeneration, and how enhancement fits into a modern creative pipeline.
What makes an AI image enhancer good for web images?
Web assets behave differently from print images. A product tile, YouTube thumbnail, homepage banner, and Instagram ad each break in different ways.
For web work, the best enhancer should do five things well:
- restore edge clarity without halos
- preserve faces, products, and typography-like shapes
- upscale to common web sizes cleanly
- avoid plastic skin or over-smoothed surfaces
- export efficiently for JPEG, PNG, or WebP delivery
A strong enhancer for web images is usually better at controlled clarity than dramatic transformation. You want selective sharpness, not a crunchy overprocessed look.
The three web image problems AI enhancement solves best
1. Soft thumbnails
Thumbnail images need fast visual readability. Tiny faces, product silhouettes, and high-contrast edges matter more than micro-detail. AI enhancement helps by rebuilding structure around eyes, hands, packaging edges, and subject outlines.
Use it when:
- a generated image looks great full-size but weak at thumbnail scale
- a screenshot or source asset is too small for a card layout
- a creator thumbnail needs more separation between subject and background
Topic: YouTube-style creator thumbnail portrait for a web card
Genre: Lifestyle Portrait
Camera: Canon EOS R5
Lens: 50mm f/1.2
Lighting: Softbox key light with subtle blue rim light
Location: Modern creator studio with monitor glow and acoustic panels
Style: Clean commercial look
Final Prompt: A confident digital creator framed for a high-impact website thumbnail, wearing a charcoal bomber jacket over a white tee, half-turn pose toward camera, direct engaging expression, one hand slightly raised as if explaining a breakthrough, softbox key light shaping the face with a faint cool rim light separating the subject from a dark studio background, modern creator studio with blurred monitor glow and acoustic panels, clean commercial composition with strong negative space for crop flexibility, Canon EOS R5 look, 50mm f/1.2 shallow depth of field, crisp eye detail, refined skin texture, clear jawline separation, bold contrast, thumbnail-friendly silhouette, rich but controlled color palette of blue, charcoal, and warm skin tones, premium web-ready sharpness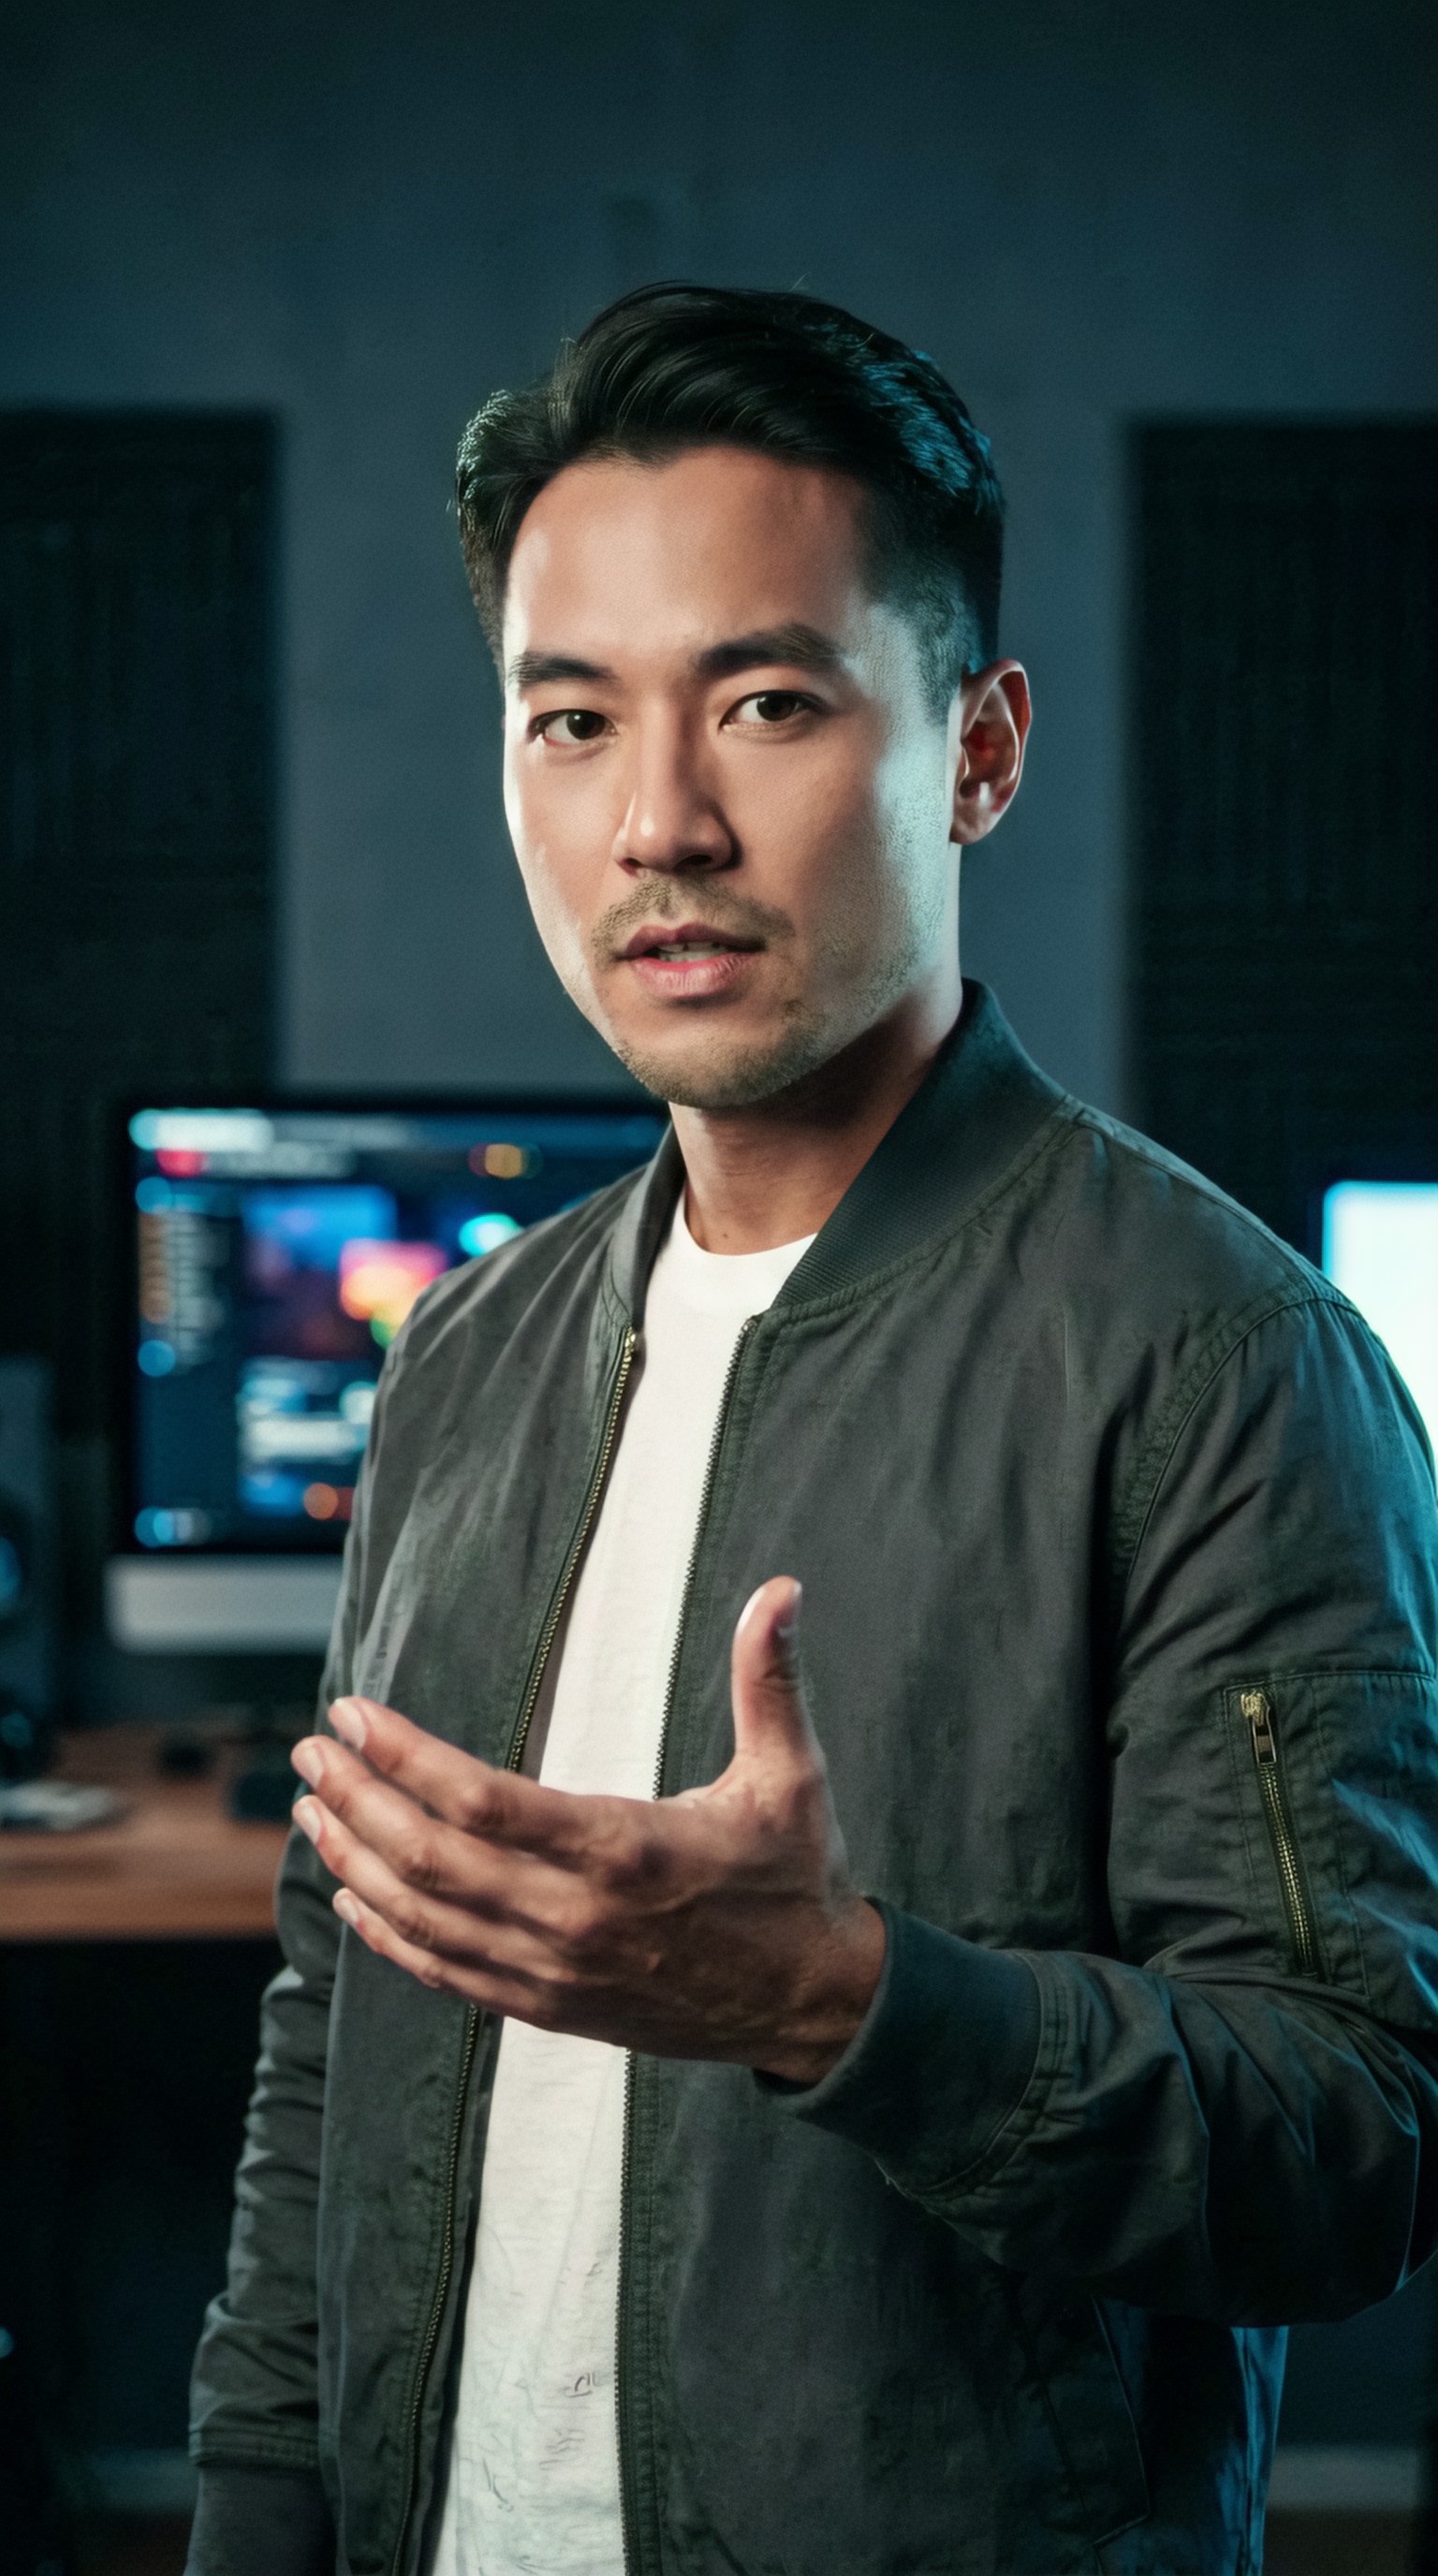
2. Hero banners that stretch too far
Hero banners often expose flaws because they are wide, shallow, and placed above the fold. If your source image is narrow, lightly detailed, or AI-generated at the wrong aspect ratio, enhancement alone may not be enough. The best tools combine upscaling with generative fill, outpainting, and texture rebuilding.
Look for enhancers that can:
- upscale while keeping sky gradients clean
- retain architecture and product edge geometry
- extend backgrounds without obvious repetition
- preserve cinematic depth in wide crops
Topic: Wide homepage hero banner for a sustainable skincare launch
Genre: Product Editorial
Camera: Hasselblad X2D 100C
Lens: 65mm f/2.8
Lighting: Studio butterfly light with soft side fill
Location: Minimal stone vanity with pale plaster wall and reflected daylight
Style: High-end beauty advertising
Final Prompt: A luxury sustainable skincare bottle and cream jar arranged for a wide website hero banner, placed on a pale travertine vanity with soft shadows, elegant spacing and asymmetrical composition designed for left and right crop flexibility, premium frosted glass packaging with subtle condensation, clean label area, studio butterfly light with gentle side fill creating polished highlights, minimal plaster wall backdrop with reflected daylight, high-end beauty advertising style, Hasselblad X2D 100C look, 65mm f/2.8 medium-format clarity, refined surface texture, soft neutral palette of ivory, sage, and warm stone, cinematic negative space, crisp packaging edges, premium commercial realism, perfect for upscale banner use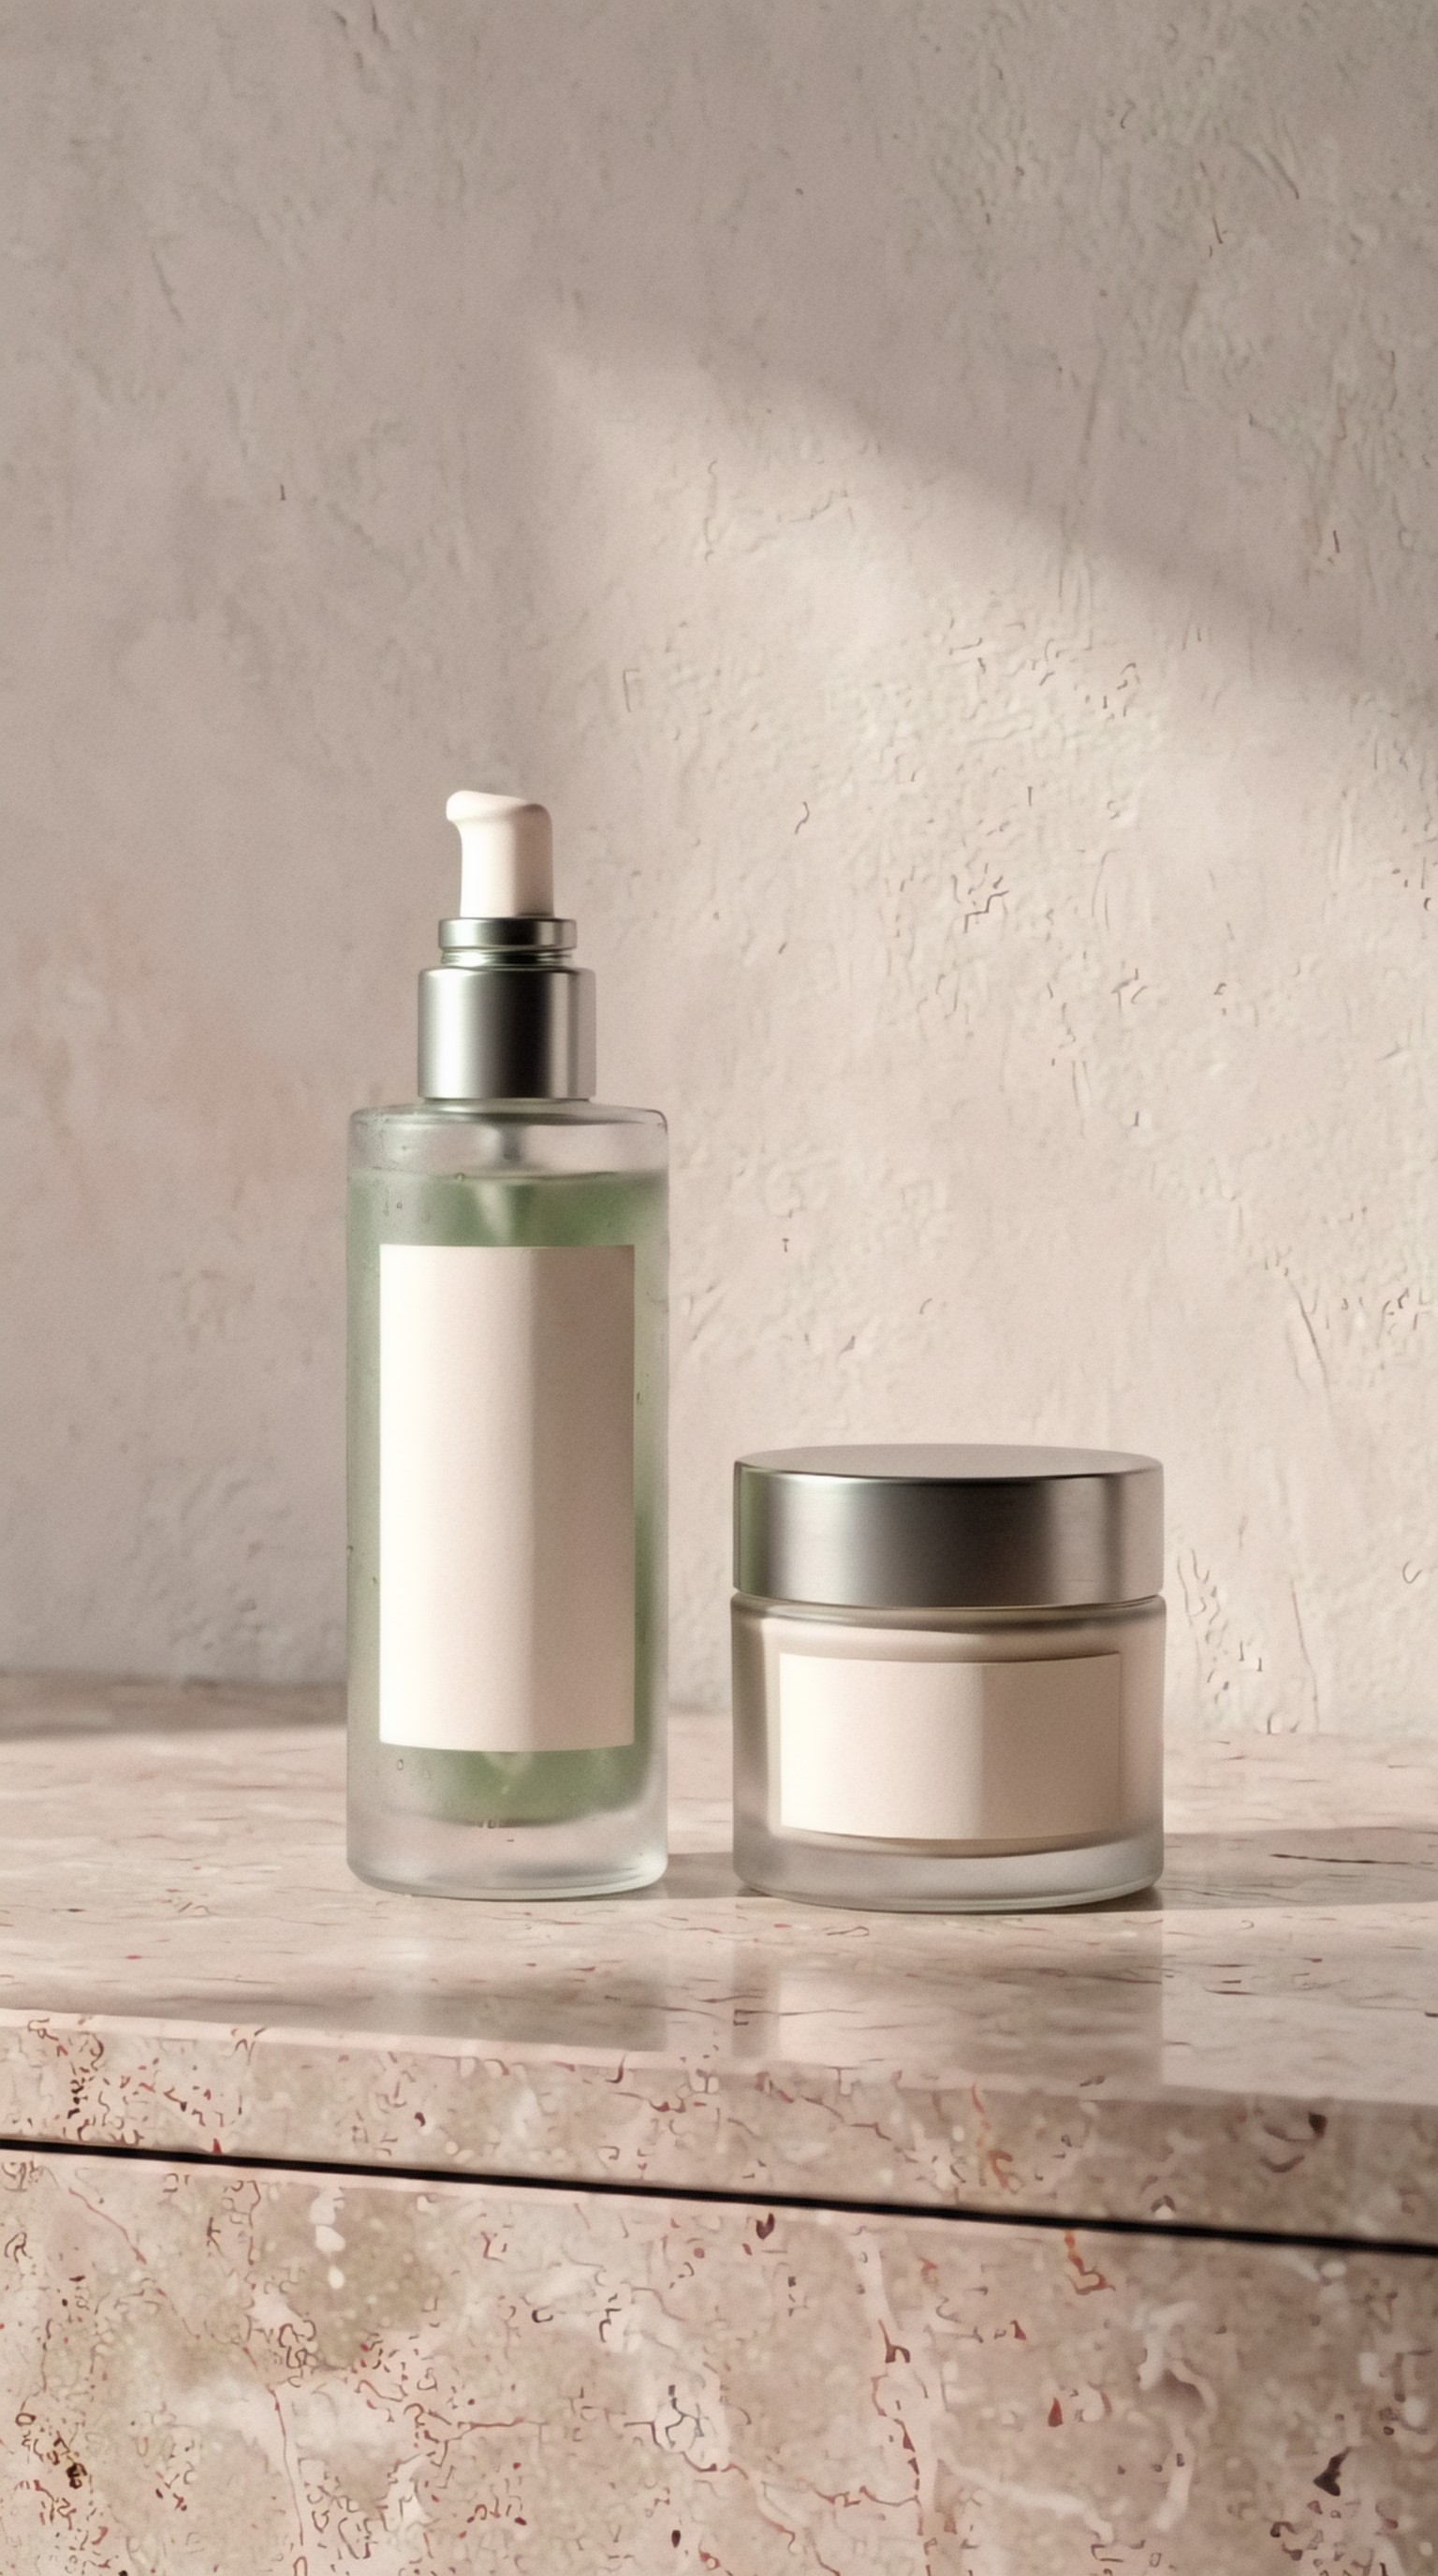
3. Social creatives destroyed by compression
Social platforms compress aggressively. Even strong images can lose polish after upload. AI enhancement helps most when it is used before export to reinforce subject edges, local contrast, and visual hierarchy.
This is especially useful for:
- ad creatives with product-plus-model compositions
- fashion posts with textured fabric
- travel visuals with layered depth and atmospheric haze
- before-and-after campaign variants in multiple aspect ratios
Topic: Instagram social creative for a streetwear drop
Genre: Street Style
Camera: Fujifilm GFX100S
Lens: 110mm f/2
Lighting: Overcast diffusion with neon rim light
Location: Wet city alley with reflective pavement and storefront glow
Style: Editorial street campaign
Final Prompt: A fashion-forward model promoting a streetwear collection for a social ad creative, wearing an oversized graphite trench, textured knit top, and sharp silver accessories, standing in a wet city alley with reflective pavement, relaxed strong stance and cool detached facial expression, overcast ambient diffusion with a subtle magenta neon rim light from storefront signage, layered urban depth behind the subject, Fujifilm GFX100S look, 110mm f/2 compressed perspective, detailed fabric weave, moody steel-blue and magenta palette, editorial street campaign styling, composition optimized for square and vertical crops, premium edge definition, realistic skin texture, atmospheric realism built for social compression resilience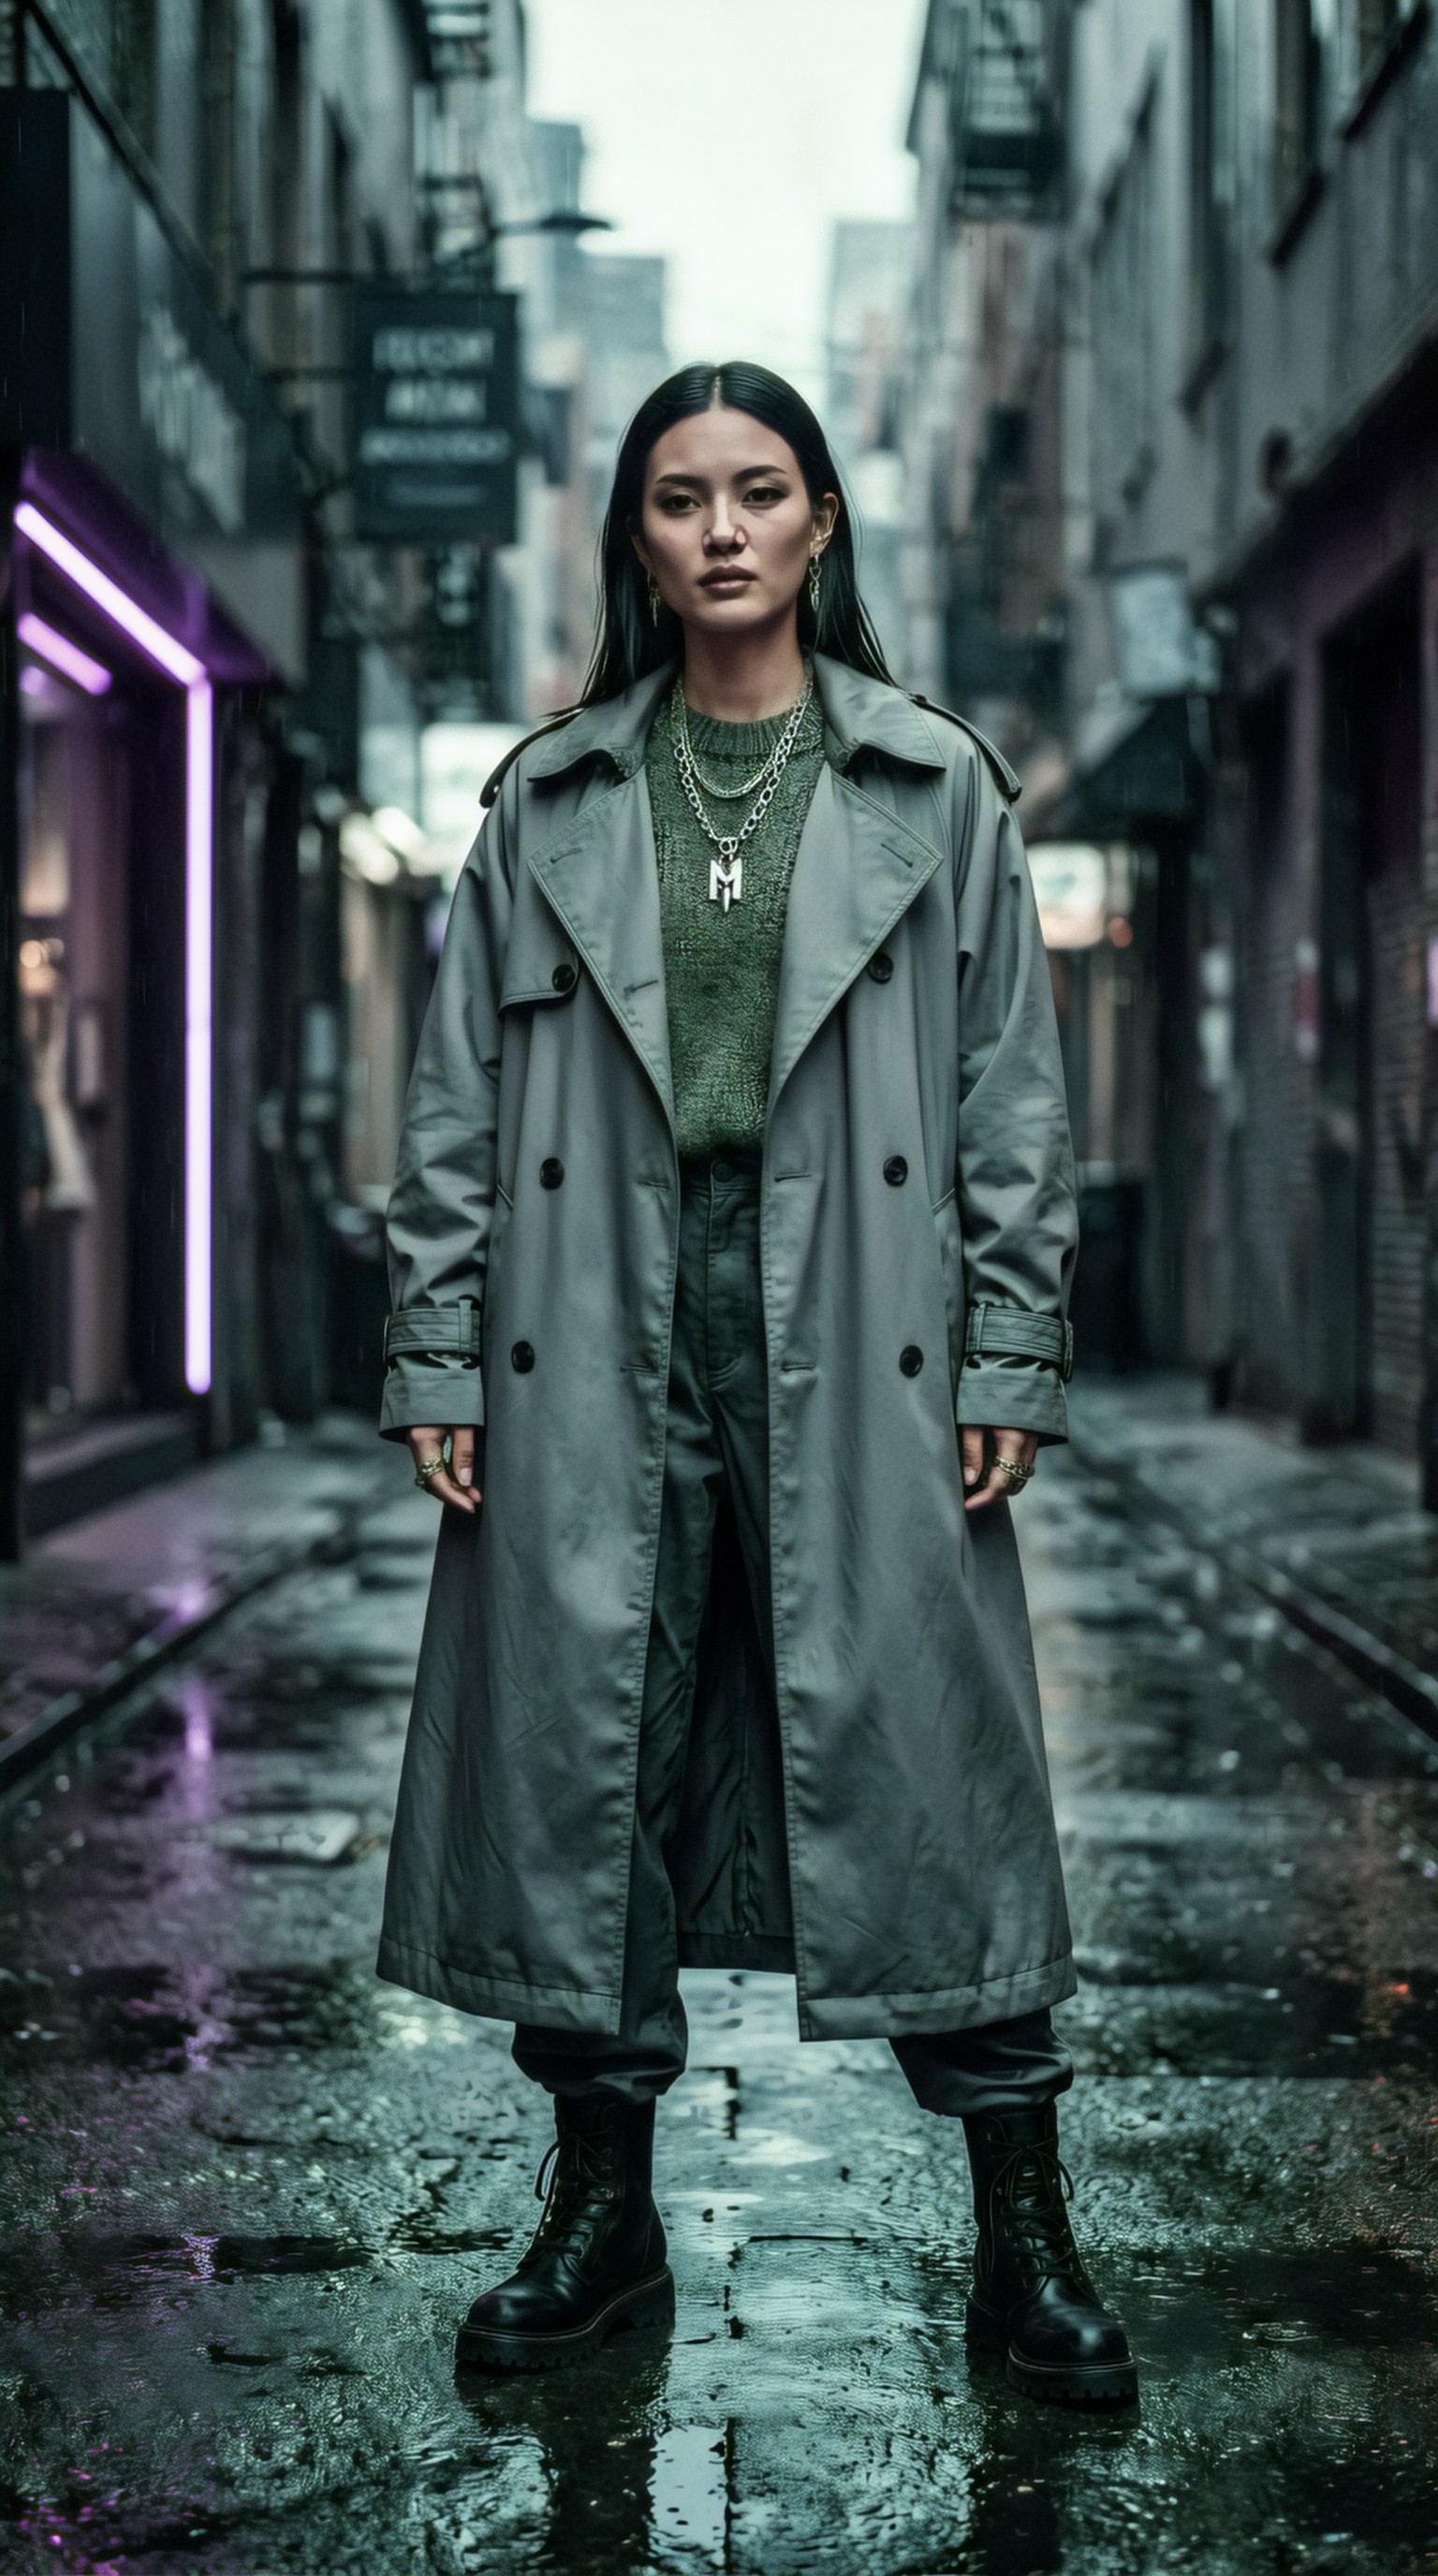
Best types of AI enhancers for web workflows
Rather than one universal winner, there are four useful categories.
Dedicated AI upscalers
These tools are best when you already like the image and only need more resolution and cleaner detail. They are ideal for product photos, UI support images, and AI-generated artwork that needs to fit multiple web breakpoints.
Best for:
- 2x to 4x enlargement
- thumbnail sharpening
- banner resizing
- batch processing
Weakness:
- limited composition repair if the source is structurally wrong
Generative enhancers
These tools do more than sharpen. They can reinterpret textures, rebuild hair, improve hands, and add plausible detail where the source is weak. For web banners and campaign visuals, this can be powerful, but only if the tool stays faithful to the layout.
Best for:
- hero images
- fashion and beauty visuals
- AI-generated art needing detail repair
- low-resolution source rescue
Weakness:
- can alter identity, product shape, or brand details
Topic: Homepage hero visual for a boutique hotel booking site
Genre: Cinematic Travel
Camera: ARRI Alexa Mini LF cinematic capture
Lens: 40mm anamorphic at T2.8
Lighting: Sunset backlight with warm interior practicals
Location: Cliffside hotel terrace overlooking the sea at dusk
Style: Cinematic realism
Final Prompt: A refined boutique hotel hero image for a travel website, featuring a stylish guest in a cream linen set standing near the terrace edge, gentle side profile and relaxed posture facing the ocean, sunset backlight creating a gold outline around the figure, warm interior practical lights glowing through open glass doors, cliffside terrace with textured stone, deep blue sea horizon, and soft dusk atmosphere, ARRI Alexa Mini LF cinematic look, 40mm anamorphic lens at T2.8 with elegant horizontal depth, cinematic realism, luxurious but natural color grading, rich amber and cobalt palette, wind movement in fabric, premium destination mood, wide composition with generous negative space for headline placement, clean detail suitable for banner enhancement and web delivery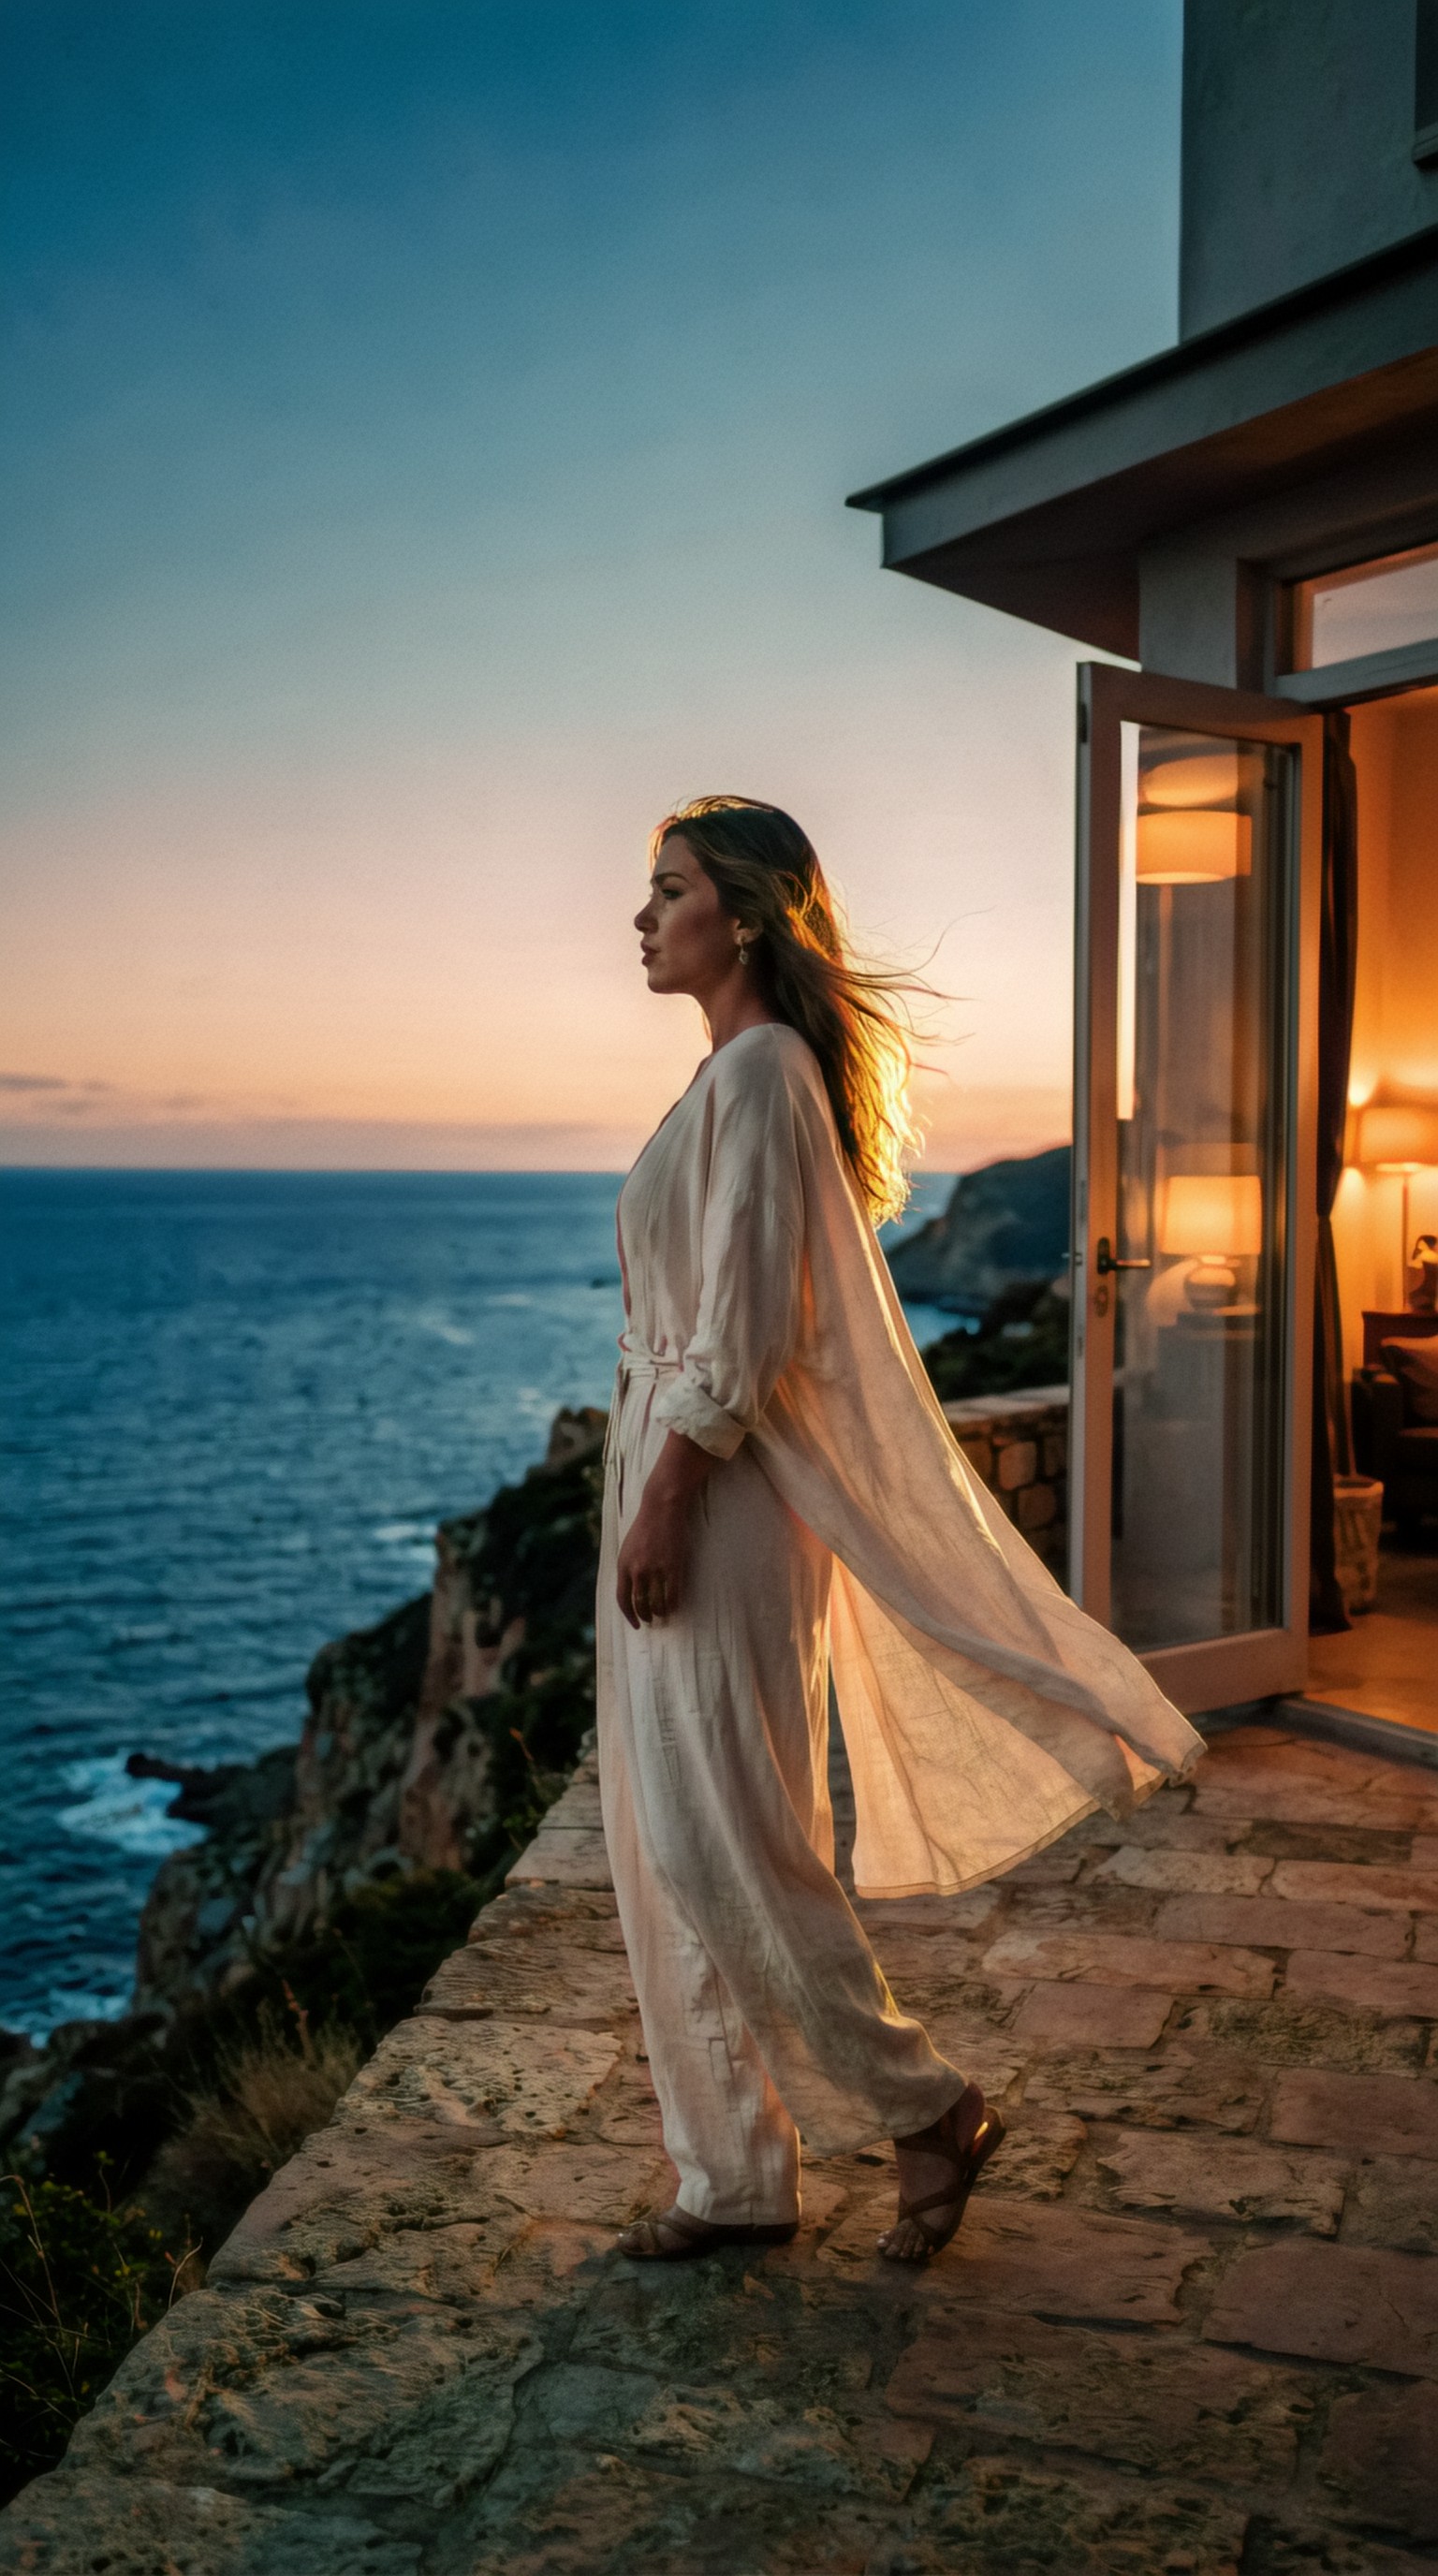
Editor-integrated enhancers
These are enhancement features built into broader design tools. They are practical for marketers and creators who need resizing, background cleanup, text placement, and export controls in one place.
Best for:
- ad teams
- social design systems
- rapid iteration
- multi-format creative production
Weakness:
- enhancement quality may be good enough rather than best-in-class
Hybrid workflows with generation plus enhancement
For AI-first creatives, the strongest setup often starts with image generation, then uses enhancement selectively.
Typical sequence:
1. generate at a close aspect ratio 2. choose the composition with strongest focal hierarchy 3. enhance face, product, or texture regions 4. upscale to final dimensions 5. export sharpened but compression-safe variants
This approach is especially useful if you create:
- landing page headers
- ecommerce feature blocks
- ad sets with many versions
- creator thumbnails and cover images
What to test before choosing the best AI image enhancer for web images
Commercial investigation means comparing tools by output, not by feature list. Use the same three sample images and test them across tools.
Test image set
Prepare:
- one portrait thumbnail
- one wide banner scene
- one social ad creative with text-safe space
Evaluate these points:
- Does the face stay natural?
- Do edges get cleaner or haloed?
- Are backgrounds rebuilt believably?
- Does fabric, hair, or product texture improve?
- Does the image survive JPEG or platform compression?
- Can you control the amount of enhancement?
A practical scoring framework
Score each tool from 1 to 5 on:
- clarity at small sizes
- realism of recovered detail
- banner crop flexibility
- color stability
- artifact control
- export speed
- price per useful output
The best AI image enhancer for web images is usually the one with the highest score in your main format, not the one with the most dramatic side-by-side demo.
Sharpen website images with AI without making them look harsh
A common mistake is over-enhancement. Web images need to feel crisp at a glance, but still natural.
Use these rules:
- sharpen local focal points, not the whole frame equally
- protect skin from waxy smoothing
- reduce enhancement on clean gradients like sky or walls
- keep grain subtle if your brand style is polished
- check the asset at actual display size, not only zoomed in
For banners, subtle texture is often more convincing than aggressive detail. For thumbnails, edge separation matters more than perfect realism.
Topic: Ecommerce product tile image for premium headphones
Genre: Product Editorial
Camera: Nikon Z8
Lens: 105mm f/2.8 macro
Lighting: Softbox key light with controlled strip lights on edges
Location: Matte black tabletop studio with dark charcoal backdrop
Style: Clean commercial look
Final Prompt: Premium over-ear headphones presented for an ecommerce website product tile, angled three-quarter view with earcups slightly turned toward camera, matte black finish with brushed metal accents, clean softbox key light defining form, narrow strip lights tracing elegant highlights along the outer frame, matte black tabletop with dark charcoal seamless backdrop, Nikon Z8 look, 105mm f/2.8 macro precision, crisp edge clarity, refined material texture, subtle shadow grounding, monochrome luxury palette with silver reflections, clean commercial look, centered composition with crop-safe margins, web-optimized sharpness that preserves smooth surfaces without harsh halos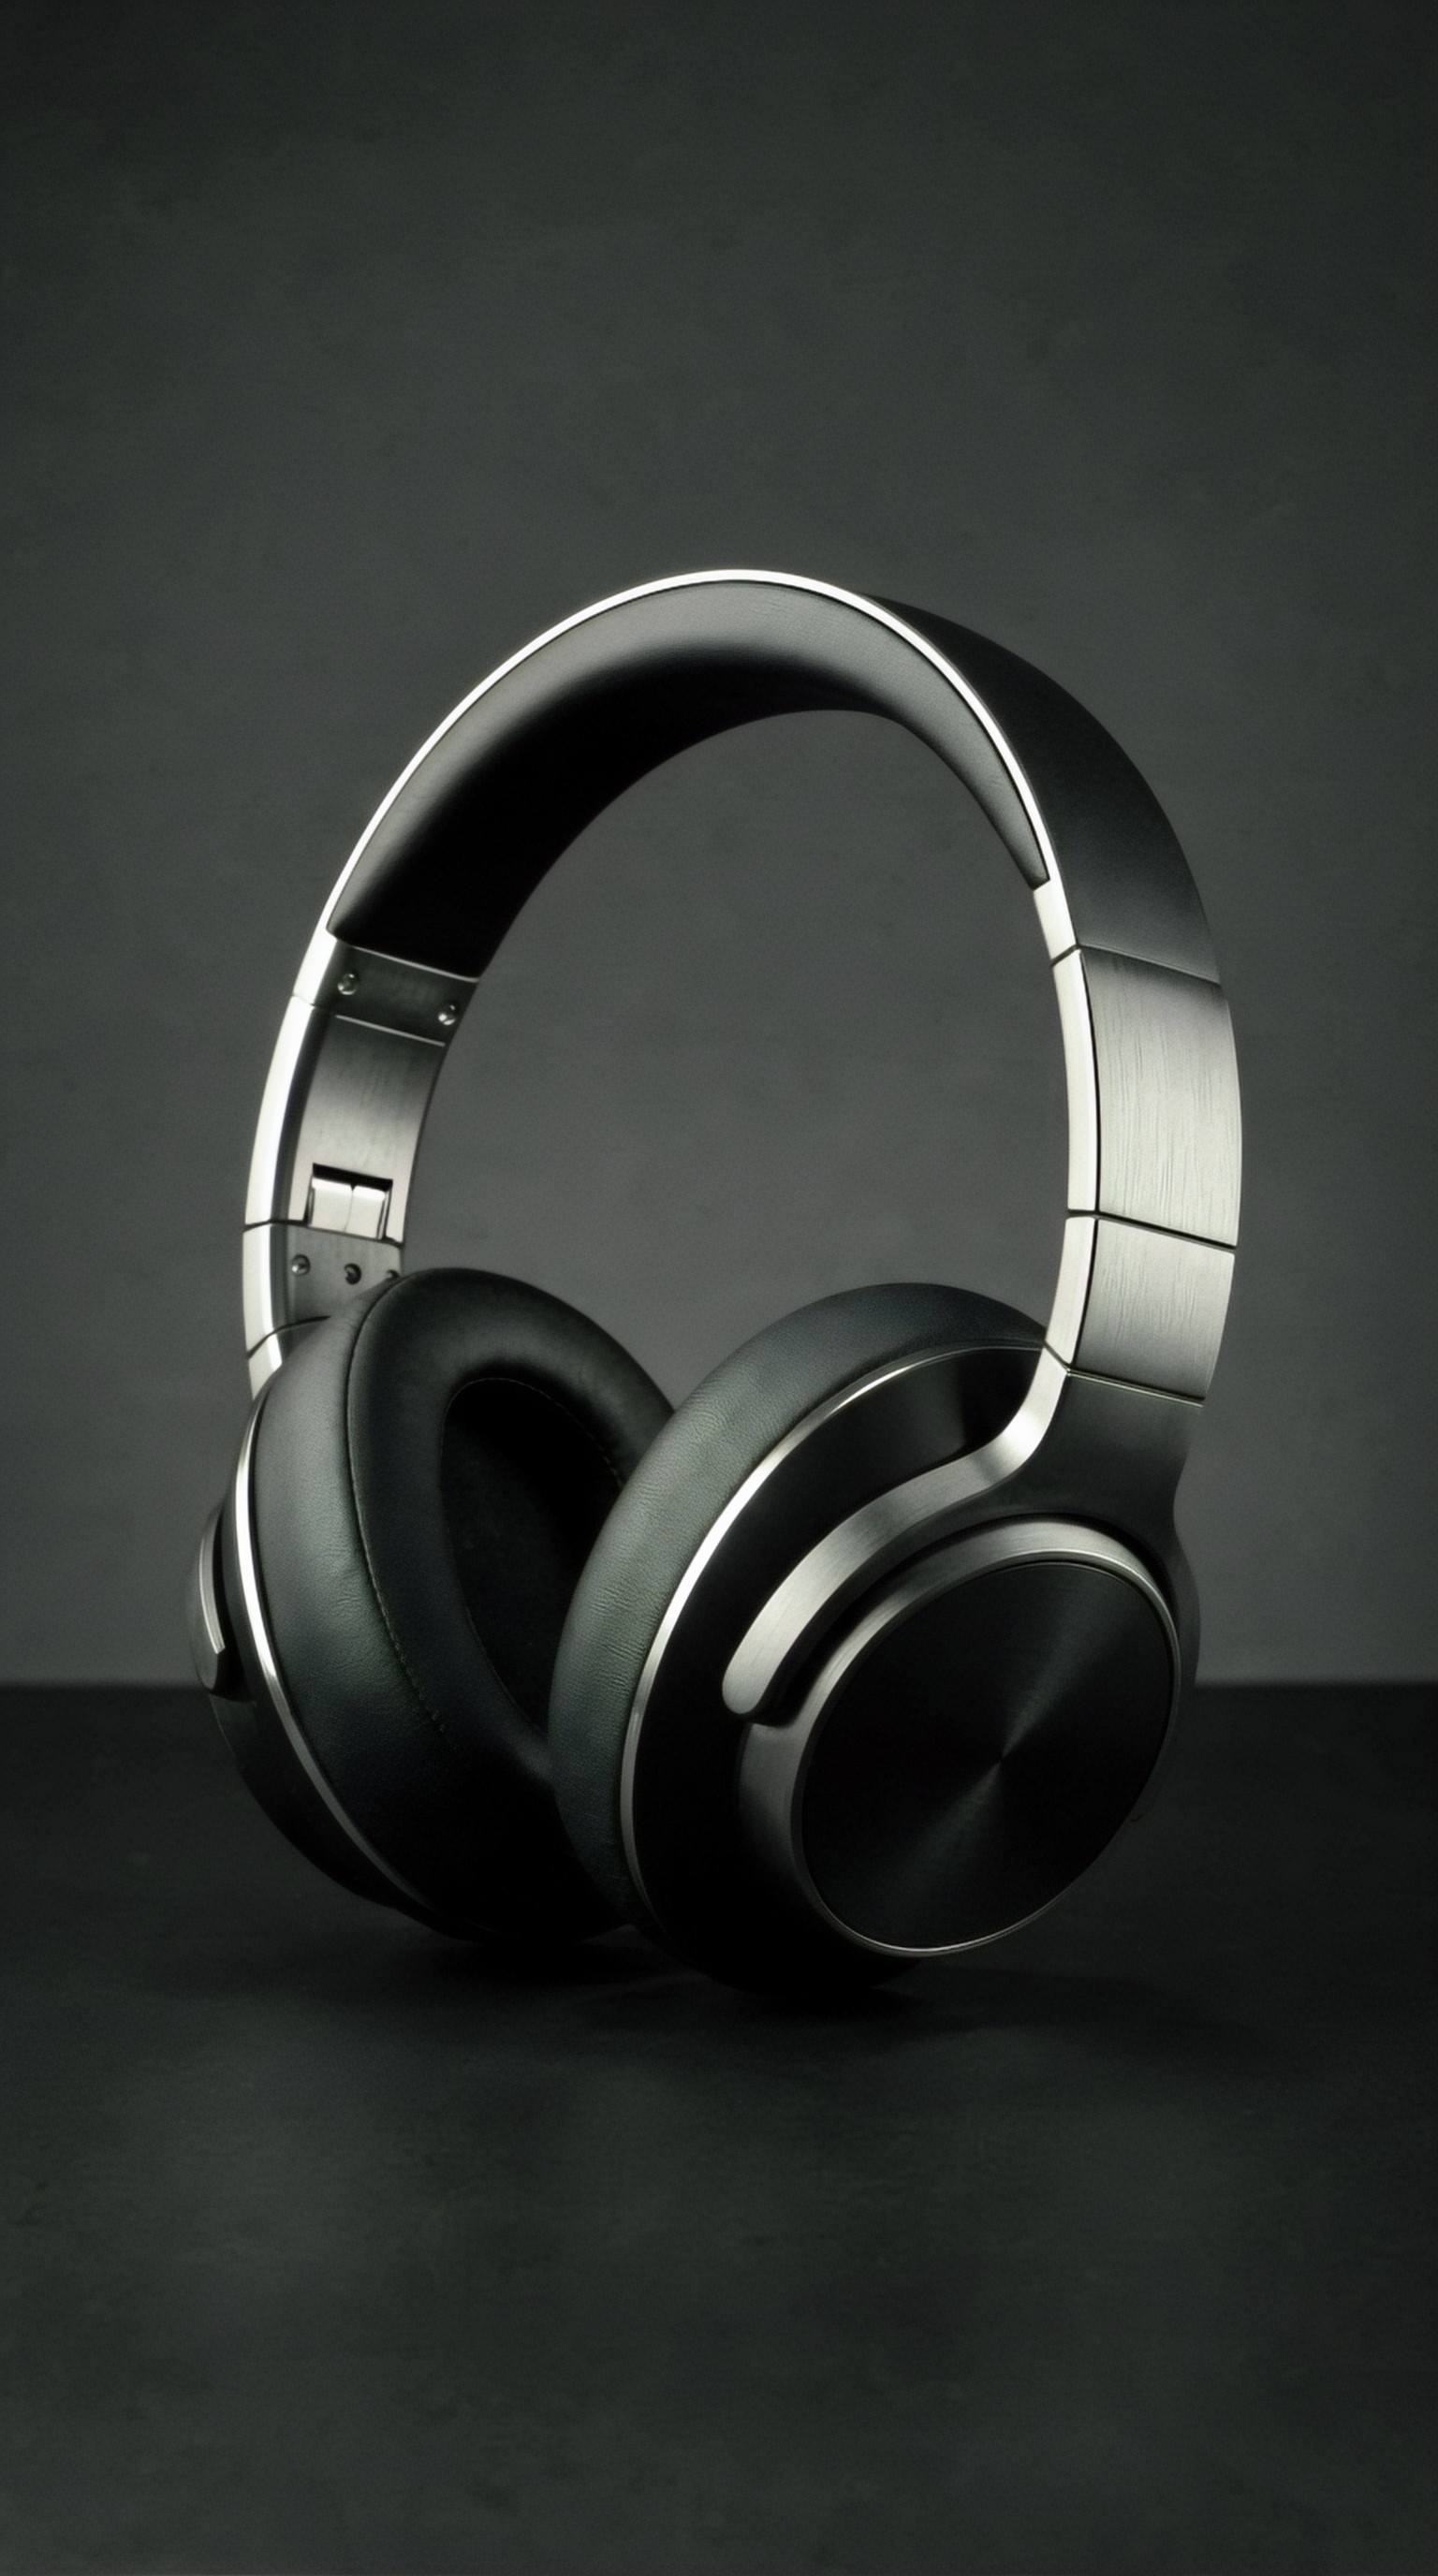
Where AI enhancement helps AI-generated images most
If your visuals are already AI-generated, enhancement can solve several familiar problems.
Better face readability for thumbnails
Generated portraits often look good full-screen but lose clarity in small cards. Enhancement can recover eyelashes, lip definition, and contour separation.
More convincing materials in product scenes
AI-generated skincare, tech, jewelry, or packaging scenes often need extra polish in reflective surfaces and label edges.
Cleaner wide compositions for banners
Generated environments sometimes blur in side zones. Enhancement helps recover architectural rhythm, background layering, and texture continuity.
Stronger crop adaptability for social formats
An enhancer paired with inpainting or outpainting can turn one source image into:
- 16:9 hero banner
- 1:1 social post
- 4:5 feed ad
- 9:16 story creative
Topic: AI-generated beauty campaign image for a homepage promo tile
Genre: Beauty Campaign
Camera: Sony A1
Lens: 90mm f/2.8 macro
Lighting: Studio butterfly light with silver reflector fill
Location: Soft beige studio with satin backdrop and floating dust shimmer
Style: Korean magazine cover
Final Prompt: A luminous beauty campaign portrait designed for a homepage promo tile, featuring a model with glossy skin, softly defined brows, peach-nude lips, and a sleek cream satin blouse, facing camera with a serene confident expression and slight chin lift, studio butterfly light shaping the face with silver reflector fill for polished under-eye brightness, soft beige studio with satin backdrop and subtle floating dust shimmer, Sony A1 look, 90mm f/2.8 macro beauty detail, Korean magazine cover style, clean premium composition, delicate neutral palette with champagne highlights, crisp eye detail, natural skin texture, refined hair strands, elegant commercial finish built for upscale web enhancement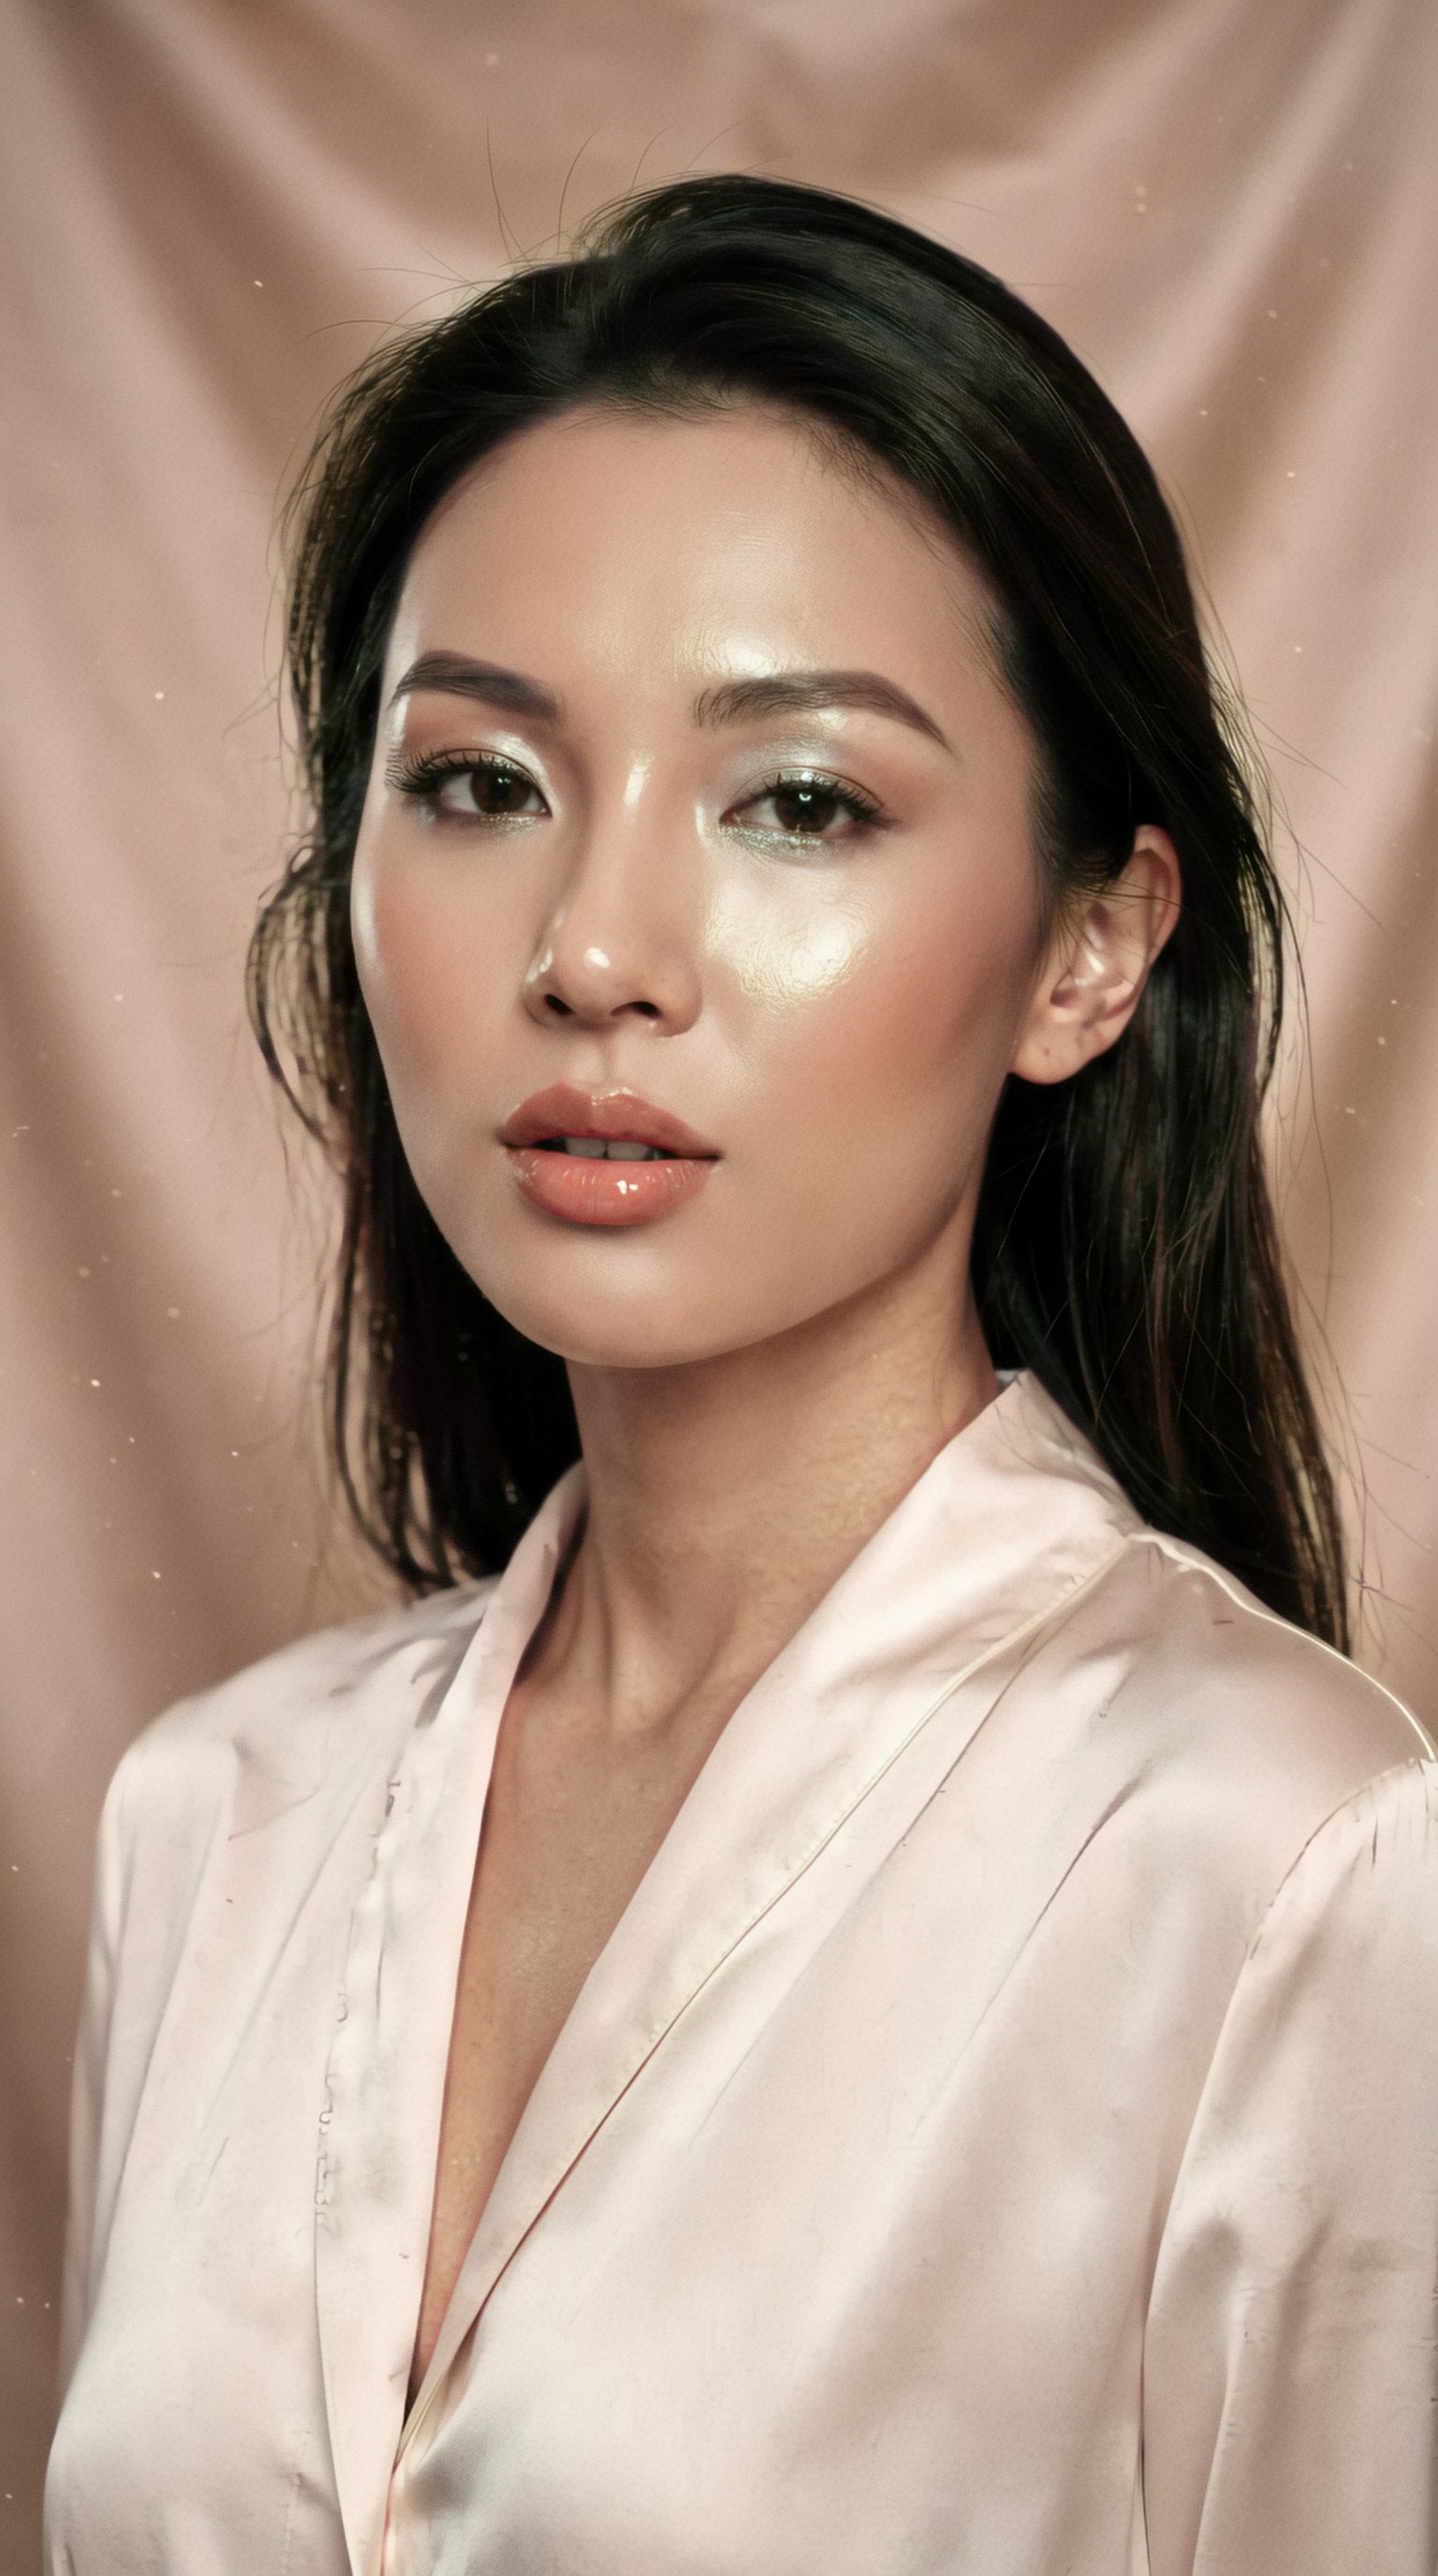
Best workflow for thumbnails, banners, and social creatives
For thumbnails
Use a face- or subject-priority workflow.
- generate or source a close composition
- enhance selectively on face and silhouette
- increase contrast slightly
- test at 200 to 400 pixels wide
- export with moderate compression
For hero banners
Use a composition-first workflow.
- generate wide or outpaint first
- enhance only after the crop is locked
- preserve gradients and atmospheric depth
- leave clean space for headline and CTA
- test on desktop and mobile breakpoints
Topic: SaaS website hero banner with a founder portrait and workspace context
Genre: Lifestyle Portrait
Camera: Leica SL2-S
Lens: 35mm f/1.4
Lighting: Window light with soft practical lamp fill
Location: Minimal startup office with glass wall, oak desk, and large monitor
Style: Modern editorial commercial
Final Prompt: A polished founder portrait designed for a SaaS homepage hero banner, featuring a thoughtful entrepreneur in a navy knit polo and tailored trousers, seated casually on the edge of an oak desk with one hand resting near a laptop, calm confident expression directed slightly off-camera, natural window light from one side with a warm practical lamp filling the shadows, minimal startup office with glass wall, large monitor, notebooks, and subtle greenery, Leica SL2-S look, 35mm f/1.4 environmental portrait perspective, modern editorial commercial style, balanced composition with ample negative space for headline text, muted palette of oak, steel, navy, and warm white, crisp facial detail, clean background separation, realistic texture and web-ready clarity for banner enhancement
For social creatives
Use a variant-heavy workflow.
- create one core visual
- enhance before resizing into multiple formats
- check safe zones for platform UI overlays
- keep texture rich but avoid crunchy contrast
- export separate versions for feed, story, and ad placements
Topic: Vertical story ad creative for an iced coffee brand
Genre: Product Editorial
Camera: Canon EOS R3
Lens: 70mm f/2
Lighting: Golden hour with translucent diffuser overhead
Location: Outdoor café terrace with sunlit stone table and blurred street motion
Style: Summer lifestyle campaign
Final Prompt: A refreshing vertical story ad for an iced coffee brand, featuring a chilled glass bottle with creamy coffee swirl beside a smiling model in a sand-colored linen shirt, seated at a sunlit stone café table, hand reaching naturally toward the drink, relaxed upbeat expression, golden hour light softened by a translucent diffuser, warm highlights on glass condensation, outdoor terrace with blurred street motion and soft summer atmosphere, Canon EOS R3 look, 70mm f/2 natural compression, summer lifestyle campaign styling, inviting caramel, cream, and sun-washed terracotta palette, crisp beverage texture, premium condensation detail, vertical composition with safe top and bottom spacing for social UI, clean enhancement-ready realism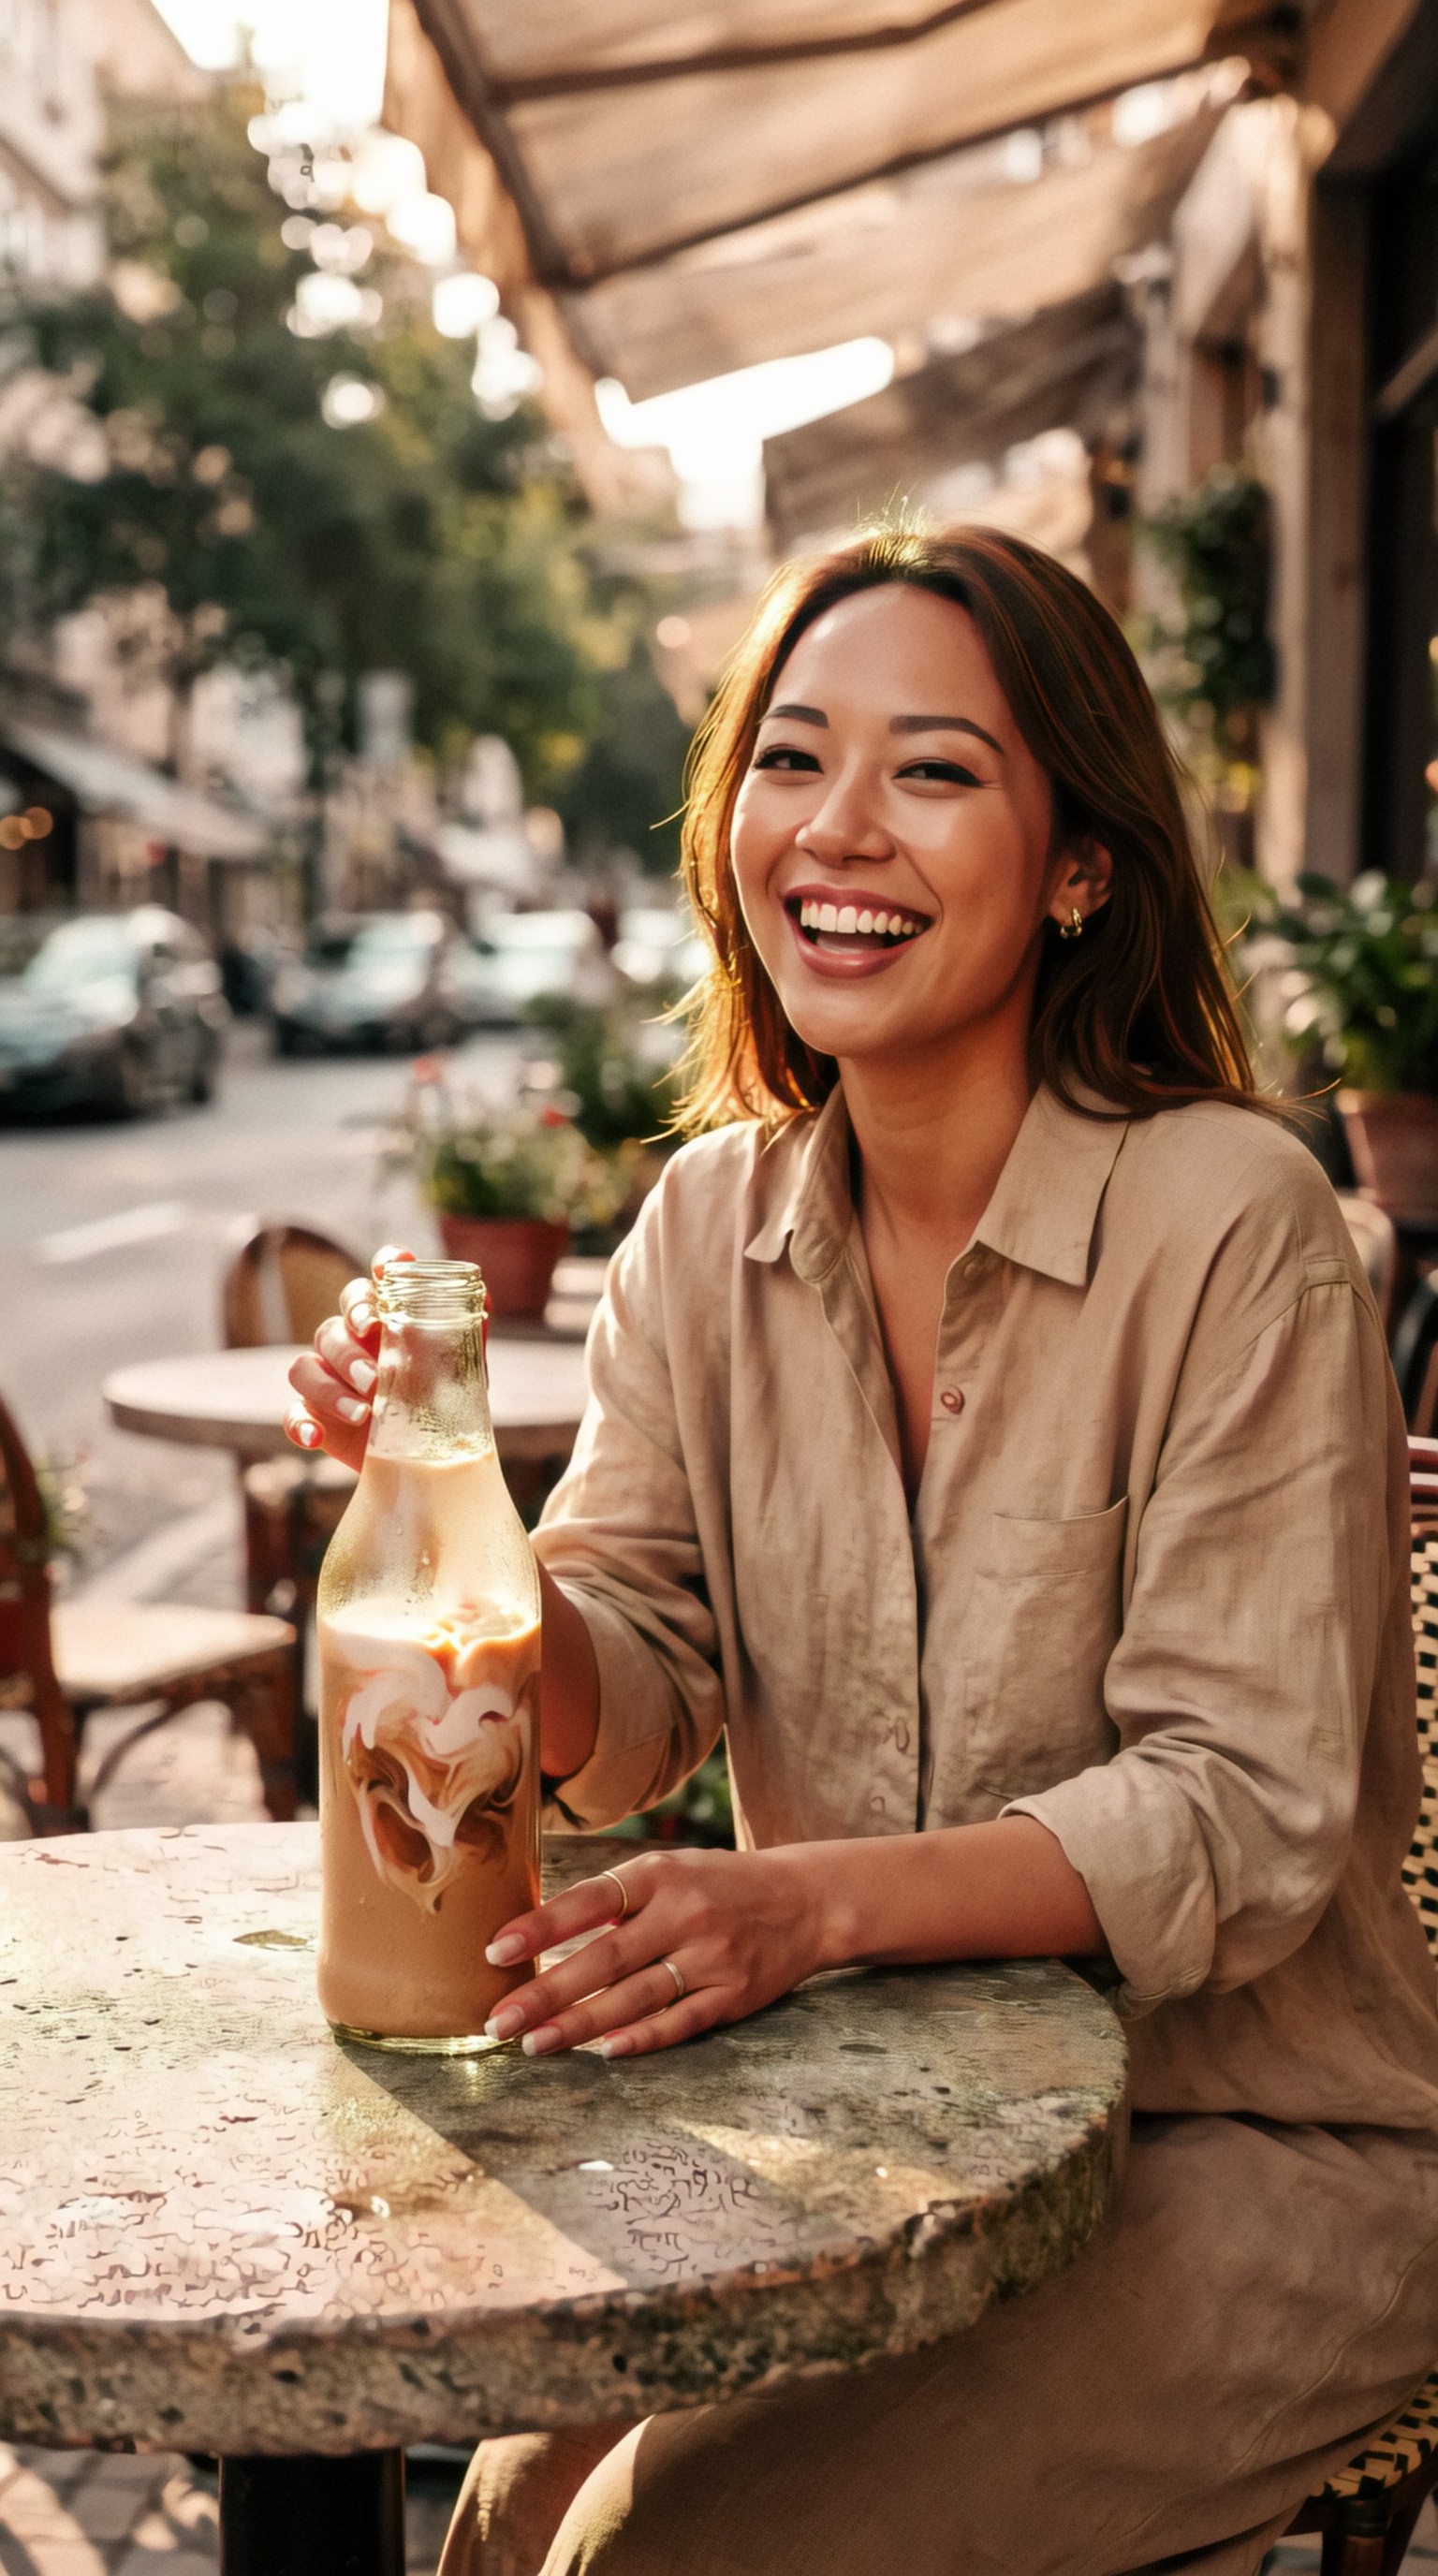
Tool selection by use case
If you want the quickest path to a decision, match the tool category to the visual job.
Best for thumbnail quality enhancement
Choose a tool that handles faces and edge separation well, with minimal artifacts at small output sizes.
Priority features:
- portrait detail recovery
- selective sharpening
- low halo behavior
- fast export
Best for banner image enhancement
Choose a tool that preserves structure and smooth gradients.
Priority features:
- wide-format upscale quality
- outpainting or generative expansion
- sky and wall gradient stability
- clean architecture and product edges
Best for AI enhancer for social creatives
Choose a tool with batch resize support and consistent output across aspect ratios.
Priority features:
- multi-format export
- balanced clarity before compression
- integrated editor workflow
- reliable product and face consistency
Topic: Facebook and Instagram ad creative for a fitness app launch
Genre: Luxury Campaign
Camera: RED Komodo 6K cinematic capture
Lens: 50mm cine prime at T1.5
Lighting: Neon rim light with soft overhead key
Location: Minimal training studio with mirrored wall and haze
Style: High-energy premium campaign
Final Prompt: A premium fitness app launch visual for paid social ads, featuring an athletic woman in sculpted black training wear mid-pose after a workout set, controlled breathing, focused determined expression, subtle sheen on skin, neon cyan rim light tracing her silhouette with a soft overhead key shaping the body, minimal training studio with mirrored wall, low haze, and sleek equipment forms in the background, RED Komodo 6K cinematic look, 50mm cine prime at T1.5, high-energy premium campaign style, dramatic but clean composition, deep black, steel, and electric cyan palette, strong vertical framing with crop flexibility, sharp subject separation, realistic muscle tone, polished texture and compression-resistant contrast for social creatives
Prompting for enhancement-ready images
The easiest way to improve enhancement results is to create better source images in the first place. If you generate visuals with future web use in mind, the enhancer has less repair work to do.
Prompt for:
- clear focal hierarchy
- simple readable silhouette
- crop-safe spacing
- realistic texture zones
- controlled background complexity
- lighting that supports edge clarity
A good source image often needs only light enhancement. A chaotic image needs reconstruction, which raises the risk of drift.
Topic: Blog feature image for an AI design workflow article
Genre: Anime Key Visual
Camera: Cinematic digital illustration capture style
Lens: 35mm equivalent at f/2 look
Lighting: Neon window glow with soft desk lamp fill
Location: Nighttime creative studio with holographic interface screens
Style: Polished futuristic editorial
Final Prompt: A striking anime-inspired key visual for a blog feature about AI design workflows, featuring a young creative seated at a sleek desk with holographic image panels floating around them, layered interface graphics, oversized black utility jacket, silver rings, and subtle teal accents, focused expression with one hand reaching toward a glowing screen, neon window glow from the city outside mixed with a warm desk lamp fill, nighttime creative studio with cables, sketchbooks, and softly lit equipment, 35mm equivalent f/2 cinematic framing, polished futuristic editorial style, rich indigo, teal, and amber palette, crisp silhouette, readable negative space for headline placement, refined line detail, atmospheric depth, enhancement-ready composition built for sharp web publishing
Common mistakes when enhancing web images
Enhancing after heavy compression
Always work from the highest quality file you have. Enhancing a heavily compressed JPEG often intensifies blockiness and ringing.
Upscaling before fixing composition
Do not enlarge an image before you decide the crop, extension, or layout role. Composition errors become more expensive later.
Using the same enhancement strength for every image
Portraits, products, and landscapes need different settings. A universal preset usually overprocesses at least one category.
Ignoring mobile display
A banner that looks elegant on desktop can feel empty on mobile. Test your enhanced images in narrow crops before publishing.
Topic: Mobile-first ecommerce banner for handmade ceramic tableware
Genre: Product Editorial
Camera: Panasonic Lumix S1R
Lens: 85mm f/1.8
Lighting: Window side light with overcast diffusion
Location: Artisan kitchen with textured plaster wall and oak shelf
Style: Elegant resort editorial
Final Prompt: A mobile-first ecommerce banner showcasing handmade ceramic tableware, featuring stacked bowls, a matte pitcher, and a linen napkin arranged on an oak surface, subtle hand-crafted imperfections visible in the glaze, soft window side light under overcast diffusion creating calm natural shadows, artisan kitchen with textured plaster wall and a blurred oak shelf in the background, Panasonic Lumix S1R look, 85mm f/1.8 selective depth, elegant resort editorial style, earthy palette of chalk white, sand, clay, and muted olive, vertically aware composition with central object readability, refined texture, calm premium mood, crisp web-ready detail suited for banner enhancement and mobile crops
So, what is the best AI image enhancer for web images?
For most teams, the best option is not the tool with the strongest sharpening demo. It is the one that gives you predictable clarity at the exact sizes you publish, while preserving realism and brand consistency.
If your priority is thumbnails, favor facial readability and edge separation.
If your priority is hero banners, favor upscale quality plus composition repair.
If your priority is social creatives, favor consistency across aspect ratios and compression-safe detail.
In practice, the best AI image enhancer for web images usually sits inside a workflow like this:
1. generate or source the cleanest possible base image 2. design the crop for thumbnail, banner, or social placement 3. enhance selectively, not globally 4. upscale only to the needed delivery size 5. test at real display dimensions before export
That process beats brute-force sharpening almost every time.
Final takeaway
The smartest way to evaluate the best AI image enhancer for web images is to judge outputs by real publishing contexts: card thumbnails, homepage heroes, and compressed social placements. Web visuals need readable subjects, stable textures, clean edges, and enough realism to survive resizing.
Start with a few representative assets, compare tools side by side, and choose the enhancer that improves clarity without changing the image's intent. For web publishing, restraint is often the feature that matters most.