For a real person's face, use the most conservative upscaler you can get, and start at 2x. Creative, diffusion-based upscalers are a better fit for synthetic portraits where an exact likeness is not at stake. "Plastic skin" is rarely created by the upscaler alone: it is usually the combination of a source image that has no real skin detail and a tool set to invent detail. This article explains how to sort your portrait into the right risk group, what the sample images on this page show about fragile source material, and what to inspect before you accept a result.
A note on evidence. The tool guidance below (Topaz Gigapixel AI, Photoshop Super Resolution, Magnific, Real-ESRGAN, SwinIR) is general knowledge about how those tools are commonly used, not the outcome of a head-to-head test on this site. The images in this article are text-to-image portraits, not upscaled files, so they show you what a source image can look like before it reaches an upscaler. They are not before/after proof for any tool.
Start with the question "what happens if the face changes?"
The choice of tool follows from the answer, not from a ranking.
| Situation | Risk if the face changes | Commonly suggested approach (general, unverified here) | |---|---|---| | Client photo, headshot, old family photo | High: the person must stay recognizable | Conservative enlargement such as Photoshop Super Resolution (Camera Raw) or Topaz Gigapixel AI with low face recovery; 2x first | | Your own AI-generated character or avatar | Medium: identity drift breaks consistency across images | Moderate enlargement, inspect the face, apply detail only where needed | | One-off AI fashion or fantasy portrait | Low: no real person to misrepresent | Creative upscalers such as Magnific are a reasonable option; keep face changes modest | | Batch or repeatable pipeline | Depends on the subject | Open-source models such as Real-ESRGAN or SwinIR, often run inside ComfyUI, if you are willing to tune settings |
Photoshop Super Resolution doubles the pixel dimensions of a photo and is known as a restrained option. Topaz Gigapixel AI runs as desktop software and exposes scale and face-recovery controls. Creative upscalers deliberately add new detail, which is exactly why they can change age, expression or features. None of these statements was measured here.
If you want to try an upscale without installing anything, the site's [Upscaler](/upscaler/en) is available; the same 2x-then-inspect habit applies.
What the source image has to give the upscaler
An upscaler can only sharpen or invent what it is handed. The samples below came from one prompt, sent to two models on 2026-06-10. The prompt, as recorded in the generation log:
Close-up professional studio portrait of a woman in her early 30s, natural skin texture, soft directional key light, subtle catchlights, neutral gray background, realistic eyes, detailed hair strands, 85mm lens look, shallow depth of field, clean editorial retouching, no plastic skin, no exaggerated facial featuresThe first result is from the Z-Image model (file size 1440x2560 pixels).
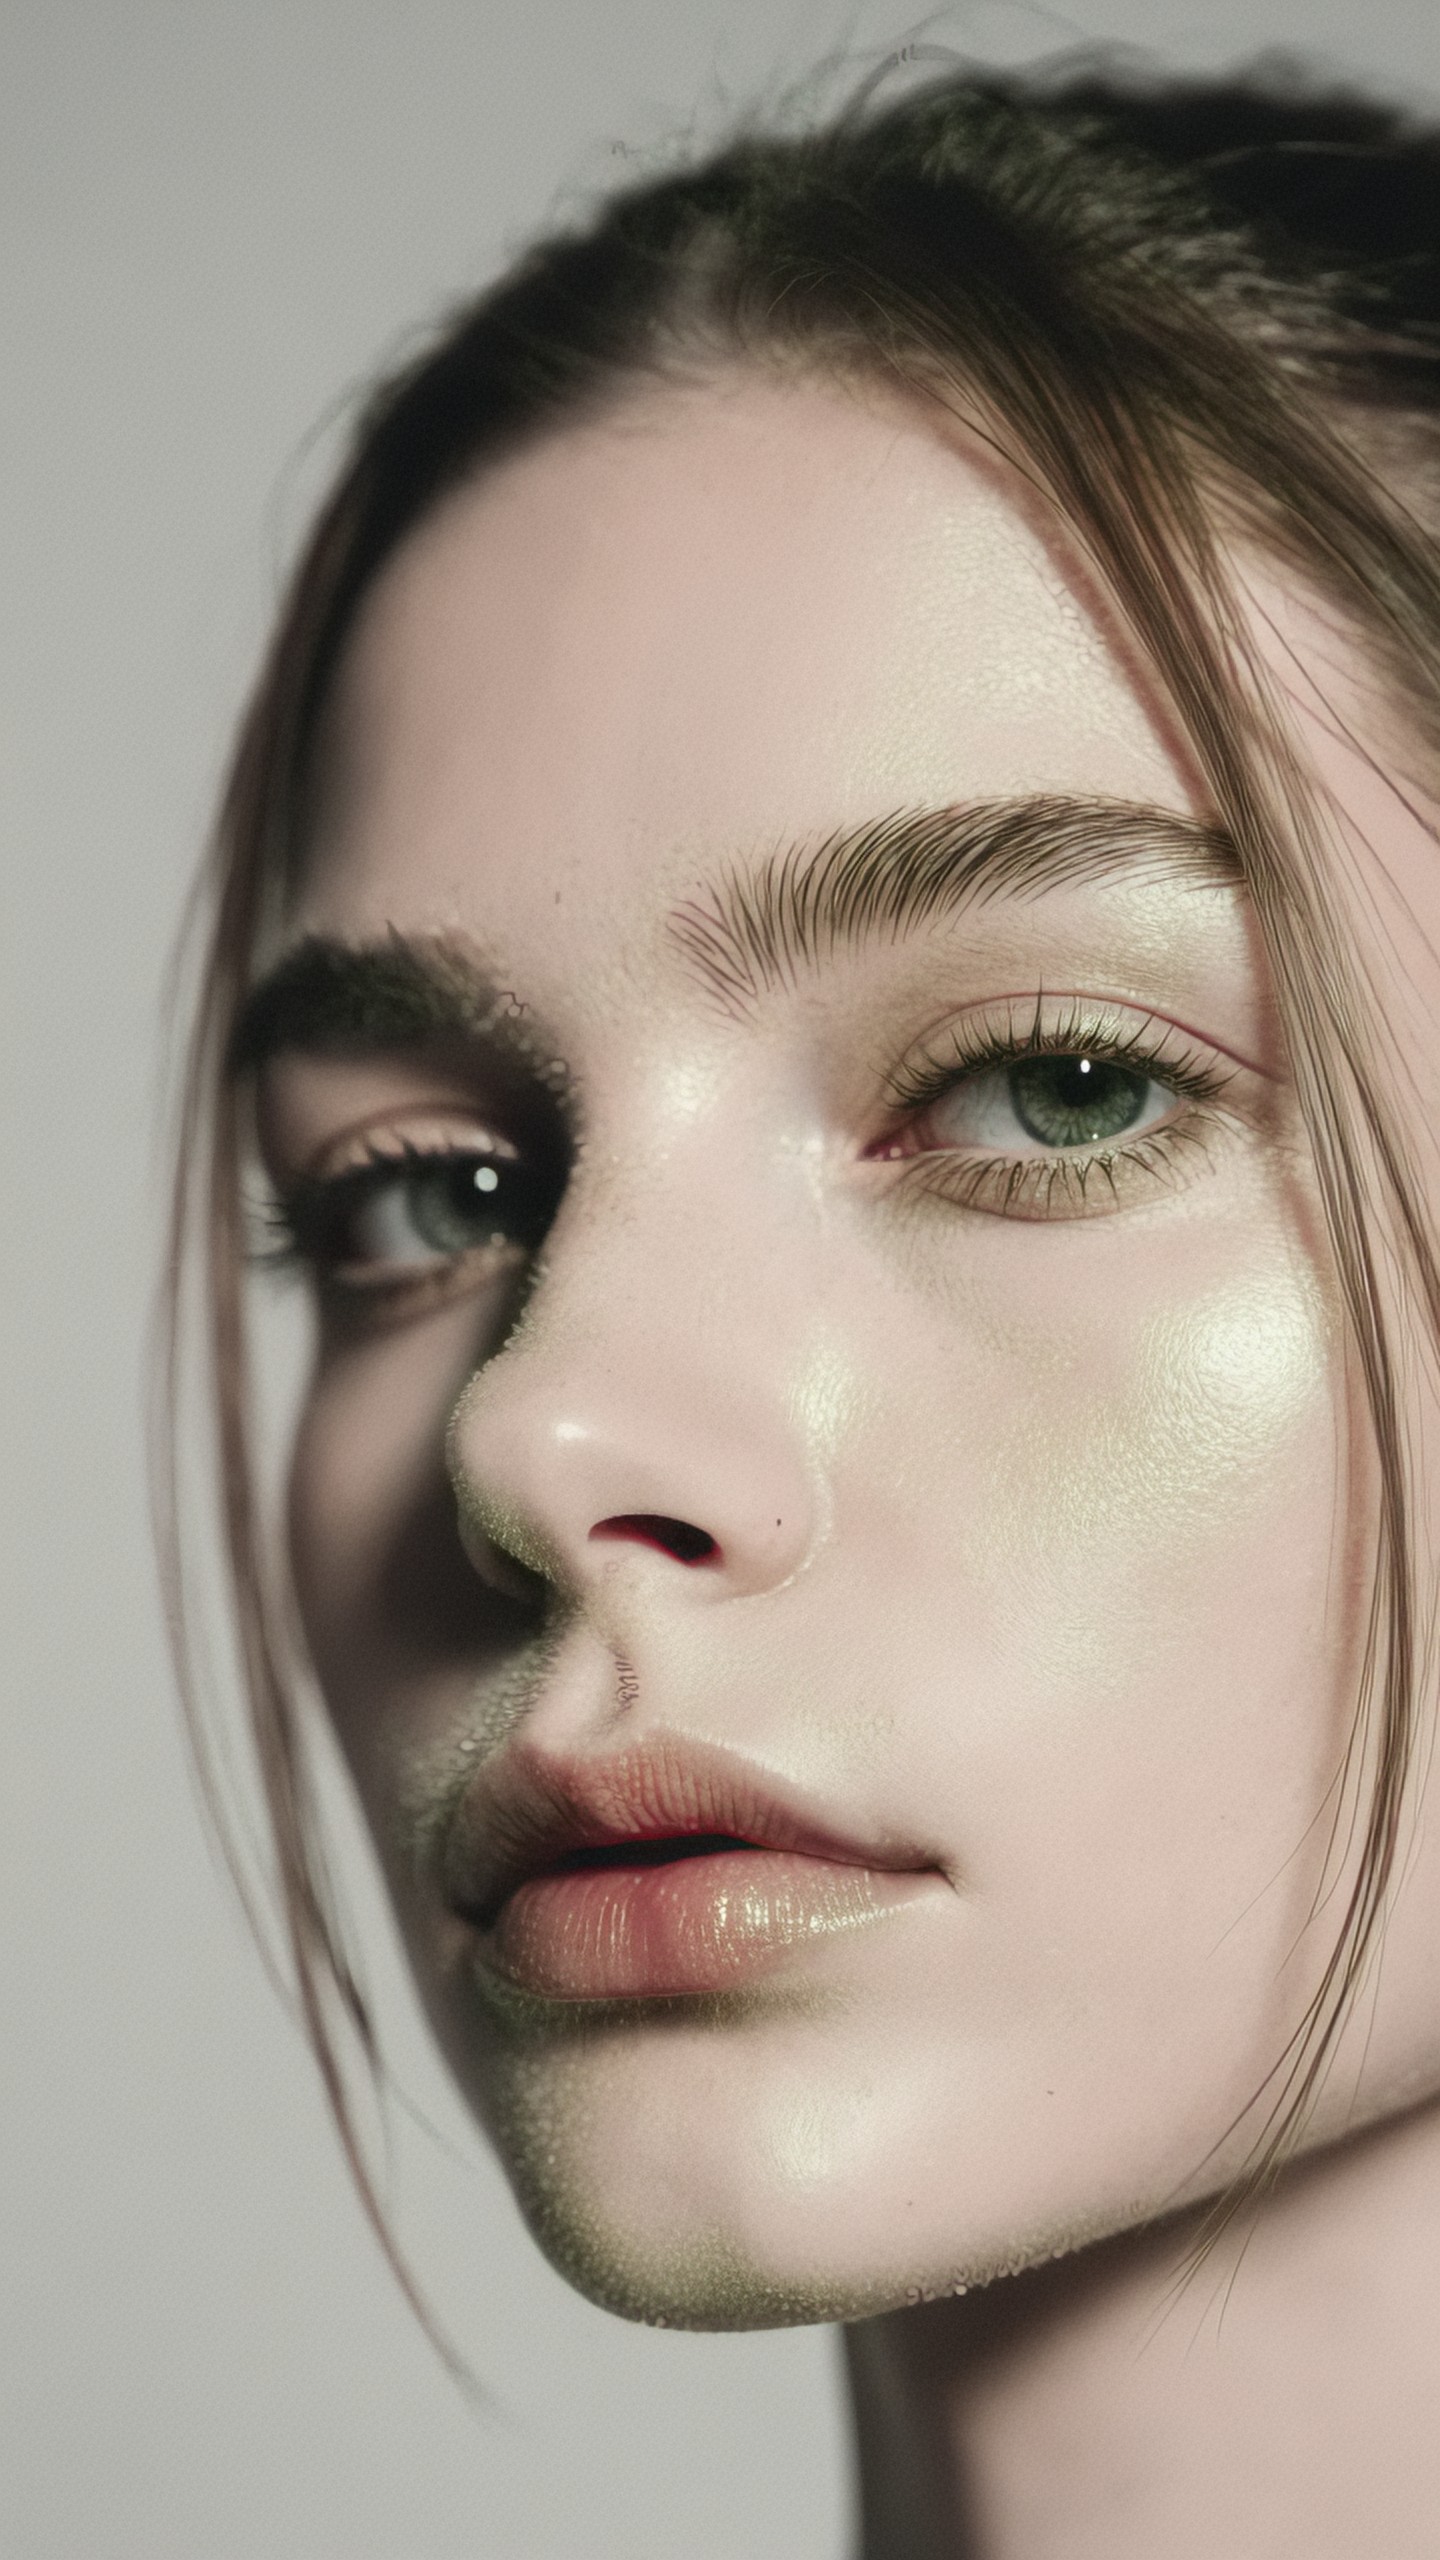
This file is larger than the other model's output, but what I see in it is not natural skin. The cheeks carry glossy, pearly highlights, and the nose, upper lip and jaw edge show a granular, slightly scaly texture with an olive-green tint that does not look like pores. Eyelashes, eyebrows and loose hair strands are sharp. Feed a file like this to a sharpening or creative upscaler and the granular patches are the part most likely to be amplified, because the tool will treat them as detail. The lesson is that pixel count does not equal usable skin detail.
The second result is from the Qwen model (928x1664 pixels) with the identical prompt.
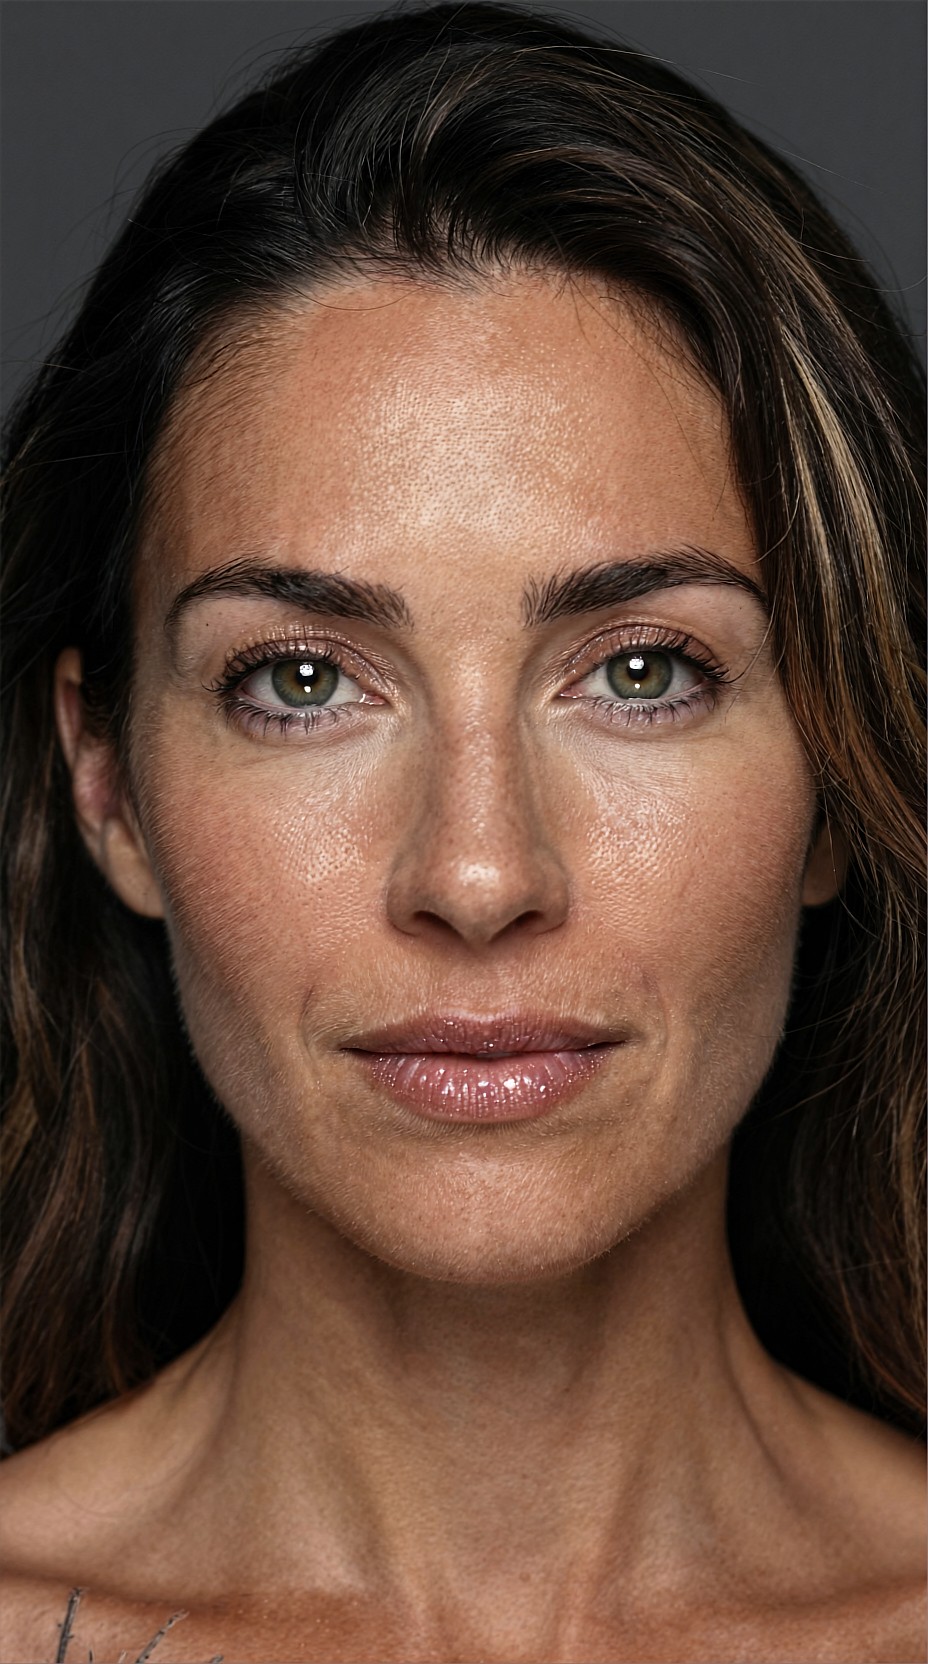
Here I can see pores across the nose and cheeks, freckles, fine lines under the eyes and beside the mouth, and some texture on the neck. The skin sheen looks natural rather than smeared. One unrequested detail: thin dark branch-like lines at the very bottom left of the frame, near the collarbone. A second visible issue is the strong, flat crop of the forehead at the top edge. For upscaling purposes, this image is the better starting material even though it has fewer pixels, because the detail is already in the skin. It also shows a second reason to inspect at 100 percent: small stray marks get enlarged together with everything else.
Soft, blurry or unfocused sources
Old-photo restoration is the case where people reach for aggressive face recovery. The recorded prompt for the next pair was:
Restored 1970s family portrait, warm faded color film look, natural smiles, soft living room background, realistic facial features, gentle film grain, preserved vintage character, improved clarity without modern retouching, authentic skin texture, documentary family photo style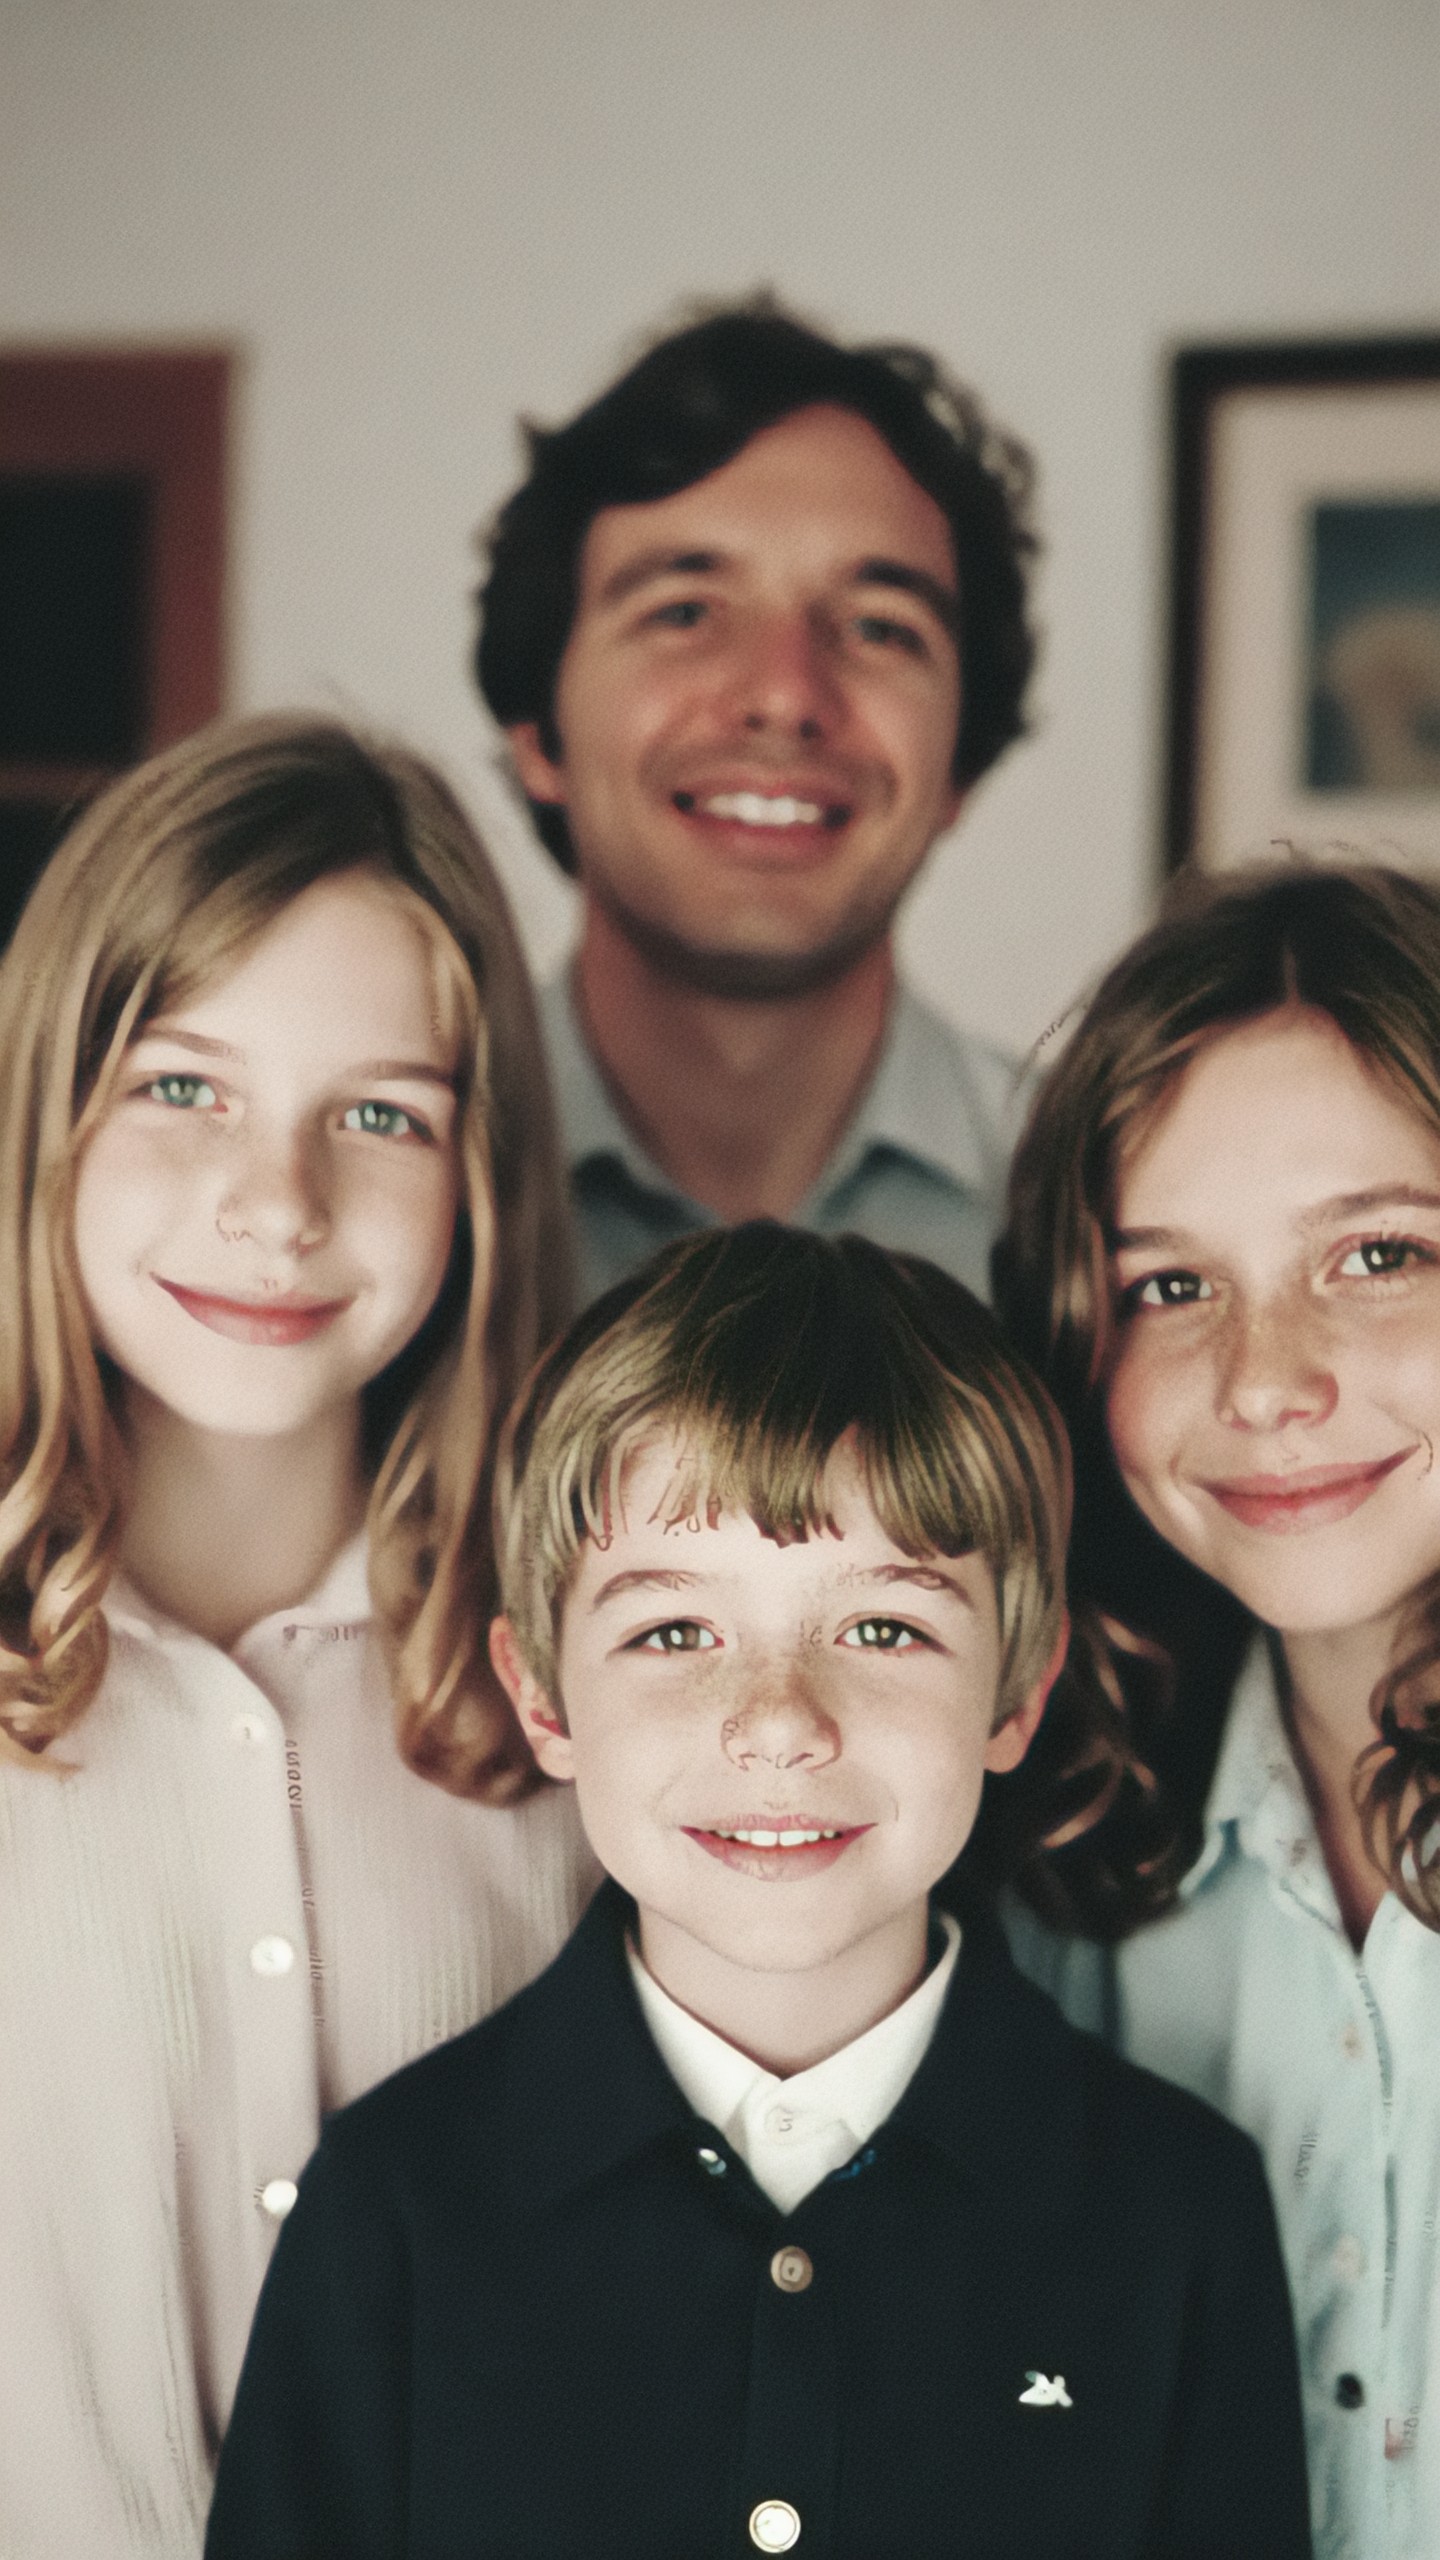
In the Z-Image result (1440x2560), the man in the back is clearly out of focus, while the boy and two girls are sharper. Fine ink-like squiggles sit on the boy's nose and forehead and on the girls' noses, and tiny garbled characters are printed along the girls' blouse plackets. These are exactly the kind of defects that a face-recovery model could either "fix" into a generic face or sharpen into something worse. It is a fair picture of why the source should be cleaned or regenerated before a heavy upscale.
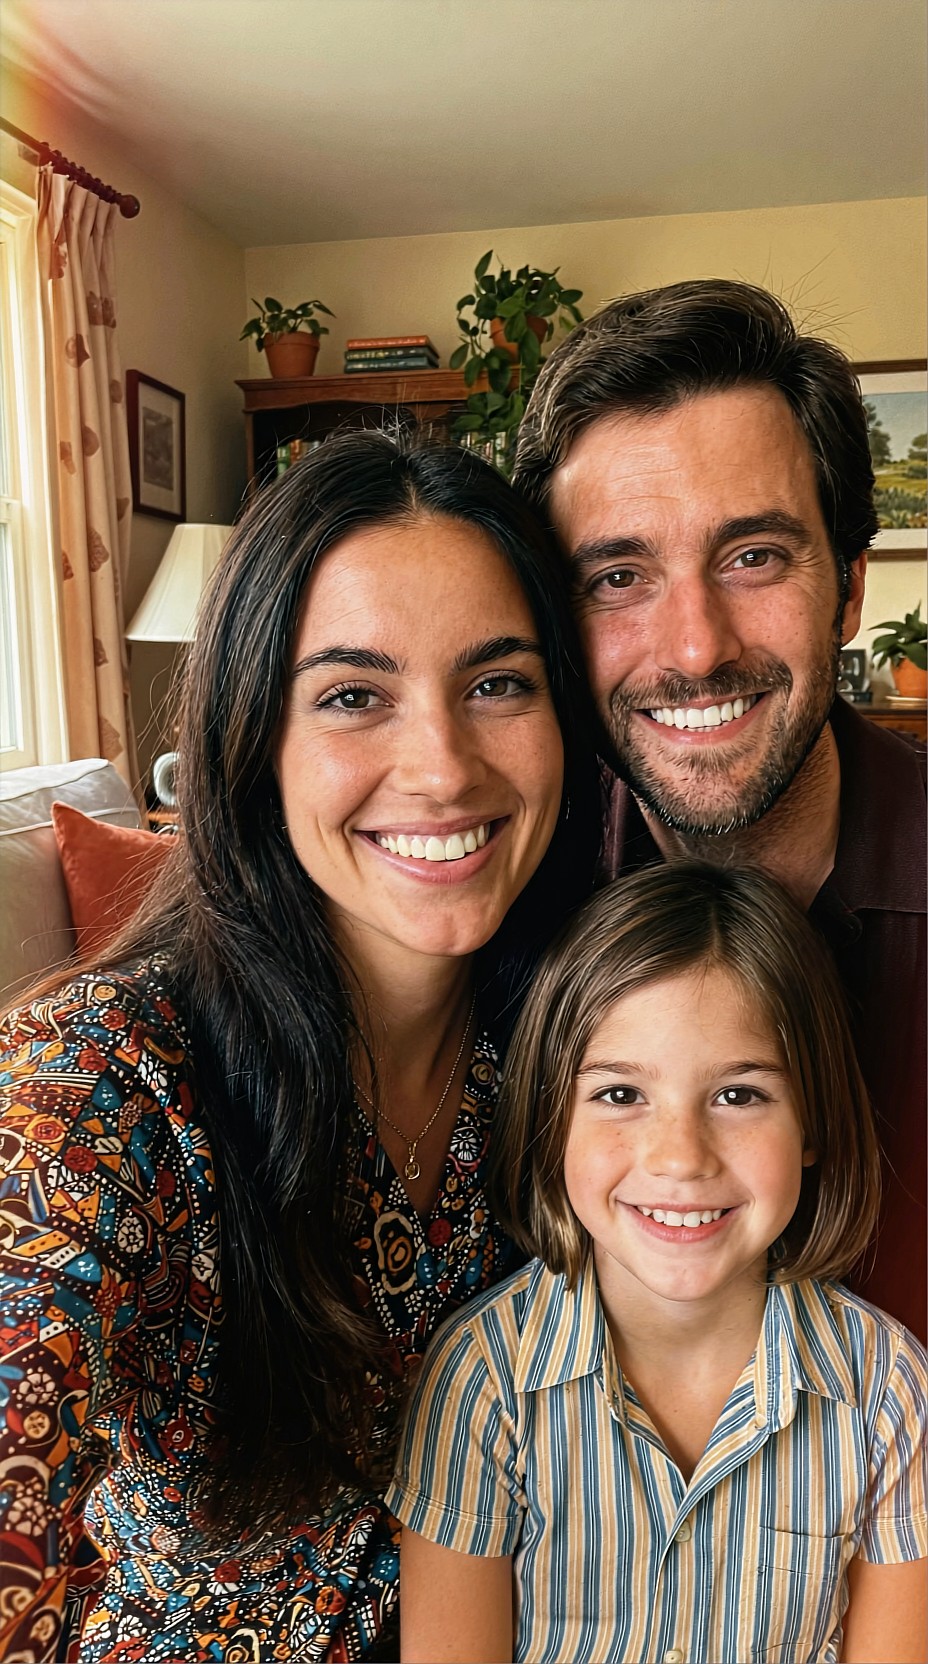
The Qwen result (928x1664) is a different image: a sharper, more contemporary-looking snapshot with three people, not four. Faces, teeth, the striped shirt and the patterned blouse are all clean. It is useful here mainly as a contrast: its faces do not need rescuing, so a conservative 2x is all it would take. It does not look like an aged 1970s photo in the way the prompt asked for, and I am not claiming either image proves anything about a restoration tool.
Skin under difficult light
Low light is where "no waxy smoothing" prompts and denoise settings collide. The next sample used this prompt (Qwen, 928x1664):
Low-light portrait of a jazz singer backstage, warm tungsten bulbs, deep shadows, realistic film grain, natural skin texture, subtle perspiration, expressive eyes, vintage 35mm photography style, soft background clutter, cinematic mood, no waxy smoothing, no artificial glamour retouching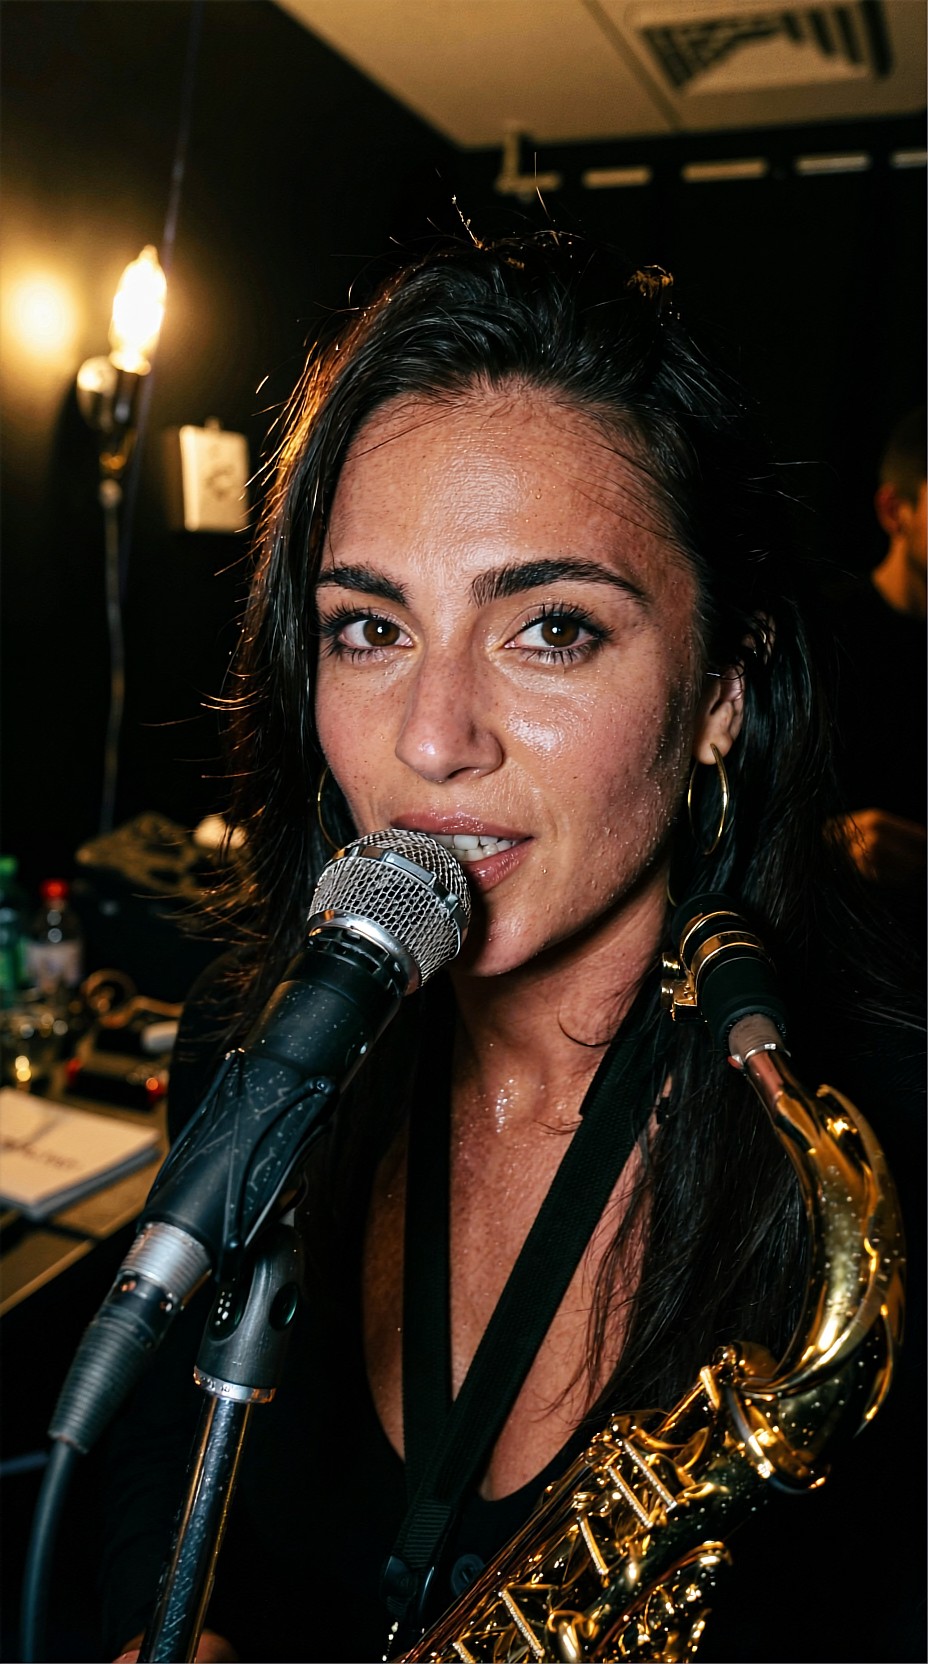
Sweat beads and freckles are visible on the face and chest, the hoop earrings and microphone mesh are crisp, and the saxophone has small water-like droplets. The mic and saxophone sit awkwardly in front of her, and the paper on the lower-left table carries scribbles rather than readable text. For upscaling, the point is that sweat highlights, film grain and real skin pores look alike to a denoiser. Heavy denoising at this stage is the most direct route to the smooth, plastic result you are trying to avoid. That is a general expectation; I did not run denoise on this file.
Settings people commonly recommend (general guidance, not tested here)
- Scale: try 2x before 4x. Larger jumps give the model more room to invent detail; if you need more, go in stages and look at the face each time.
- Face recovery: keep it low for real people. It can swap a specific face for a generic one.
- Sharpening: skin needs less than eyes, lashes and hair. Masked or selective sharpening is safer than a global pass.
- Denoise: remove digital noise, not skin variation.
- Compressed sources: JPEG blocking can turn into odd skin texture after enlargement, so mild artifact reduction beforehand is commonly advised.
- Fashion or fantasy images: allow more detail on fabric, jewelry and hair, and mask the skin if the tool supports it.
- Open-source route: a common ComfyUI structure is a 2x general-purpose upscale, light face restoration only if needed, a detail pass on hair and clothing, and a slight downsample if the result looks oversharpened. Treat this as a starting point to test.
Check before you accept the result
Compare original and result at the same screen size, then at 100 percent. Look at eye shape and iris, teeth and lip edges, nostrils, hairline and eyebrows, jewelry and glasses, and the boundary between hair and background. If skin looks smoother than the neck, or a feature you cannot find in the original has appeared, lower the creative strength or go back to a more conservative tool. For print, judge at the physical print size; skin that looks soft on a monitor can be fine on paper.
If the source itself is weak, regenerating it is often more productive than rescuing it. You can make a cleaner source in the [image generator](/create/en) and draft the skin and lighting wording in the [Prompt Lab](/promptlab/en) before you upscale.
FAQ
Is a bigger image always a better source? No. In the samples above, the 1440x2560 Z-Image portrait showed granular, off-color patches, while the 928x1664 Qwen portrait showed clearer pores. Judge the detail, not the pixel count.
Can I use one upscaler for both client photos and AI art? You can, but set the strength differently. Client photos call for low face recovery and small changes; synthetic images tolerate more invention.
> What this article is based on. Models: Z-Image and Qwen (per generation records), images generated 2026-06-10 and published 2026-06-11. I opened eight images directly (five are shown, three were viewed but not used); the other twelve of the 20-image set were not opened and are not discussed. The generation records hold only model names and prompts, so there are no upscaler settings, before/after pairs or benchmarks. All tool guidance is general and unverified.