ComfyUI Workflow for Low-VRAM PCs: Practical Node Choices That Still Deliver Good Images 한국어 요약
이 페이지는 ZView Space의 영어 원문을 한국어 검색 사용자도 이해할 수 있도록 정리한 SEO 요약입니다. 핵심은 단순한 얼굴 중심 이미지가 아니라 패션 에디토리얼, 룩북, 아웃핏, 프롬프트 테스트, 이미지 생성 워크플로우를 실제로 어떻게 구성할지입니다.
핵심 요약
- 원문 주제: ComfyUI Workflow for Low-VRAM PCs: Practical Node Choices That Still Deliver Good Images
- 목적: AI 이미지 생성에서 outfit, silhouette, fabric, pose, location, camera framing을 더 명확하게 설계합니다.
- 활용 범위: Z-Image Turbo, Krea2 Turbo, Qwen Image, Anima, SeedVR2 같은 이미지 생성 및 업스케일 워크플로우에 적용할 수 있습니다.
- SEO 관점: 제목, 설명, 이미지 alt, 프롬프트 예시가 실제 검색 의도와 맞아야 색인 가능성이 높아집니다.
한국어 사용자를 위한 체크포인트
1. 프롬프트가 얼굴 묘사에만 머물지 않고 전체 스타일과 의상 구성을 설명하는지 확인합니다. 2. 패션 이미지라면 상의, 하의, 아우터, 신발, 액세서리, 소재감, 촬영 장소를 분리해서 씁니다. 3. 생성 결과는 바로 게시하지 말고 디테일, 손, 의상 형태, 배경 일관성, 이미지 품질을 비교합니다. 4. 글 본문에는 실제 테스트 기준과 실패를 줄이는 방법이 들어가야 검색엔진에서 얇은 콘텐츠로 보일 가능성이 줄어듭니다.
원문 미리보기
If you need a ComfyUI workflow low VRAM setup that still produces images worth keeping, the short version is this: use a lean SDXL or SD1.5 graph, avoid loading extra conditioning stacks unless they clearly earn their memory cost, keep latent sizes disciplined
---
If you need a ComfyUI workflow low VRAM setup that still produces images worth keeping, the short version is this: use a lean SDXL or SD1.5 graph, avoid loading extra conditioning stacks unless they clearly earn their memory cost, keep latent sizes disciplined, and treat hi-res passes as optional rather than default. In this test, the best low-memory results did not come from the most complex graph. They came from a smaller, cleaner node chain with predictable VRAM behavior.
What surprised me most was how often a lightweight workflow beat a more ambitious one once I factored in retries, crashes, and the amount of cleanup needed after artifacts. A graph that fits comfortably in memory is usually faster in practice than a graph that only works after cache clearing, reduced batch size, and constant compromise.
What I tested
I compared two practical workflows for low-memory image generation in ComfyUI:
- Option A: Lean base workflow using checkpoint loader, CLIP text encode, empty latent image, KSampler, VAE decode, save image
- Option B: Enhanced low-VRAM workflow using the same core path but with selective additions like LoRA loading, tiled VAE decode or upscale, and a second controlled pass when memory allowed
The goal was not to find the absolute highest image quality at any cost. The goal was to find the best balance of:
- image quality per GB of VRAM
- stability on 8GB-class GPUs
- speed of iteration
- tolerance for portrait, product, and environment prompts
- failure rate when moving beyond simple scenes
In this test, the practical target machine was the kind many users actually have: an older or mid-range GPU with around 8GB VRAM, limited headroom for SDXL at larger resolutions, and little patience for crashes.
The plain-language verdict
If you are on 8GB VRAM or less, the strongest starting point is a minimal graph with one sampler pass at modest latent resolution, then a careful upscale only when the image already works compositionally. If you start with large dimensions, multiple ControlNets, stacked LoRAs, and a hi-res second pass, you may eventually get a better frame, but the workflow becomes fragile fast.
For most people searching ComfyUI for 8GB GPU or best ComfyUI settings low VRAM, I would recommend:
1. Generate smaller first 2. Keep batch size at 1 3. Use one style modifier at a time 4. Decode or upscale only after subject, framing, and lighting are already correct 5. Prefer a reproducible graph over an ambitious graph that fails every third run
Option A: The lean workflow that held up best
This was the most reliable graph in the comparison:
- Load Checkpoint
- CLIP Text Encode Positive
- CLIP Text Encode Negative
- Empty Latent Image
- KSampler
- VAE Decode
- Save Image
That may sound too basic, but in this test it had three real advantages.
1. It failed less often
The obvious benefit was VRAM headroom. But the more important benefit was that I could iterate on prompts and seeds without wondering whether the next change would push the graph over the edge. That matters more than it sounds. Low-VRAM users lose a lot of time to uncertainty, not just slow generation.
2. It made prompt differences easier to read
When the graph is simple, prompt edits show up more clearly. Once you add LoRAs, extra passes, or multiple control layers, it becomes harder to tell whether a better result came from better prompting or just heavier processing. For testing prompts, this lean path was much more honest.
3. It produced more consistent composition
The strongest result from Option A was not micro-detail. It was composition stability. Framing, pose direction, and object placement drifted less than I expected, especially at moderate resolutions.
A good first test for this workflow is a portrait with fabric detail and soft lighting. It exposes whether the graph can hold subject clarity without overloading memory.
Topic: cinematic indoor portrait with layered clothing texture
Genre: Fashion Editorial
Camera: Canon EOS R5
Lens: 50mm f/1.8
Lighting: window side light with soft bounce fill
Location: narrow apartment studio with matte plaster wall and wooden floor
Style: cinematic realism
Final Prompt: a seated young woman in layered autumn clothing, wool coat over ribbed knit sweater, relaxed posture on a wooden stool, calm direct gaze, soft window side light, subtle bounce fill, apartment studio with matte off-white plaster wall and warm wood floor, muted brown and cream palette, realistic skin texture, visible knit fibers, natural hand placement, balanced composition with negative space, Canon EOS R5 look, 50mm f/1.8 depth of field, detailed but clean cinematic realism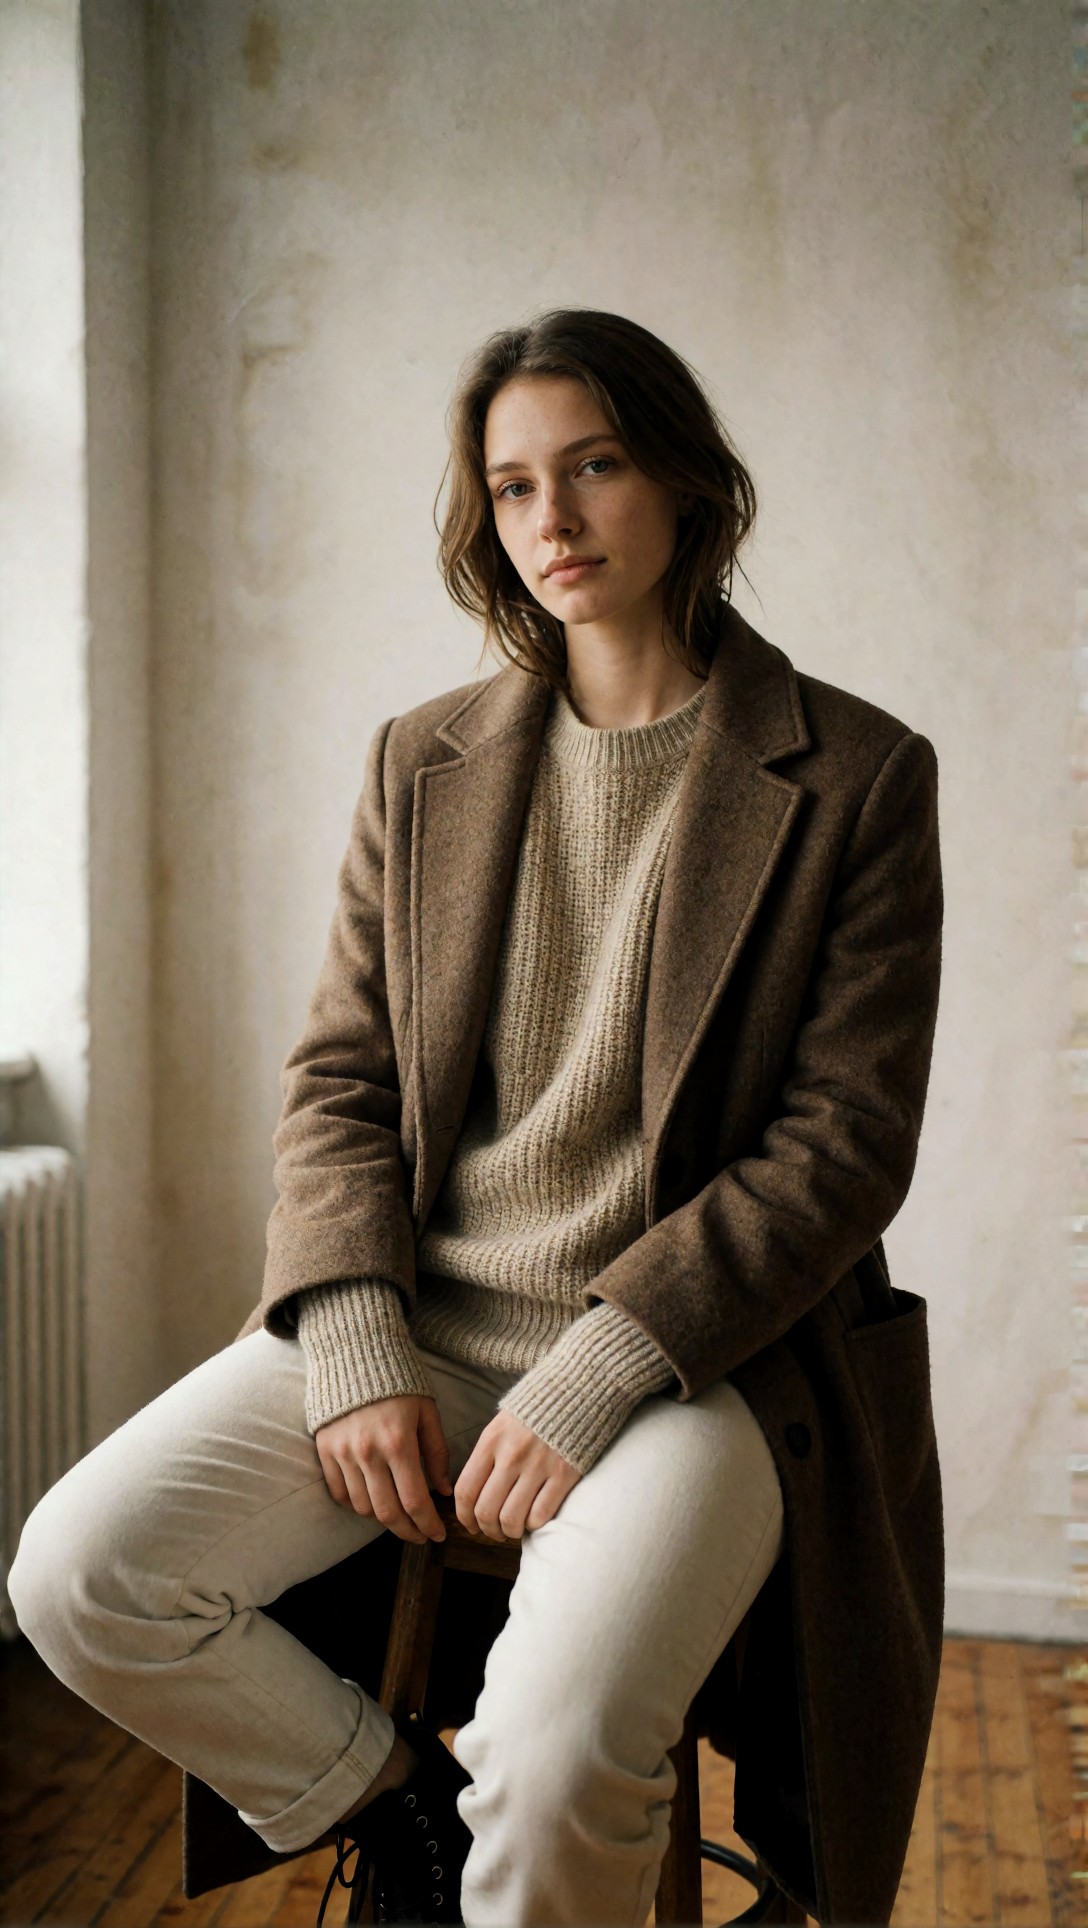
Inspect whether the knit texture survives without turning noisy and whether the hands remain believable. On lean graphs, hands often stay acceptable if the pose is simple, but fabric micro-detail may flatten before facial structure does.
A second useful test is a product-led scene. These often reveal whether the workflow can maintain edge clarity without a heavy upscale stage.
Topic: premium skincare bottle on textured stone pedestal
Genre: Product Editorial
Camera: Nikon Z7 II
Lens: 85mm f/2.8 macro
Lighting: overhead softbox with narrow strip rim light
Location: minimal studio set with warm gray backdrop
Style: clean commercial look
Final Prompt: a premium amber skincare bottle with matte black cap placed on a textured stone pedestal, minimal studio set, warm gray seamless backdrop, overhead softbox for soft label readability, narrow rim light defining bottle edges, subtle shadow falloff, clean commercial composition, realistic glass reflections, legible product silhouette, controlled highlights, tactile stone surface, Nikon Z7 II look, 85mm macro precision, premium retail editorial finish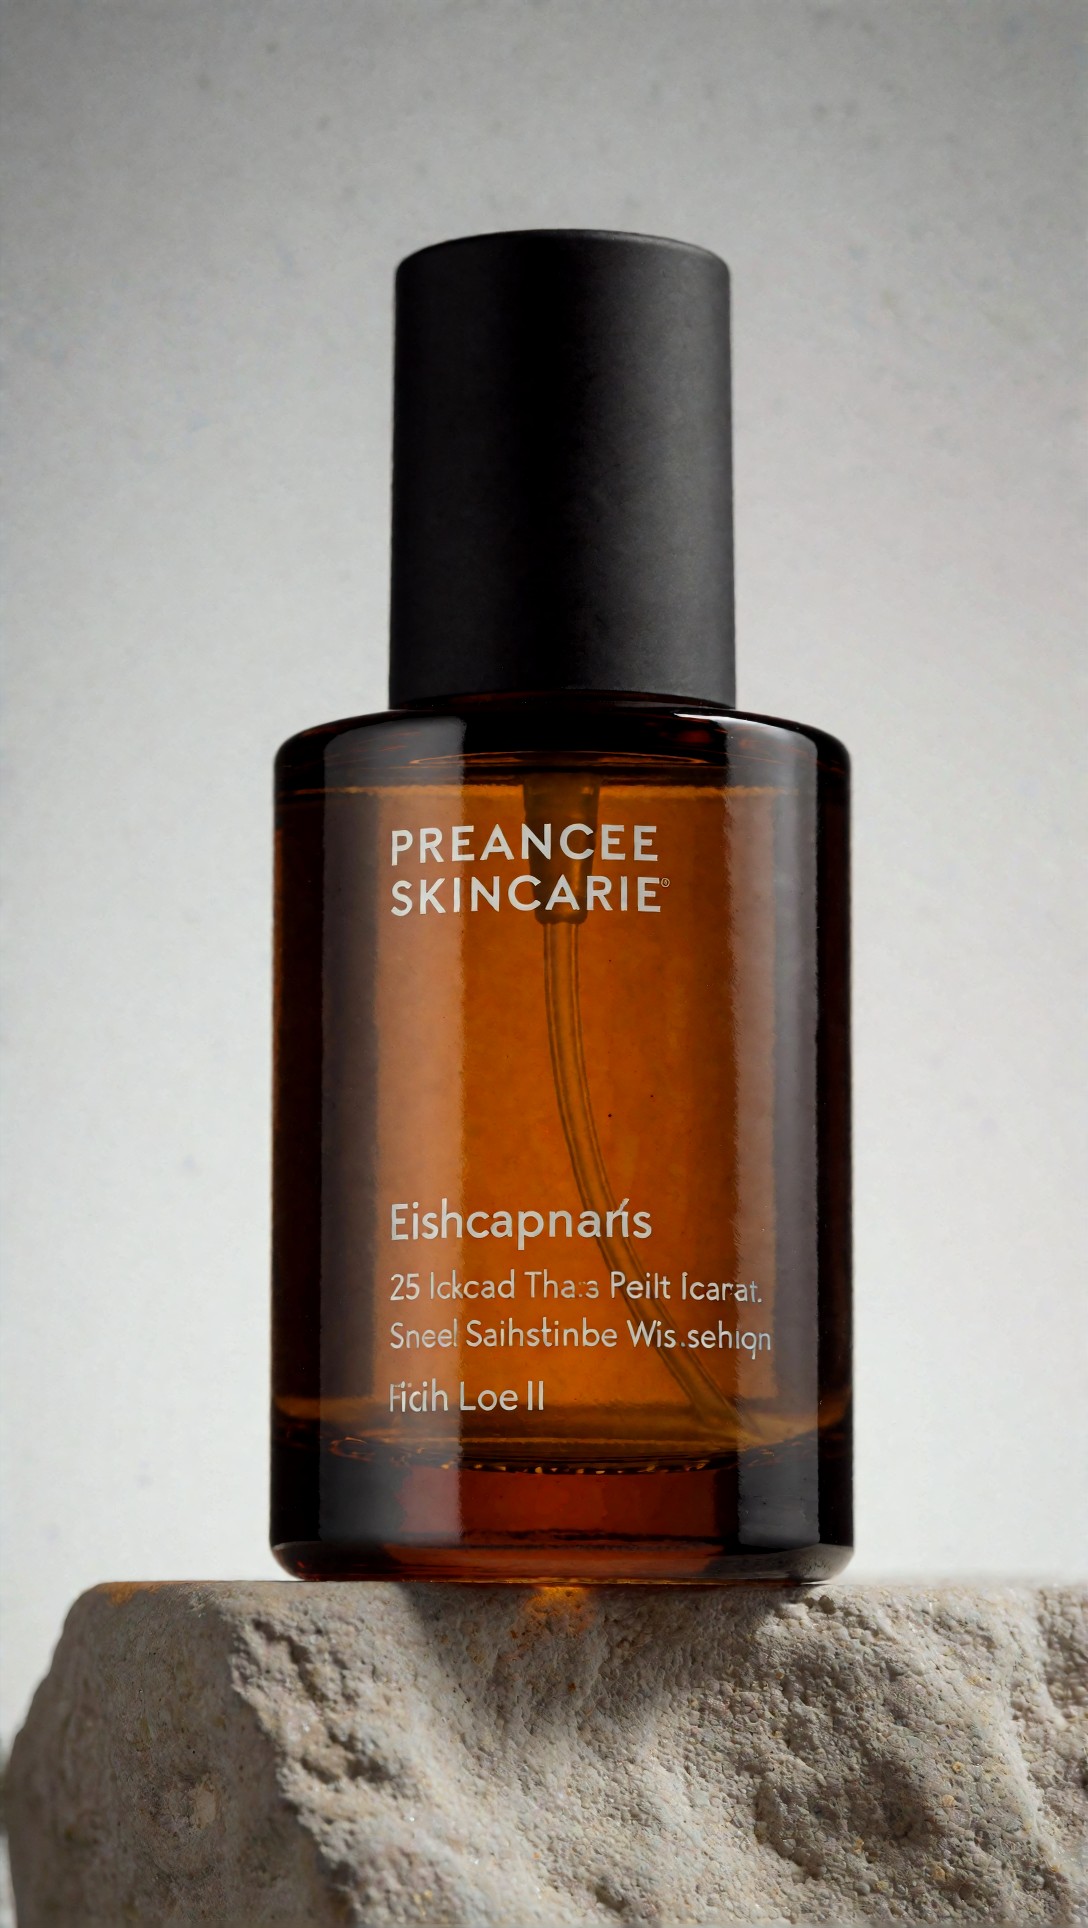
Here the key thing to inspect is edge discipline: label area, cap geometry, and reflection control. On low-VRAM settings, product scenes often look good at first glance but break down around text zones and specular edges.
Where the lean workflow starts to show limits
The weak point of Option A was detail recovery in busy scenes. Once I pushed toward:
- wider environments
- multiple subjects
- dense architecture
- glossy reflective surfaces
- intricate hands near the camera
…the image stayed coherent, but finer details became soft or synthetic. This is where many users overcorrect by jumping directly to a much heavier workflow.
A better lesson from the test was that not every image deserves an upscale pass. If the base image is compositionally weak, more detail just sharpens the mistake.
This prompt was useful for exposing those limits because it combines layered depth, practical lighting, and fine environmental structure.
Topic: neon-lit alley scene with full-body subject and layered signage
Genre: Cinematic Travel
Camera: Sony A7S III
Lens: 35mm f/1.4
Lighting: neon rim light with wet pavement reflections
Location: dense night market alley in Osaka-inspired urban setting
Style: cinematic realism
Final Prompt: a full-body subject walking through a narrow neon-lit night market alley, dark tailored coat, reflective wet pavement, layered Japanese-style shop signs, steam drifting from food stalls, blue and magenta rim light, slight motion in background pedestrians, confident stride, off-center composition, glossy reflections, atmospheric depth, realistic urban clutter, cinematic realism, Sony A7S III look, 35mm f/1.4 perspective, rich night contrast, controlled noise, detailed but readable street scene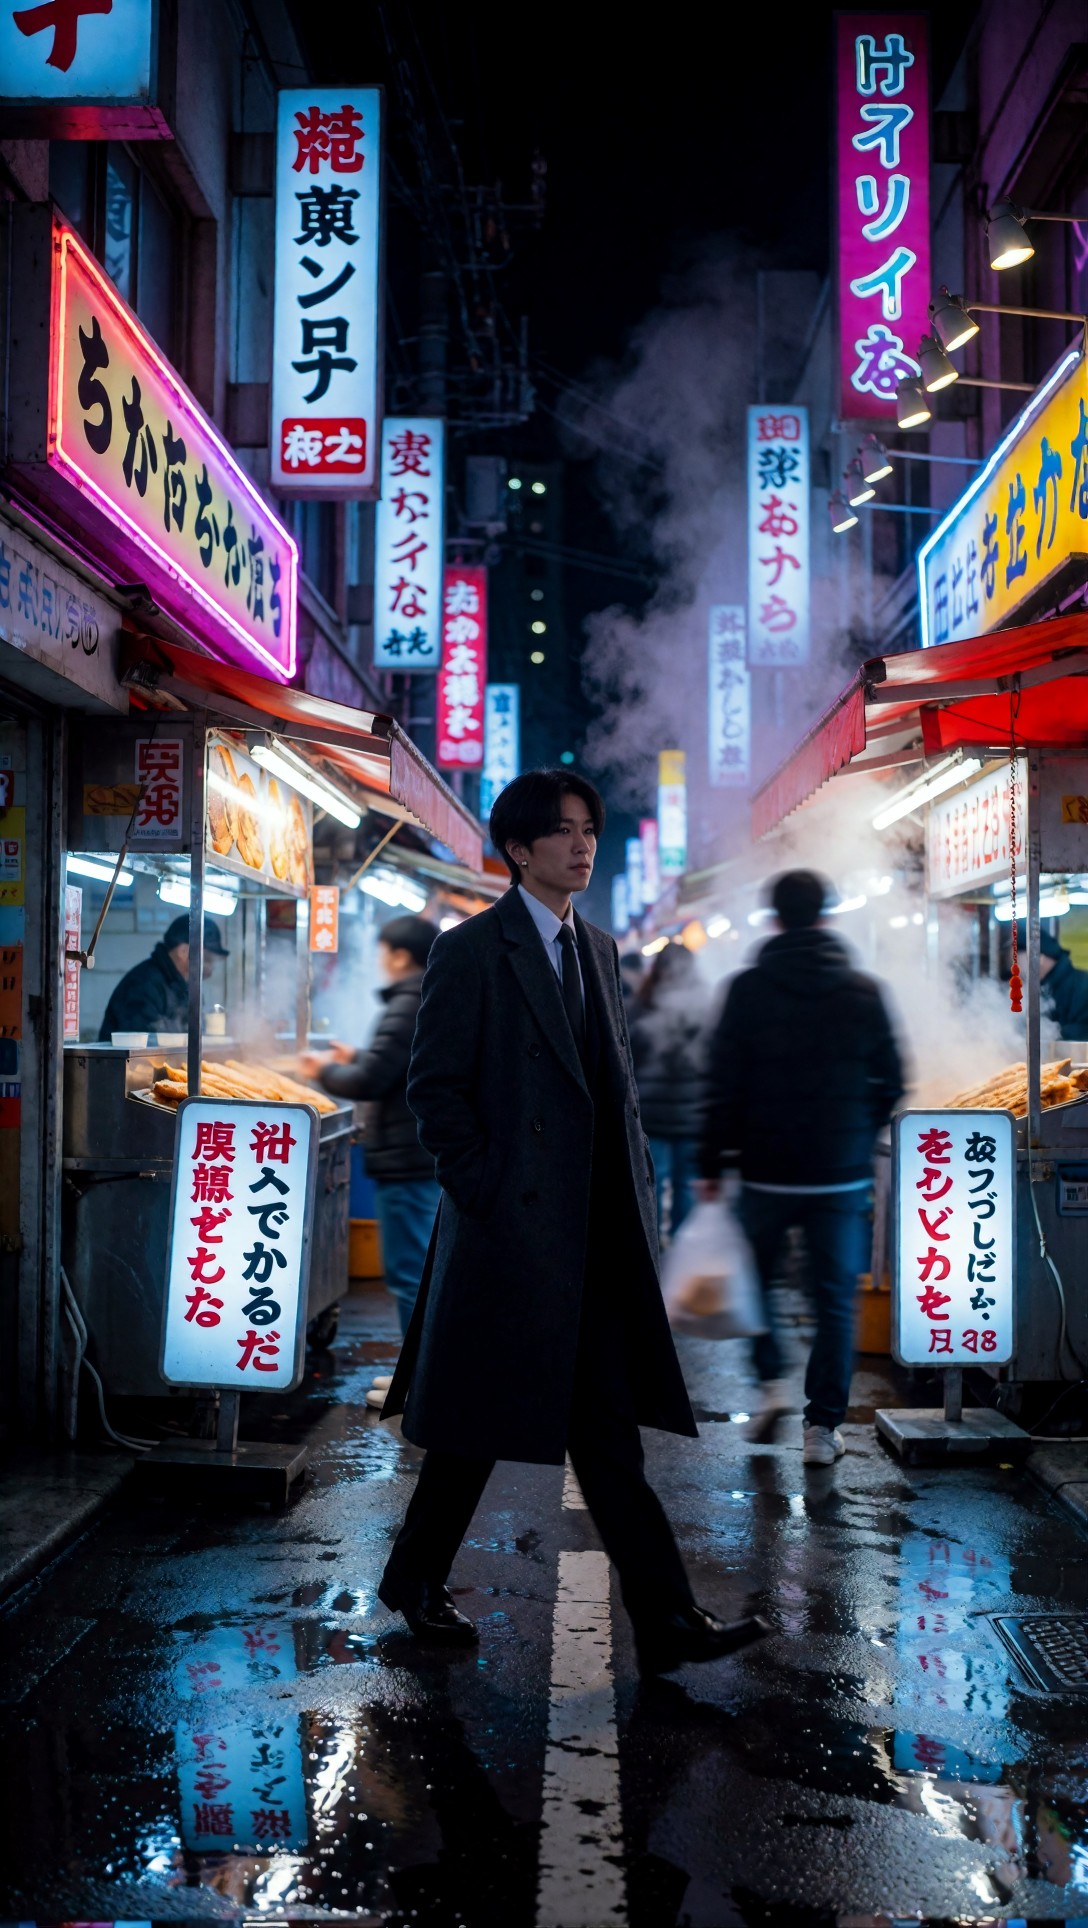
Check the signs, distant faces, and pavement texture. In this test, the lean workflow usually held the subject well enough, but background lettering and small structural details were the first things to collapse into mush or invented shapes.
Option B: The upgraded low-memory workflow when you need more finish
The second workflow added just enough complexity to improve output without becoming self-defeating.
Typical additions included:
- one LoRA at modest strength when style lock was needed
- tiled VAE decode or tiled upscale for larger outputs
- a second pass only after a strong base frame existed
- selective use of lower starting resolution before upscale
This is the version I would call a real ComfyUI low memory workflow, because it accepts the hardware limit and works around it deliberately instead of pretending the machine has room for everything.
What improved
Better texture finish
Clothing folds, product materials, and interior surfaces looked more resolved after a controlled upscale than when I tried to force large native generation.
Better style consistency
A single LoRA, used carefully, was often worth the memory cost if the alternative was fighting prompt drift for ten generations.
Better salvage rate for near-miss images
This was the biggest practical gain. A nearly good base image could often be rescued with a light second pass. That is more useful than squeezing out a tiny quality increase on already strong images.
A fashion prompt with more accessories showed this difference clearly. It tests whether the added workflow can hold belts, jewelry, and layered textiles without overcooking the face.
Topic: structured street-style fashion with layered accessories
Genre: Street Style
Camera: Fujifilm GFX100S
Lens: 80mm f/1.7
Lighting: overcast diffusion
Location: concrete pedestrian underpass with soft reflected daylight
Style: magazine street editorial
Final Prompt: a full-body fashion subject in structured street-style clothing, oversized charcoal blazer, pleated skirt, leather belt bag, layered silver jewelry, knee-high boots, composed stance under a concrete pedestrian underpass, cool overcast daylight with soft reflected fill, editorial posture, clean lines, textured fabrics, muted gray and steel-blue palette, detailed accessories, realistic skin, modern magazine street editorial, Fujifilm GFX100S look, 80mm f/1.7 shallow separation, premium fabric and styling clarity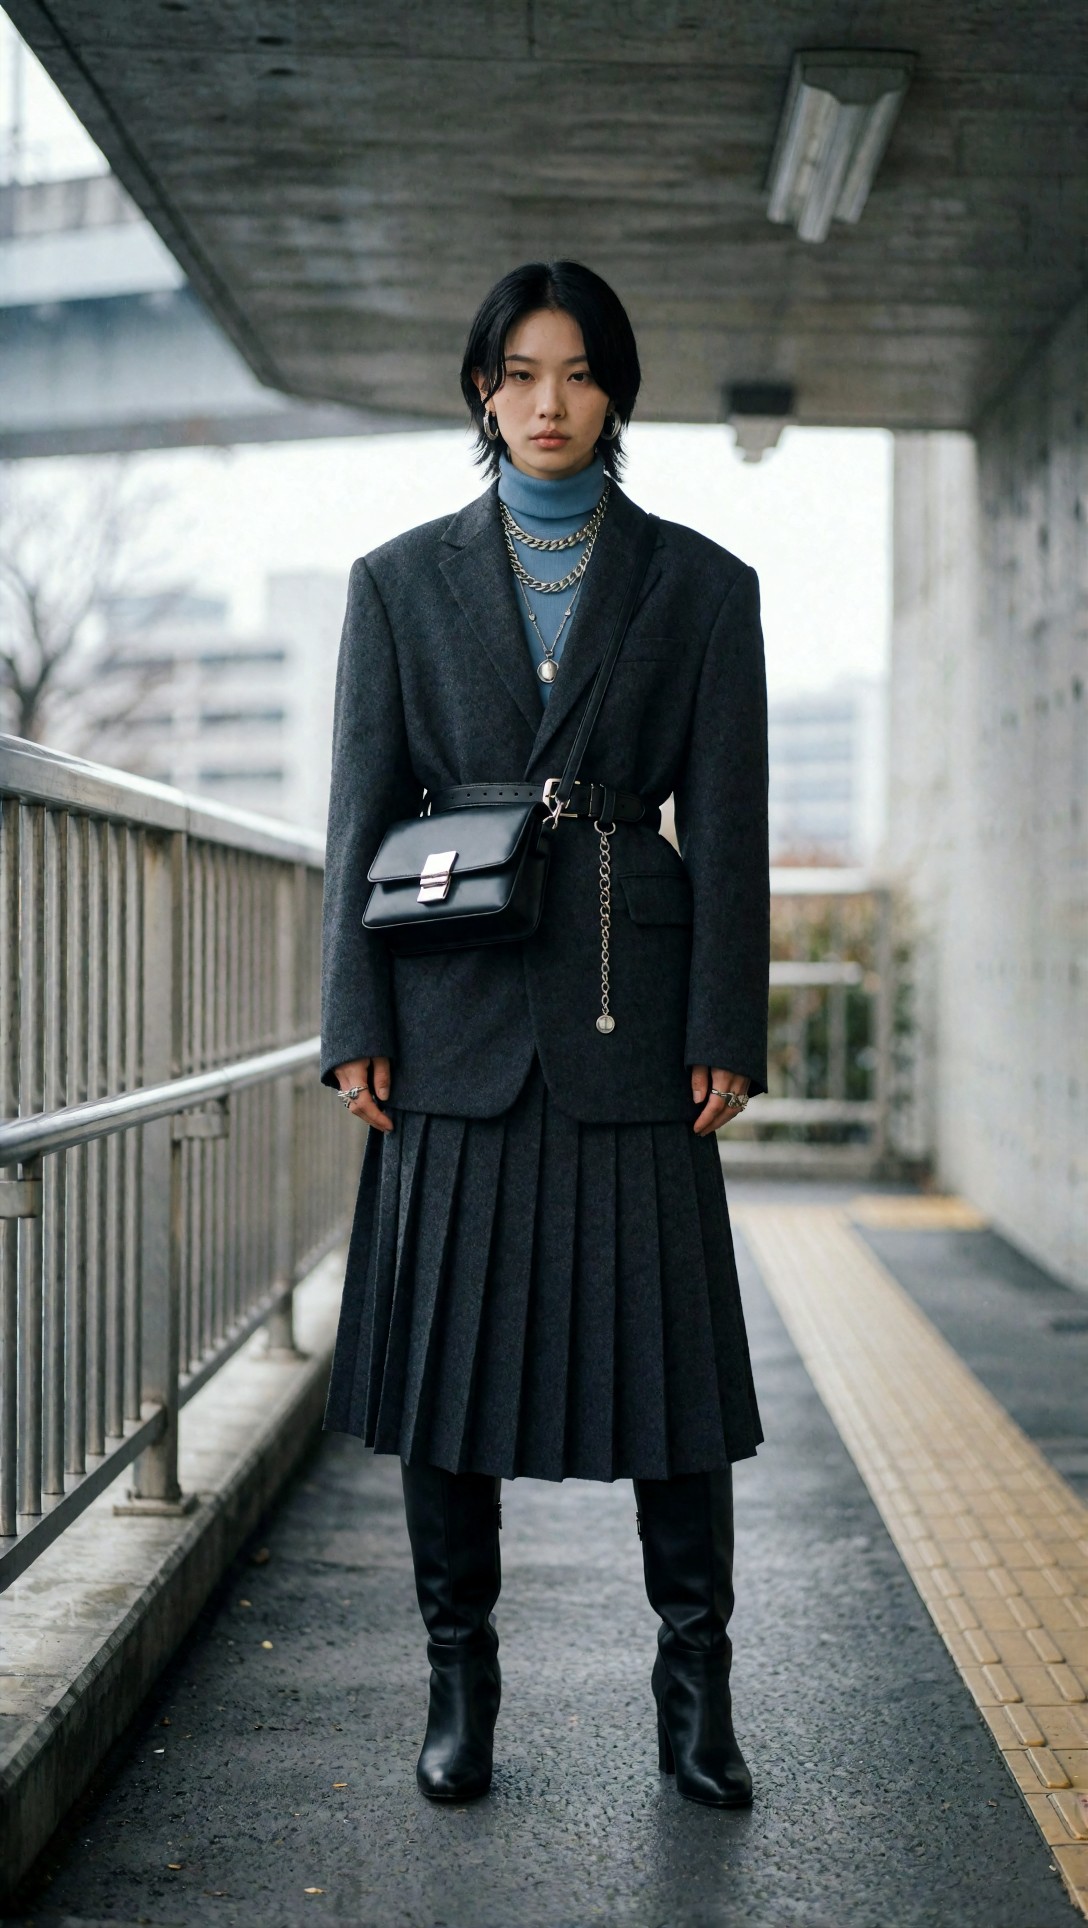
Inspect the belt bag edges, jewelry shape, and skirt pleats. In this test, the enhanced workflow kept accessory structure more reliably, but if the LoRA strength was too high, skin texture and facial proportions became oddly polished.
Another strong use case was interior realism, where tiled decode helped preserve line structure better than pushing native resolution too high.
Topic: compact Scandinavian living room interior with daylight styling
Genre: Interior Editorial
Camera: Leica SL2
Lens: 28mm f/4
Lighting: soft morning window light
Location: small Scandinavian apartment living room
Style: clean architectural editorial
Final Prompt: a compact Scandinavian living room with pale oak flooring, off-white sofa, boucle armchair, low walnut coffee table, linen curtains, ceramic decor, books stacked casually, soft morning window light entering from the left, clean but lived-in styling, precise wall lines, calm neutral palette, balanced wide composition, realistic textile texture, architectural order without sterile emptiness, Leica SL2 look, 28mm f/4 interior perspective, clean architectural editorial finish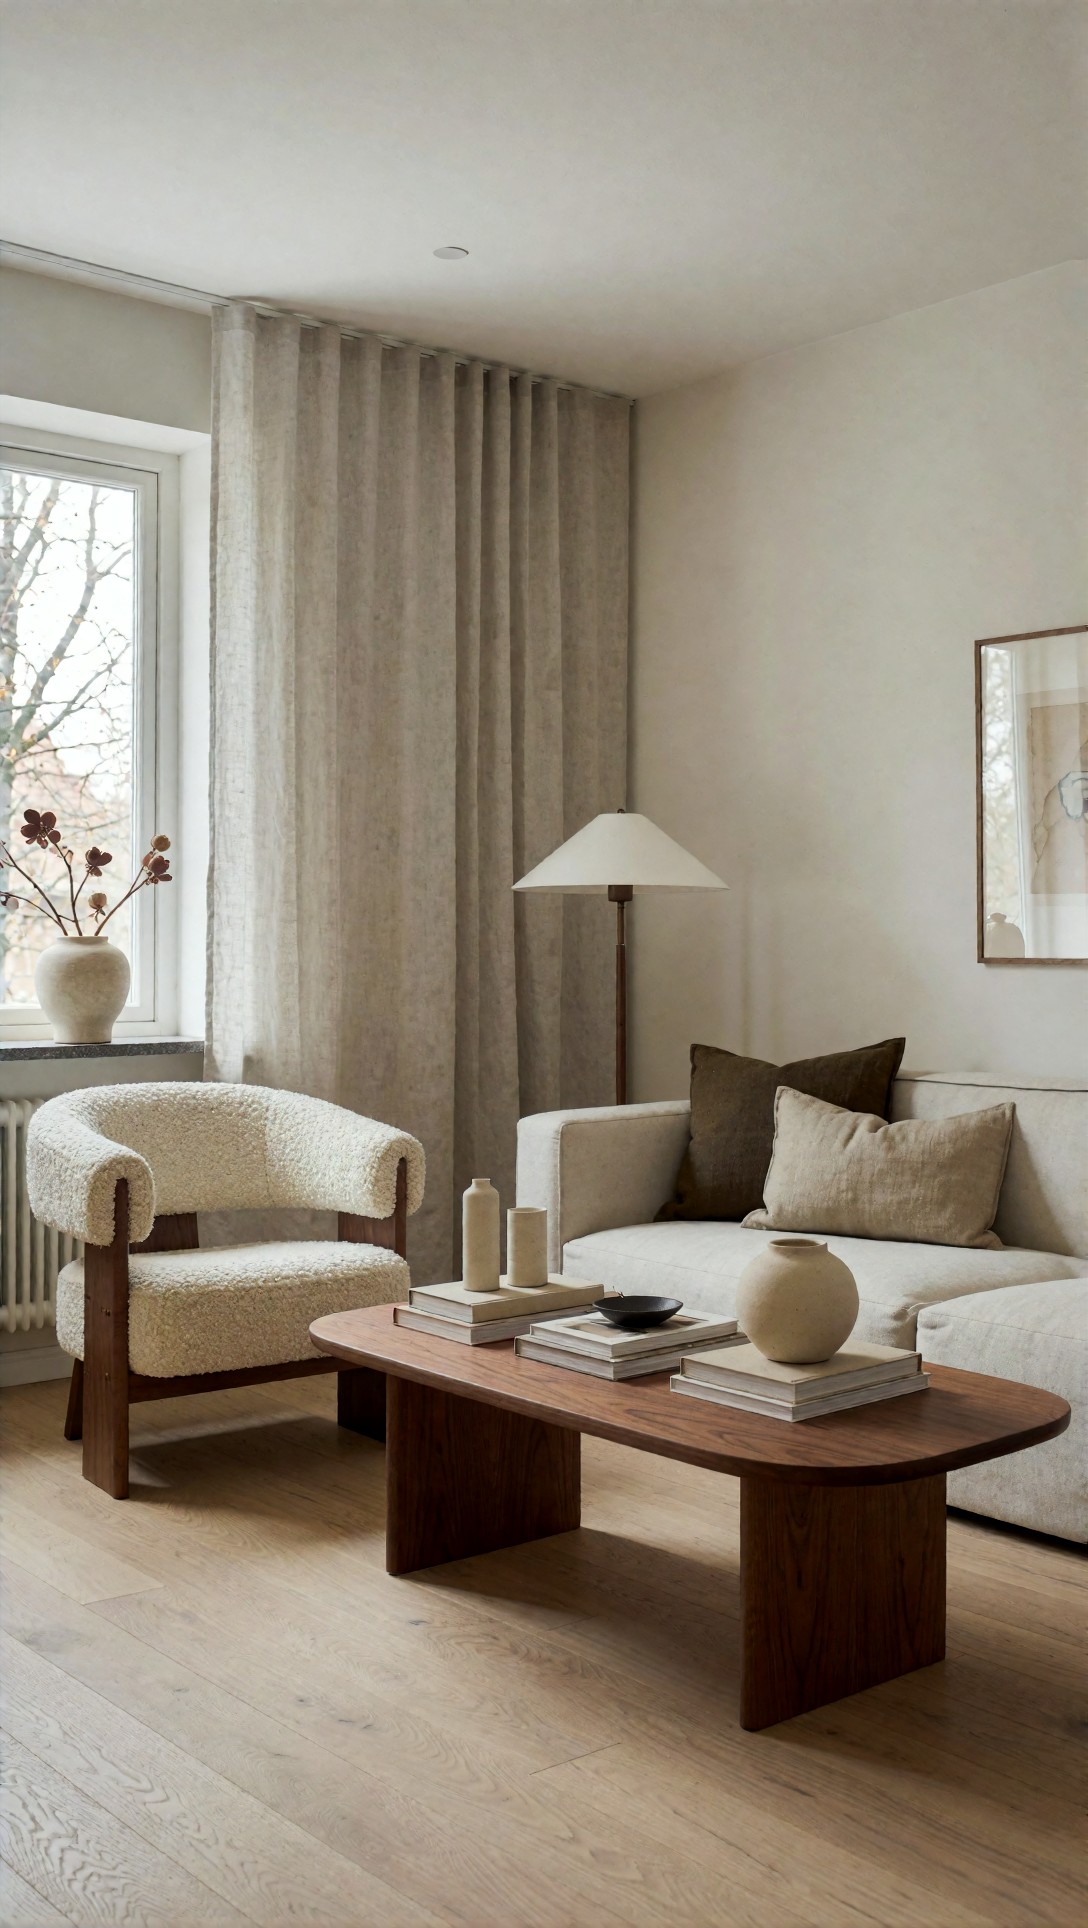
Look closely at wall edges, sofa seams, and curtain folds. Low-VRAM workflows tend to expose themselves in interiors through warped geometry and smeared fabric boundaries before they fail anywhere else.
The tradeoff chart that mattered in practice
Here is the side-by-side outcome from repeated tests.
Option A: Lean base graph
Best for:
- quick iteration
- prompt testing
- portraits
- simpler products
- users who crash often on SDXL
Strengths:
- most stable
- easiest to diagnose
- lowest memory pressure
- fastest route to a usable composition
Weak points:
- weaker fine detail in dense scenes
- limited rescue power for near-miss images
- less style lock without extra conditioning
Option B: Enhanced low-VRAM graph
Best for:
- finalizing selected images
- fashion styling with accessory detail
- interiors and products needing cleaner edges
- users disciplined enough to upscale only after a good base image exists
Strengths:
- better texture finish
- better edge quality
- better consistency when one LoRA is used carefully
- more viable print or portfolio outputs
Weak points:
- easier to overdo
- more likely to trigger memory issues if you stack extras
- slower to iterate
- harder to isolate what caused a failure
Settings that actually mattered more than people admit
During testing, a few settings had outsized impact on whether a lightweight ComfyUI workflow felt usable.
Batch size: keep it at 1
This is the easiest win. Trying to batch on low VRAM quickly turns a manageable graph into a crash-prone one. The time saved by parallel output rarely compensates for instability.
Start resolution: conservative beats ambitious
A smaller base image with better composition nearly always outperformed a larger shaky image. For low VRAM, the smartest path was:
- compose small
- pick the winner
- upscale the winner
LoRA count: one is usually enough
In this test, one carefully chosen LoRA at moderate weight improved reliability more than stacking multiple aesthetic modifiers. Two or three often made style stronger but anatomy and material logic weaker.
Negative prompting: keep it specific
Overloaded negative prompts did not save weak images. They often made them blander. Specific negatives for deformed hands, warped products, extra limbs, or broken geometry were more useful than giant generic anti-quality lists.
This prompt was built to check anatomy stress under a controlled setup. It is useful because hand placement and layered costume details often break first when memory-saving compromises get too aggressive.
Topic: seated musician portrait with visible hands and layered costume detail
Genre: Editorial Portrait
Camera: Panasonic Lumix S1R
Lens: 85mm f/2
Lighting: studio butterfly light with soft fill
Location: dark velvet backdrop studio set
Style: refined magazine portrait
Final Prompt: a seated musician holding a hollow-body guitar, both hands visible, tailored black suit with satin lapel, deep burgundy silk shirt, polished shoes, composed expression, dark velvet backdrop, studio butterfly light with soft fill preserving facial structure and hand detail, elegant seated pose, clean editorial framing, realistic fabric sheen, accurate finger placement, rich burgundy and black palette, Panasonic Lumix S1R look, 85mm f/2 portrait compression, refined magazine portrait finish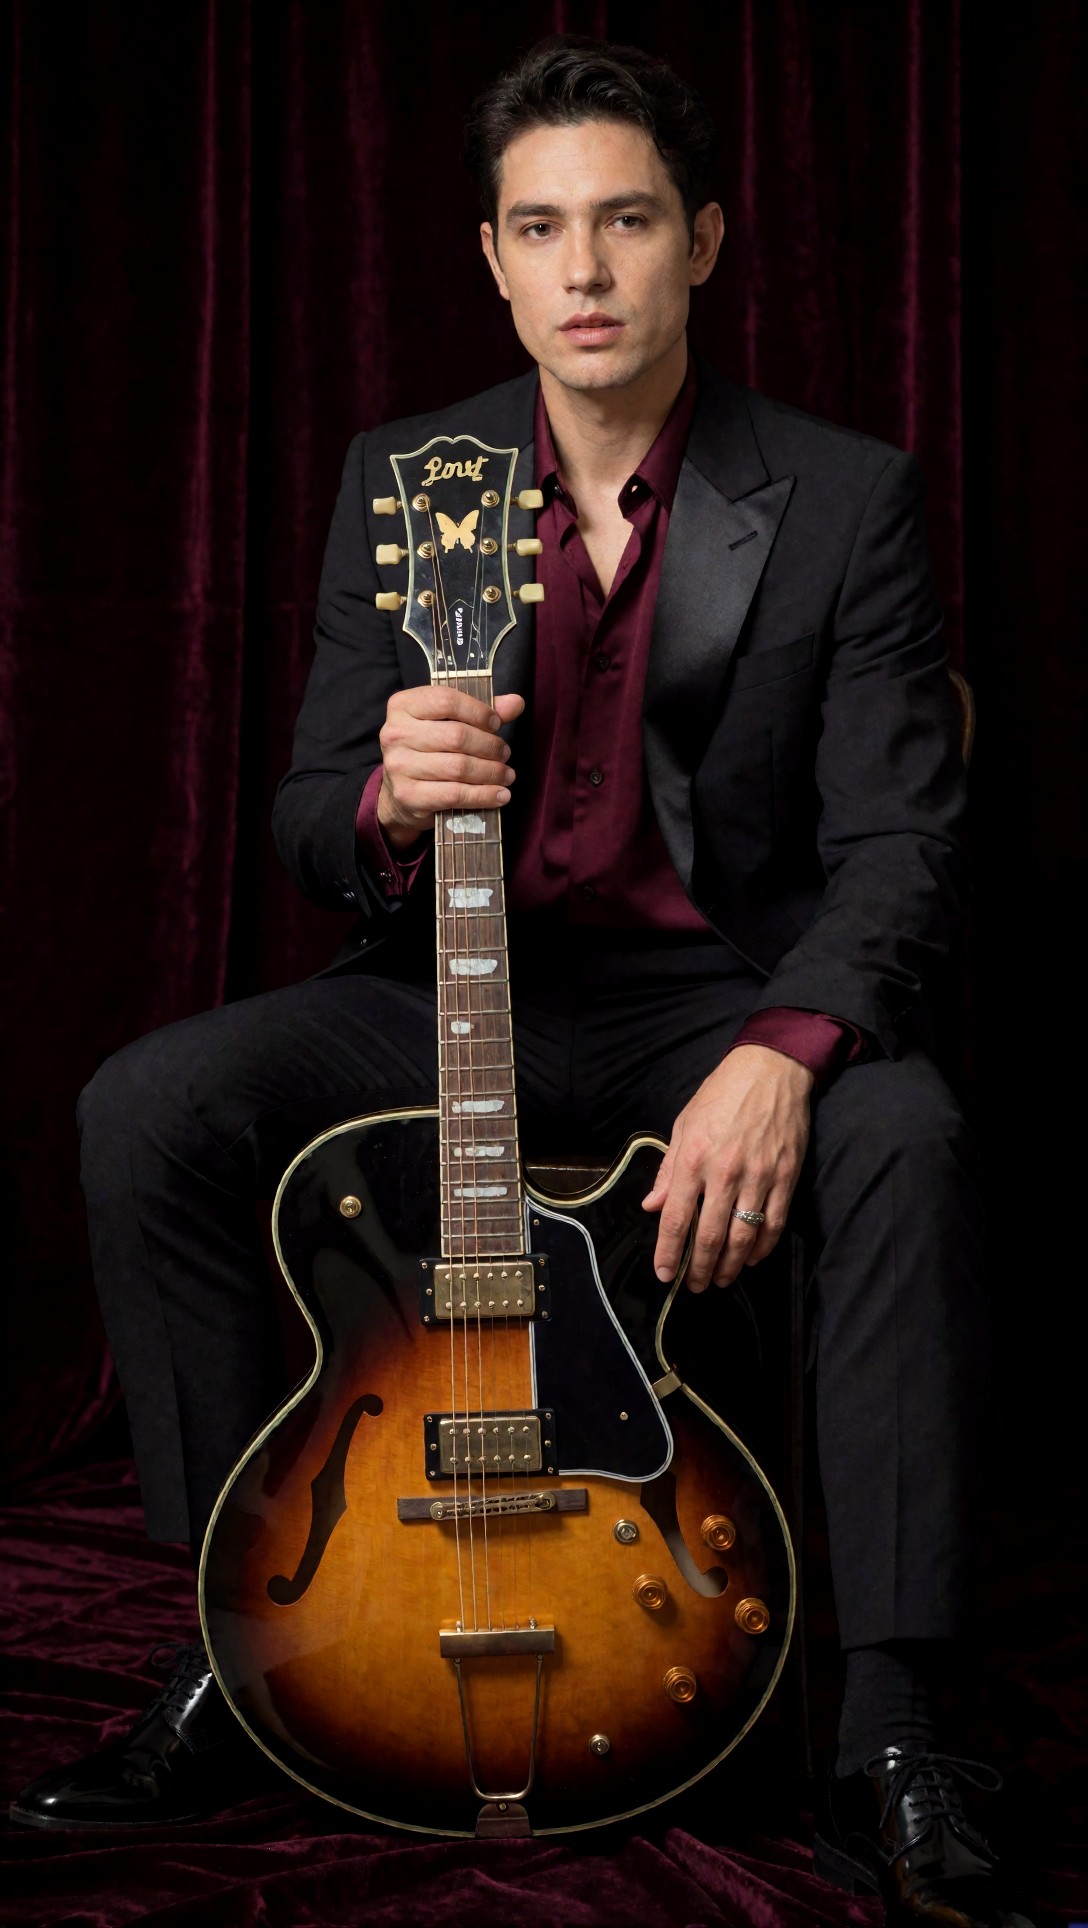
Inspect finger count, guitar contours, and satin sheen. In my runs, low-VRAM workflows often kept the face intact while quietly failing on instrument geometry or hand posture.
Prompts that exposed the difference fastest
I found that some prompt types reveal low-memory weaknesses much faster than others. If you only test close-up faces, almost any workflow can look fine. The real separation appears in scenes that combine depth, material contrast, and structural precision.
A food-commercial scene is a good example because it mixes reflective surfaces, texture, steam, garnish detail, and shallow depth of field.
Topic: gourmet ramen bowl with steam and lacquer reflections
Genre: Food Editorial
Camera: Canon EOS R3
Lens: 100mm f/2.8 macro
Lighting: warm side key with soft top fill
Location: intimate wooden counter restaurant set
Style: premium restaurant campaign
Final Prompt: a gourmet ramen bowl on a dark lacquered wooden counter, rich broth sheen, sliced pork, soft-boiled egg, scallions, sesame, rising steam, ceramic bowl texture, chopsticks resting nearby, warm side key light with soft top fill, shallow depth of field, cozy intimate restaurant atmosphere, amber and deep wood palette, premium restaurant campaign styling, Canon EOS R3 look, 100mm macro detail, appetizing realism with controlled reflections and crisp ingredient separation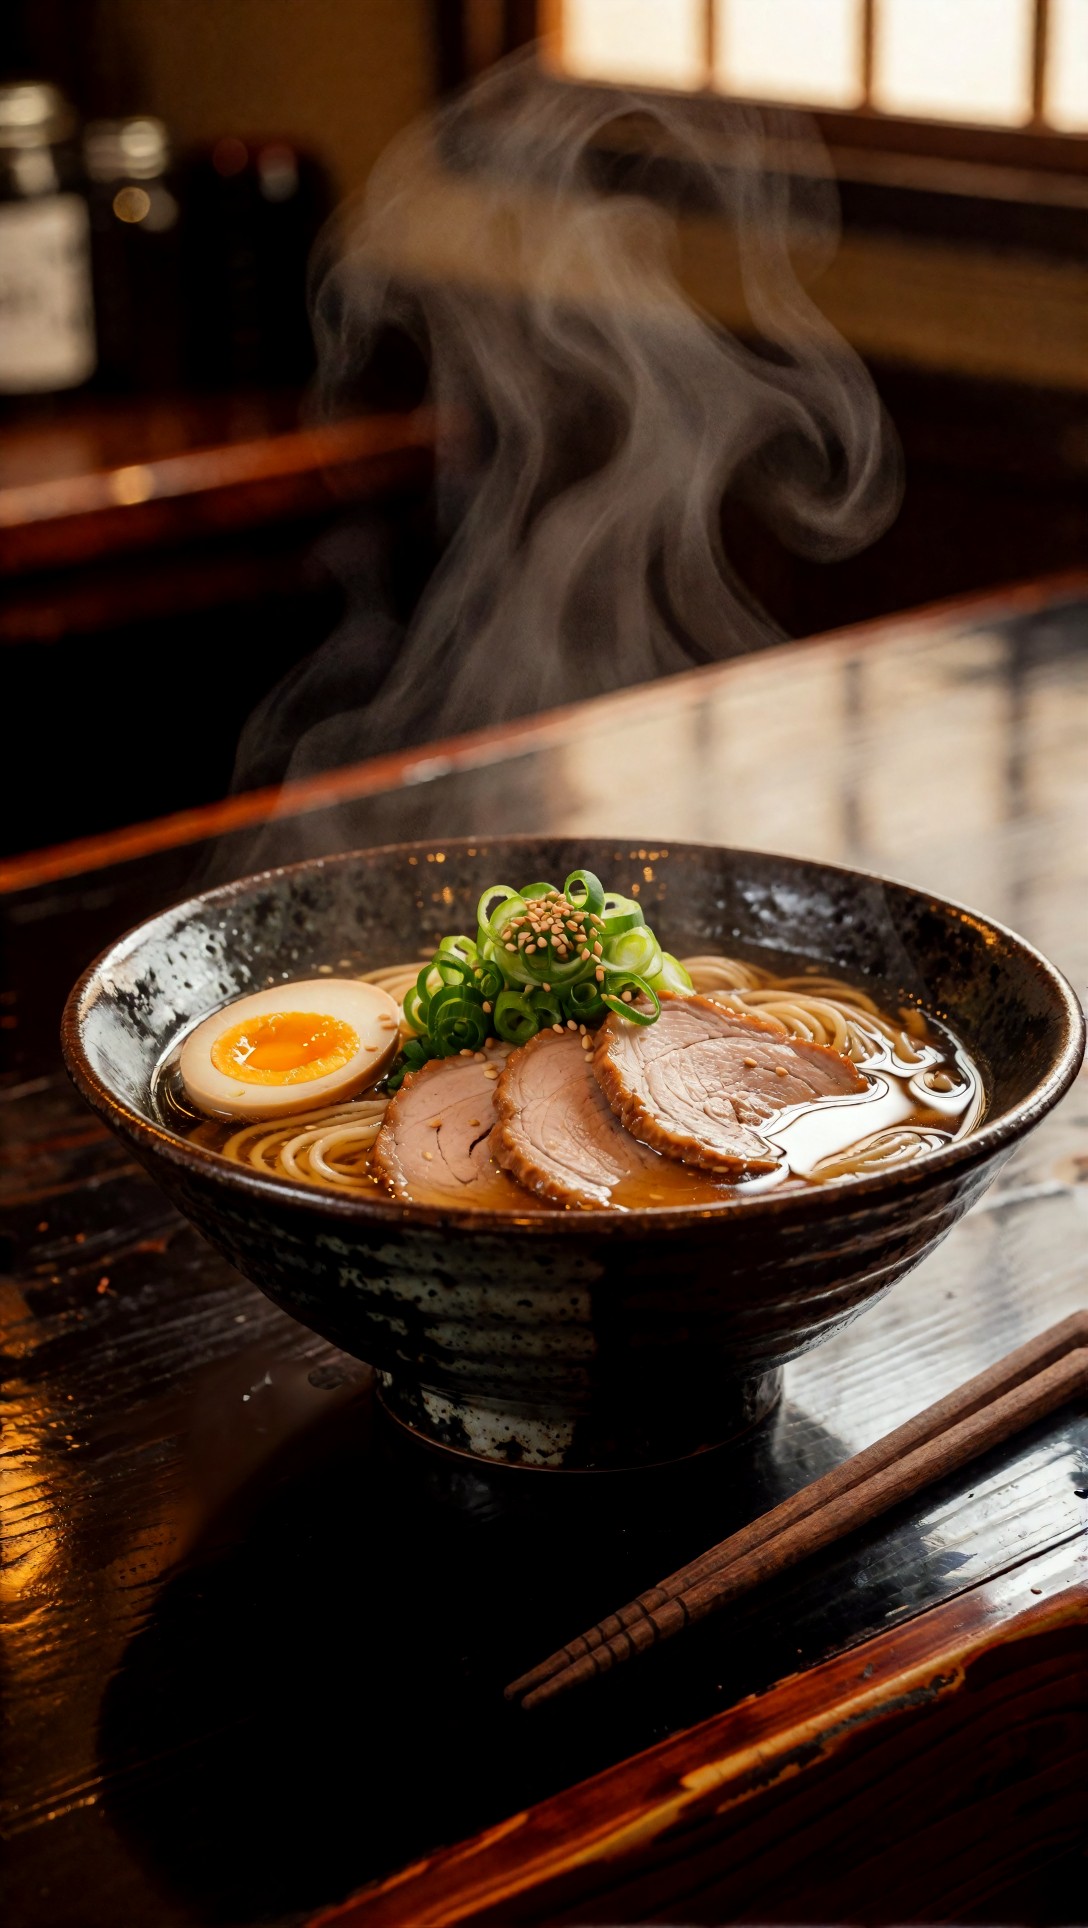
Check whether steam reads naturally and whether ingredient boundaries stay distinct. The lean graph often gave a pleasant image here, but the enhanced workflow preserved bowl edge definition and garnish detail better.
Another useful stress test is vehicle imagery, because symmetry and hard surfaces punish weak detail reconstruction.
Topic: electric sports car hero shot at dusk
Genre: Luxury Campaign
Camera: Hasselblad X2D 100C
Lens: 55mm f/2.5
Lighting: dusk ambient with controlled LED edge light
Location: rooftop parking deck overlooking city skyline
Style: high-end automotive advertising
Final Prompt: a sleek electric sports car in three-quarter view on a rooftop parking deck at dusk, polished graphite bodywork, narrow LED headlights, soft city skyline bokeh in the background, controlled LED edge light tracing body lines, subtle reflections across hood and doors, cinematic low stance, premium automotive composition, cool blue-gray evening palette, clean surface realism, Hasselblad X2D 100C look, 55mm f/2.5 medium-format clarity, high-end automotive advertising finish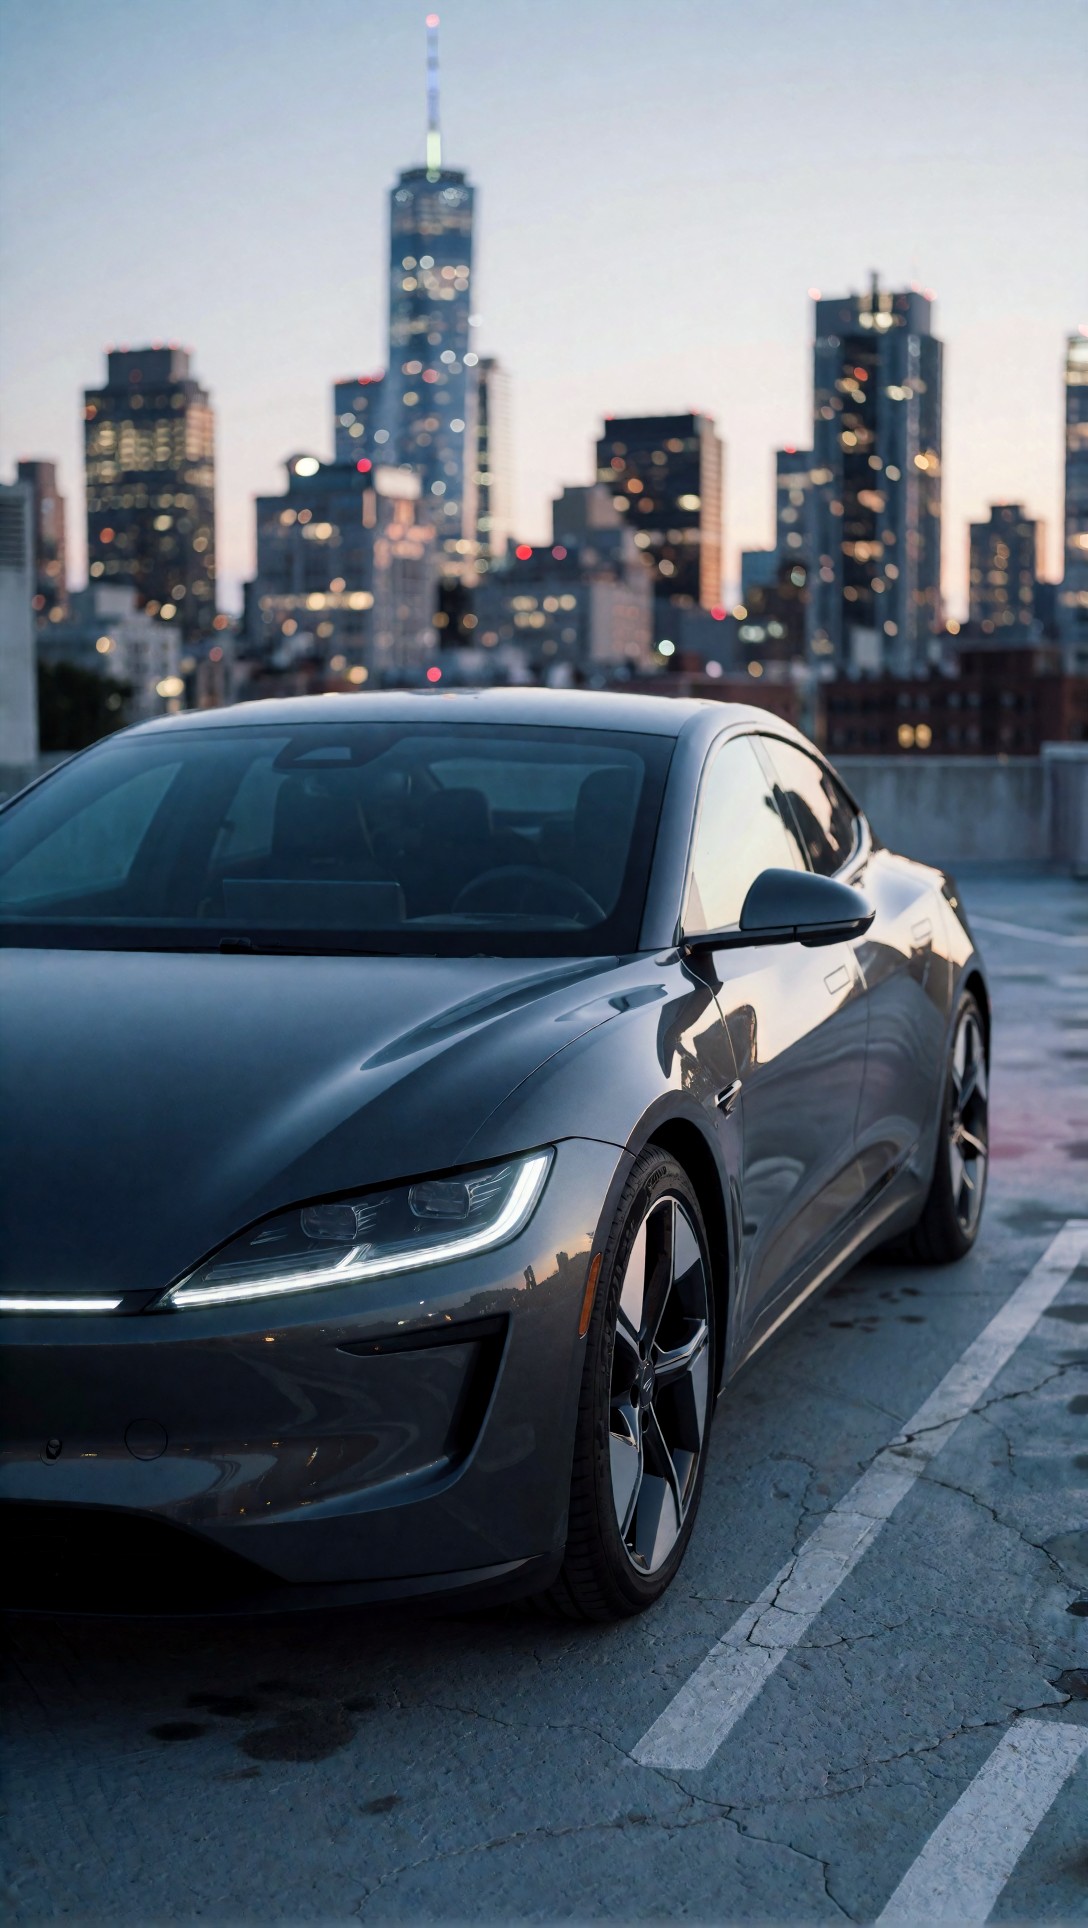
Inspect panel lines, wheel geometry, and reflection continuity across the doors. In this test, low-memory upscaling helped more here than on portraits because hard-surface errors are so easy to spot.
Finally, an anime or stylized key visual is worth testing because low VRAM does not only affect realism. It also affects edge cleanliness, costume readability, and background layering in stylized art.
Topic: fantasy academy mage character with layered costume and magical effects
Genre: Anime Key Visual
Camera: cinematic anime cel capture style
Lens: 50mm equivalent f/2 look
Lighting: moonlit backlight with floating magic glow
Location: ancient academy courtyard at night
Style: polished fantasy anime illustration
Final Prompt: a full-body fantasy academy mage standing in an ancient stone courtyard at night, layered navy and silver robes, ornate belt, leather satchel, glowing spellbook in one hand, floating blue sigils around the other, moonlit backlight, wind lifting cloak edges, determined expression, dramatic anime composition, stone arches and lanterns in the background, cool blue and silver palette, crisp line clarity, costume readability, polished fantasy anime illustration with clean depth layering
Look for cloak edge separation, symbol cleanliness, and background hierarchy. Stylized outputs usually hide skin issues well, but they reveal whether the workflow can keep line integrity under memory pressure.
A practical low-VRAM checklist based on output quality
Before you add more nodes, check these in the base image:
- Is the composition already worth saving?
- Are the hands acceptable at normal viewing size?
- Does the lighting direction read clearly?
- Are important product or wardrobe edges intact?
- Is the background helping the subject instead of collapsing into clutter?
- Would an upscale improve detail, or only magnify existing mistakes?
If the answer to the first three is no, do not upscale yet. Rewrite the prompt or change seed first.
What I would choose by use case
Use the lean workflow if you are:
- learning prompt behavior in ComfyUI
- running an older 8GB card
- mostly generating portraits or simple scenes
- testing many ideas quickly
- tired of graphs that technically work but constantly stall
Use the enhanced workflow if you are:
- finalizing shortlisted images
- generating accessories, products, interiors, or hard-surface subjects
- comfortable adding one optimization step at a time
- willing to trade speed for a better finishing pass
Avoid both versions in their basic form if you need:
- large multi-subject action scenes
- heavy ControlNet stacks
- multiple style LoRAs plus hi-res pass on 8GB
- dependable high-resolution commercial output straight from a single generation
That is the point where model choice, quantization strategy, and more aggressive memory management become more important than node order alone.
Best choice by scenario
For a beginner looking up ComfyUI image generation low VRAM, the best workflow is Option A first, Option B second. Build confidence with a graph you can trust, then add only the upgrades that solve a specific visible weakness.
For an experienced user trying to get polished results on limited hardware, the best path is a hybrid routine:
1. Generate with the lean graph 2. Select the best seed based on composition and anatomy 3. Apply one targeted enhancement step 4. Stop as soon as the image reaches delivery quality
That last part matters. The strongest result in this test usually came from restraint, not from squeezing every possible node into the workflow.
Conclusion
My editorial conclusion is simple: if you want a ComfyUI workflow low VRAM setup that you can actually live with, choose the workflow that preserves stability and readable prompt response first. The lean graph is the right choice for most 8GB users, especially for portraits, simpler products, and fast iteration. The enhanced graph is worth using when you already have a strong base image and need better accessory detail, cleaner interiors, or more polished surfaces.
Who should use this workflow: users on 8GB-class GPUs, prompt testers, and anyone who values consistent runs over theoretical maximum quality. Who should avoid it: users expecting giant native resolutions, stacked conditioning, or complex multi-stage production on very limited memory.
If I had to reduce the whole test to one setting that mattered most, it would be this: start smaller than you want, and only upscale images that are already compositionally correct. That one decision saved more time, more VRAM, and more failed generations than any fancy node trick.